


28
w
w
w
w
w
w
.
.
f
f
o
o
s
s
c
c
a
a
m
m
.
.
c
c
o
o
m
m
S
S
h
h
e
e
n
n
z
z
h
h
e
e
n
n
F
F
o
o
s
s
c
c
a
a
m
m
I
I
n
n
t
t
e
e
l
l
l
l
i
i
g
g
e
e
n
n
t
t
T
T
e
e
c
c
h
h
n
n
o
o
l
l
o
o
g
g
y
y
C
C
o
o
.
.
,
,
L
L
i
i
m
m
i
i
t
t
e
e
d
d
T
T
e
e
l
l
:
:
8
8
6
6
7
7
5
5
5
5
2
2
6
6
7
7
4
4
5
5
6
6
6
6
8
8
F
F
a
a
x
x
:
:
8
8
6
6
7
7
5
5
5
5
2
2
6
6
7
7
4
4
5
5
1
1
6
6
8
8
28
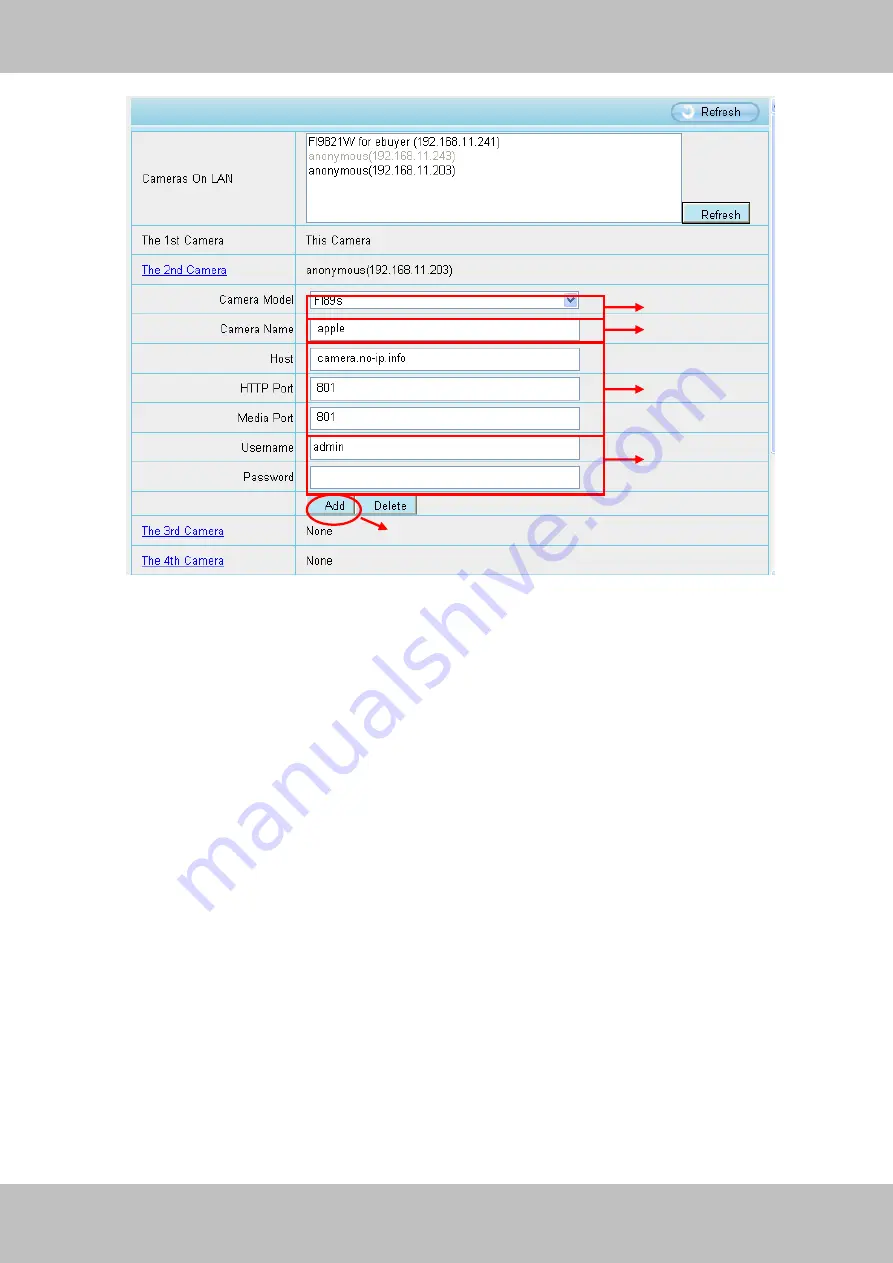
Figure 3.19
1----- The camera model: FI89s or FI98s.
2----- The 2nd
camera‟s name
3----- Fill in the 2nd
camera‟s DDNS host not LAN IP
NOTE:
The FI89s series have the same HTTP Port no. and Media Port no.
4 ---- Enter the 2nd
camera‟s user name and password
5---- Click Add button and to take effect
NOTE:
Here the Host must be entered as the second camera‟s DDNS domain name, not its LAN
IP.
2
3
4
5
1


