background image


No. 

Name 

Qty 

No. 

Name 

Qty 

1. 

Motor Top Cover 

49. 

Switch Group 

2. 

Motor Bottom Cover 

50. 

Overload Protector 

3. 

Motor Side Cover L 

51. 

AC Link Line 350 

4. 

Motor Side Cover R 

52. 

AC Link Line 150 

5. 

Motor Front Cover 

53. 

Ground Lead 

6.  

Motor Cover Support Cover 

54. 

DC Motor 

7. 

Move Wheel Cover 

55. 

Computer PCB 

8. 

End Cover L 

56. 

Magnet Ring 

9. 

End Cover R 

57. 

Controller 

10. 

Rear Cover Modified Cover 

58. 

Filter 

11. 

Mid Foot Pad 

59. 

Aluminium Rod L 

12. 

Rear Foot Pad 

60. 

Aluminium Rod R 

13. 

Borders 

61. 

Stand Column 

Summary of Contents for FST2JOGPADA

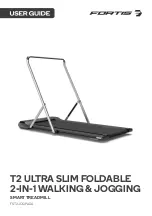
Page 1: ...T2 ULTRA SLIM FOLDABLE 2 IN 1 WALKING JOGGING SMARTTREADMILL FST2JOGPADA...

Page 2: ......

Page 3: ...jects nearby Do not use it near water and heat sources Please keep your hands away from all moving parts Do not place your hands and feet in the gap below the running belt The treadmill must have only...

Page 4: ...ase use a supply voltage of 240V Please do not let the power cord touch the running belt roller and do not use a damaged plug Unplug the plug from the socket before cleaning and maintenance WARNING if...

Page 5: ...Treadmill Silicone oil x2 Installation tool Remote controller COMPONENTS...

Page 6: ...OVERVIEW...

Page 7: ...ver R 1 52 AC Link Line 150 1 5 Motor Front Cover 1 53 Ground Lead 1 6 Motor Cover Support Cover 4 54 DC Motor 1 7 Move Wheel Cover 2 55 Computer PCB 1 8 End Cover L 1 56 Magnet Ring 1 9 End Cover R 1...

Page 8: ...72 Socket Head Screw M8x16 4 25 Aluminium Roller Mounting Piece 2 73 Socket Head Screw M8x45 2 26 Aluminium Rod Support 2 74 Socket Head Screw M8x70 2 27 Aluminium Link Block Of L Hand Bar 1 75 Socket...

Page 9: ...16 40 Poly V Belt 1 88 Cross Tapping Screw ST3 0x8 12 41 Front Foot Pad 2 89 Cross Tapping Screw ST2 2x6 1 42 Front Support Mat 90 Manual 1 43 Hand Bar Silicone Ring 91 Eva Sticker 2 44 Magnetic Rubb...

Page 10: ...ace Make sure there is a 50cm open space before and after the treadmill to fold and place the power cord etc 2 Pull up the handle bar in the direction of the arrow until the foot switch hooks the hand...

Page 11: ...running platform then grab the tail of the running platform with both hands and lift it up Note Unplug the power cord when folding The treadmill is laid flat Grab the tail of the treadmill with both h...

Page 12: ...appropriate speed for your needs 6 When the handle bar is folded the walker will function at a speed range of 0 8 6 0km h 7 Expand the column for treadmill mode speed range 0 8 8 8km h Remote Button F...

Page 13: ...create your sport account 3 Select Training Plan Select training plan and create a customised plan on the app then you can control your treadmill from your smart phone remotely and do your customised...

Page 14: ...n adjustment The running belt has been adjusted at the factory However after use the running belt will be stretched or deviated from the centre plate and cause damage to the running belt trim strip an...

Page 15: ...rent forces when running that causes the belt deviate from the centre This deviation is normal When no one is using the treadmill the belt goes back to the centre automatically If not you need to adju...

Page 16: ...90x125mm Peak horsepower 1 5hp Speed 0 8 6 0 8 8km h Shock absorption Yes Max user Weight 100kgs Without handle bar Colour Silver Net weight 25kg Running belt 420x1200mm Folding size 1430x620x125mm Pe...

Page 17: ...NOTES...

Page 18: ......

Page 19: ......

Page 20: ...ion We hope that this user guide has given you the assistance needed for a simple set up For the most up to date guide for your product as well as any additional assistance you may require head online...

Reviews: