


Camera connection
Page 44
FortiRecorder 2.4.2 Administration Guide
9.
Go to
Camera > Configuration > Camera
, and click
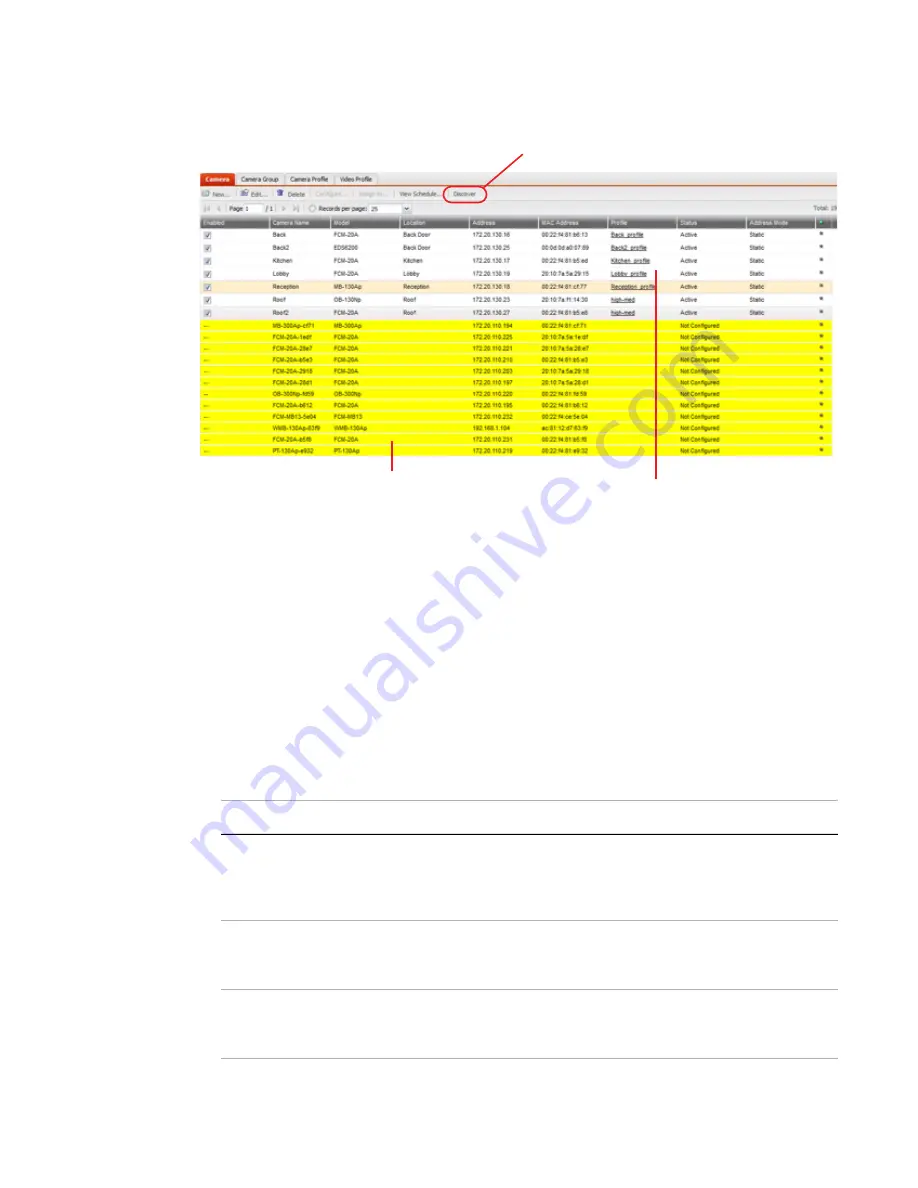
Discover
. After several seconds, a list of
discovered cameras should appear. Newly discovered cameras will be highlighted in yellow,
and their
Status
column will contain
Not Configured
.
10.
Double click on the discovered camera to configure the camera settings. For details, see
“Configuring cameras” on page 44
.
11.
Go to
Monitor > Video Monitor
to view the live feed from the camera.
Configuring cameras
After you have connected the cameras to FortiRecorder, you can start to configure the
discovered cameras. Because most of the camera information has been retrieved from the
camera, you do not have to change the settings. But if you are adding a remote camera or
adding a new camera before connecting it to FortiRecorder, you must specify all the camera
settings.
1.
Go to
Camera > Configuration > Camera
. For each discovered camera, click its row to select
it, click
Configure
, then configure these settings:
Yellow: discovered but not configured cameras
Configured cameras
Discover button
Setting name
Description
Enable
Mark this check box to enable the FortiRecorder NVR to
communicate with this IP address. Communications are
required to trigger scheduled recordings and other camera
commands.
Name
Type a name (such as
front-door1
) that can be referenced
by other parts of the configuration. Do not use spaces or
special characters. The maximum length is 35 characters.
Location
Optional. Type a description of the camera’s physical location
that can be used if the camera is hidden, in case it is forgotten
or lost.


