


9
8
Rack Installation
Note:
Each power cable should be connected to a different power source. In this
way, if one power source fails, the other may still be operational and the unit will not
lose power.
The FortiSwitch unit can be placed on a flat surface using the provided rubber feet, or
mounted in any standard 19 inch rack unit with the provided mounting hardware.
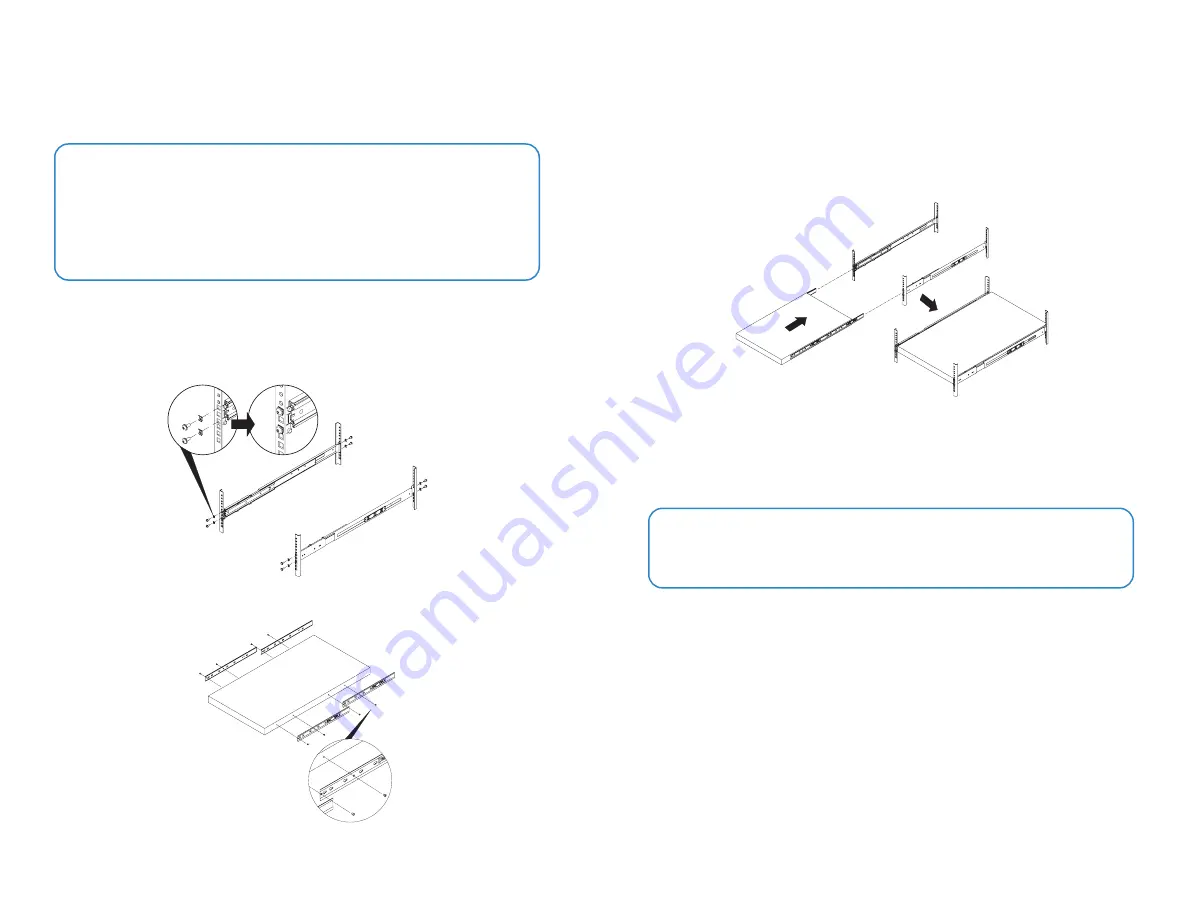
To install the unit into a rack
1. Verify there is enough room around where the unit will be mounted to allow for
sufficient air flow.
2. Mount the outer rails to the rack.
3. Attach the inner rails to the device using the provided M4 waffle head screws.
Caution:
Electrostatic discharge (ESD) can damage your Fortinet equipment.
To avoid personal injury or damage to the unit, it is recommended that two or more
people install the unit into the rack.
Do not place heavy objects on the unit.
4. Attach the rail handles to the device using the provided M4 flat head screws.
5. Check that the inner rails are properly connected to the device and that the outer
rails are securely attached to the rack.
6. Align the inner rails with the outer rails then slide the device onto the rails. Ensure that
even pressure is applied to both sides of the device while doing this.
7. For additional security, insert and tighten the provided M6 screws to hold the front of
the unit to the rack.
8. Plug the provided power cables into the rear of the unit, and then into grounded
electrical outlets or separate power sources, such as an uninterruptible power
supplies (UPS) or a power distribution units (PDU).
Summary of Contents for FAC-3000F
Page 1: ...FortiAuthenticator 3000F FAC 3000F QuickStart Guide...
Page 10: ...19 18...
Page 11: ...Fortinet com...


