background image

Bass adjust

The bass adjust control allows you
to increase or decrease the audio
system’s bass output.

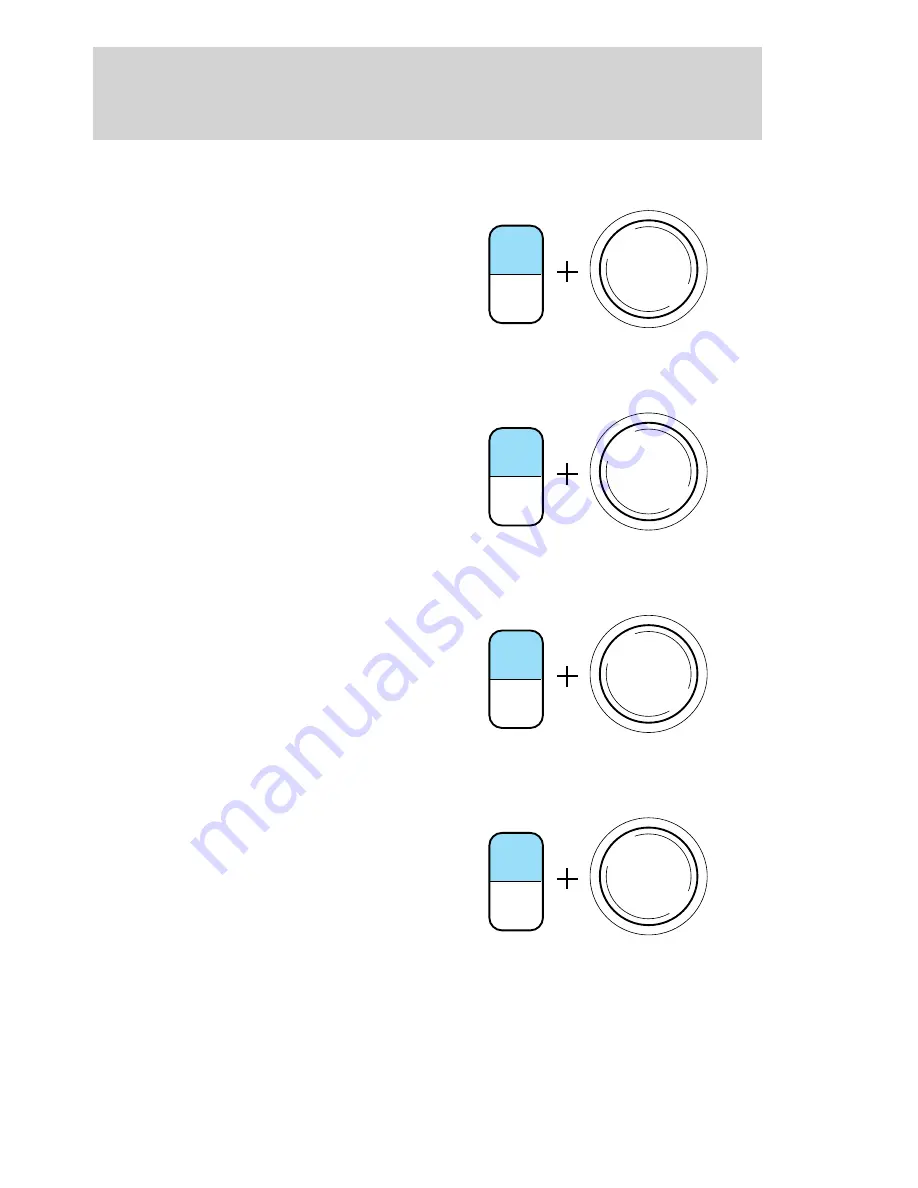
With the electronic AM/FM stereo,
press the TONE control once, then
use the volume knob to adjust the
level.

Treble adjust

The treble adjust control allows you
to increase or decrease the audio
system’s treble output.

With the electronic AM/FM stereo,
press the TONE control twice, then
use the volume knob to adjust the
level.

Speaker balance adjust

Speaker sound distribution can be
adjusted between the right and left
speakers.

With the electronic AM/FM stereo,
press the TONE control three times,
then use the volume knob to adjust
the level.

Speaker fade adjust (if equipped)

Speaker sound can be adjusted
between the front and rear
speakers.

With the electronic AM/FM stereo,
press the TONE control four times,
then use the volume knob to adjust
the level.

TONE

CLK

VOL

PUSH

ON

TONE

CLK

VOL

PUSH

ON

TONE

CLK

VOL

PUSH

ON

TONE

CLK

VOL

PUSH

ON

Controls and features

40

Summary of Contents for 1999 Windstar

Page 1: ...d care 188 Capacities and specifications 236 Reporting safety defects 242 Index 243 All rights reserved Reproduction by any means electronic or mechanical including photocopying recording or by any in...

Page 2: ...disposal of waste cleaning and lubrication materials are significant steps towards protecting the environment Indicates a message regarding child safety restraints Refer to Seating and safety restrain...

Page 3: ...are no particular breaking in rules for your vehicle During the first 1 600 km 1 000 miles of driving vary speeds frequently This is necessary to give the moving parts a chance to break in INFORMATION...

Page 4: ...EFT TRAC ACTIVE TRAC OFF TEM F FUEL E km h BRAKE mi O D OFF P AUTO Headlamp control pg 25 Speed control pg 70 Driver side air bag pg 124 Turn signal and wiper washer control pg 74 Instrument cluster p...

Page 5: ...M FM 1 2 3 4 5 6 DOLBY B NR A C FRONT REAR OFF MAX A C REAR CONT OFF T C O D ON OFF INFO SETUP RESET ST FM1 Climate control systems pg 27 Gearshift includes overdrive button pg 157 Electronic sound sy...

Page 6: ...the ON position and the engine is off The light also illuminates when the battery is not charging properly requiring electrical system service Traction ControlY active if equipped This light momentar...

Page 7: ...s turned to the ON position to remind you to fasten your safety belts For more information refer to the Seating and safety restraints chapter Anti theft system Refer to SecuriLocky passive anti theft...

Page 8: ...s Momentarily illuminates when the ignition is turned ON If the light fails to illuminate continues to flash or remains on have the system serviced immediately High beams Illuminates when the high bea...

Page 9: ...t flashes when you are driving have your vehicle serviced Check engine Your vehicle is equipped with a computer that monitors the engine s emission control system This system is commonly known as the...

Page 10: ...malfunctions present the Check Engine light should turn off A driving cycle consists of a cold engine startup followed by mixed city highway driving No additional vehicle service is required If the Ch...

Page 11: ...em SRS warning chime For information on the SRS warning chime refer to the Seating and safety restraints chapter Key in ignition warning chime Sounds when the key is left in the ignition in the OFF LO...

Page 12: ...eserve fuel in the tank When refueling the vehicle from empty indication the amount of fuel that can be added will be less than the advertised capacity due to the reserve fuel Tachometer Indicates the...

Page 13: ...as safely possible switch off the engine immediately and let the engine cool Refer to Engine coolant in the Maintenance and care chapter Never remove the coolant reservoir cap while the engine is runn...

Page 14: ...vehicle systems You may select display features on the message center for a display of status preceded by a brief indicator chime The system will also notify you of potential vehicle problems with a d...

Page 15: ...message or a warning message for three seconds Pressing the RESET control cycles the message center through each of the systems being monitored The sequence of the system check report is as follows 1...

Page 16: ...nits to be displayed 2 Press the RESET control to change from English to Metric Single Dual Display Mode 1 Select this function from the SETUP menu for the current display mode 2 Press the RESET contr...

Page 17: ...ed This acts as a reminder that these warning conditions still exist within the vehicle Driver s door ajar Warning cannot be reset Passenger door ajar Driver rear door ajar Passenger rear door ajar Ch...

Page 18: ...ISSION Indicates the transmission is not operating properly If this warning stays on contact your dealer as soon as possible TRANSMISSION OVERHEATED Indicates the transmission is overheating This warn...

Page 19: ...al is activated and the vehicle is driven more that 0 8 km 1 2 mile LOW WASHER FLUID Indicates the washer fluid reservoir is less than one quarter full Check the washer fluid level Refer to Windshield...

Page 20: ...essage center will display OIL LIFE RESET TO 100 DATA ERR These messages indicate improper operation of the vehicle network communication between electronic modules Fuel Computer Oil life Charging sys...

Page 21: ...few days of operating your vehicle in normal conditions If the compass still appears to be inaccurate a manual calibration may be necessary Refer to Compass zone calibration adjustment Most geographic...

Page 22: ...he zone map 4 From Info menu select the Compass Outside Temperature function 5 Press and hold the RESET control until the message center display changes to show the current zone setting 6 Release the...

Page 23: ...the automatic shut off points on the fuel pumps at service stations variations in top off procedure from one fill up to another rounding of the displayed values to the nearest 0 1 liter gallon 1 Driv...

Page 24: ...pproximate amount of fuel in the fuel tank in whole numbers liters or gallons If your tank is full or nearly full the display will be F If your tank is empty or nearly empty the display will be E Inst...

Page 25: ...to full brightness This control also has other features that are activated when any door is opened Rotate to full up position or next position adjustment dial to turn on all interior lights Rotate to...

Page 26: ...ghbeam headlamps on with a reduced output To activate the key must be in the ON position the headlamp control is in the OFF or Parking lamps position Always remember to turn on your headlamps at dusk...

Page 27: ...p system also keeps the lights on for a fixed period of time after the ignition switch is turned to OFF To turn autolamps on rotate the control counterclockwise To turn autolamps off rotate the contro...

Page 28: ...strument panel registers OFF Outside air is shut out and the fan will not operate For short periods of time only use this mode to prevent undesirable odors from entering the vehicle Panel and floor Di...

Page 29: ...trument panel be careful to not place them over the defroster outlets These objects can block airflow and reduce your ability to see through your windshield Also avoid placing small objects on top of...

Page 30: ...ir conditioning system without rear controls if equipped Manual heating and air conditioning system with rear controls if equipped Fan speed control Controls the volume of air circulated in the vehicl...

Page 31: ...e airflow for the rear passenger compartment determines the air distribution to the rear registers The rear climate control distributes air in the following manner Cool air is delivered from the overh...

Page 32: ...culated air to cool the vehicle MAX A C is noisier than A C A C but more economical and will cool the inside of the vehicle faster In this mode the air conditioning will automatically engage if the ou...

Page 33: ...not light unless the A C A C control is selected If the A C control was previously selected before using Floor Defrost the indicator light will remain lit For added customer comfort when the temperatu...

Page 34: ...rce most of the hot stale air out of the vehicle Then operate your air conditioner as you would normally When placing objects on top of your instrument panel be careful to not place them over the defr...

Page 35: ...ystem will also be off If the rear passenger compartment climate control lever is set to OFF the rear climate controls will be off If the rear fan control on the main climate control system is set in...

Page 36: ...or your desired comfort level and gives you three choices for air distribution Panel Panel and floor Floor It is important to note that whenever the temperature mode selection control is set to a spec...

Page 37: ...automatically after 10 minutes or when the ignition is turned to the OFF position To manually turn off the defroster before ten minutes have passed push the control again USING YOUR AUDIO SYSTEM AM F...

Page 38: ...come back on at a nominal listening level when the ignition switch is turned back on AM FM select The AM FM select control works in radio mode AM FM select in radio mode This control allows you to sel...

Page 39: ...cy band Press to find the next listenable station up the frequency band Radio station memory preset The radio is equipped with four station memory preset controls These controls can be used to select...

Page 40: ...then use the volume knob to adjust the level Speaker balance adjust Speaker sound distribution can be adjusted between the right and left speakers With the electronic AM FM stereo press the TONE contr...

Page 41: ...ning frequencies and clock mode To set the hour press and hold the CLK control and press to decrease hours and to increase hours To set the minute press and hold the CLK control and press TONE CLK SEE...

Page 42: ...he media information will again display for ten seconds before reverting back to the clock In media mode the media information will always be displayed AM FM Stereo Cassette CD changer compatible Your...

Page 43: ...level when the ignition switch is turned back on AM FM select The AM FM select control works in radio tape and CD changer modes if equipped AM FM select in radio mode This control allows you to selec...

Page 44: ...e adjust for CD changer if equipped Press to select the previous disc in the CD changer Play will begin on the first track of the disc unless the CD changer is in shuffle mode Refer to Shuffle feature...

Page 45: ...can function in CD changer mode if equipped Press the SCAN control to hear a brief sampling of all selections on the CD The CD scans in a forward direction wrapping back to the first track at the end...

Page 46: ...ass output Treble adjust The treble adjust control allows you to increase or decrease the audio system s treble output Speaker balance adjust Speaker sound distribution can be adjusted between the rig...

Page 47: ...the tape selection being played or to skip to the next selection To activate the feature momentarily depress the TAPE AMS button Then press either REW for the beginning of the current selection or FF...

Page 48: ...o rewind in CD changer mode press the CD control preset 1 Press the control again to deactivate rewind mode Fast forward The fast forward control works in tape and CD changer modes To fast forward in...

Page 49: ...e if equipped The shuffle feature operates in CD changer mode and plays all tracks on the current disc in random order The shuffle feature continues to the next disc after all tracks are played Press...

Page 50: ...ction system is manufactured under license from Dolby Laboratories Licensing Corporation Setting the clock Press CLK to toggle between listening frequencies and clock mode while in radio mode To set t...

Page 51: ...ill again display for ten seconds before reverting back to the clock In media mode the media information will always be displayed Premium AM FM Stereo Cassette Single CD Premium Sound Your vehicle is...

Page 52: ...l come back on at a nominal listening level when the ignition switch is turned back on AM FM select The AM FM select control works in radio tape and CD modes AM FM select in radio mode This control al...

Page 53: ...for quick movement Tune adjust for CD changer if equipped Press to select the previous disc in the CD changer Play will begin on the first track of the disc unless the CD changer is in shuffle mode Re...

Page 54: ...a selection has been playing for three seconds or more and you press the CD changer will replay that selection from the beginning Press to seek forward to the next track of the current disc After the...

Page 55: ...reset The radio is equipped with six station memory preset controls These controls can be used to select up to six preset AM stations and twelve FM stations six in FM1 and six in FM2 Setting memory pr...

Page 56: ...emporarily stored in the memory preset controls until deactivated and are accessed in the same manner of your original presets To deactivate autoset and return to your audio system s manually set memo...

Page 57: ...ween the right and left speakers Press the BAL control then press to shift sound to the left and to shift sound to the right Speaker fade adjust Speaker sound can be adjusted between the front and rea...

Page 58: ...n single CD and CD changer play if equipped Rewind The rewind control works in tape and CD modes In tape mode radio play will continue until rewind is stopped with the TAPE control or the beginning of...

Page 59: ...tories Licensing Corporation Compression adjust Compression adjust brings soft and loud CD passages together for a more consistent listening level Press the COMP control to activate and deactivate com...

Page 60: ...K control and press SEEK to decrease hours and to increase hours To set the minute press and hold the CLK control and press TUNE to decrease minutes and to increase minutes AUTO CLK SEEK SEEK TUNE TUN...

Page 61: ...and then revert to clock information Anytime that the media is changed new radio station etc the media information will again display for ten seconds before reverting back to the clock In media mode...

Page 62: ...volume radio setting Once in headphone mode the RSC volume controls will only change volume in the headphones to a desired level and will have no effect on the front speakers muting the speakers will...

Page 63: ...control successively to allow rear seat passengers to scroll through the 6 memory presets in AM FM1 or FM2 Push the MEM control in CD changer mode if equipped to advance to the next disc Seek functio...

Page 64: ...e the door to access the CD changer magazine Press to eject the magazine Make sure only one disc is inserted in each slot Each disc must be inserted with the label surface upward You may insert up to...

Page 65: ...cratched discs or the disc may be dirty Skipping will not scratch the discs or damage the player If your changer does not work it may be that A disc is already loaded where you want to insert a disc T...

Page 66: ...treme temperatures to reach a moderate temperature before playing Tighten very loose tapes by inserting a finger or pencil into the hole and turning the hub Remove loose labels before inserting tapes...

Page 67: ...single channel reception if it will improve the reception of a station normally received in stereo Audio system warranties and service Refer to the Warranty Guide for audio system warranty informatio...

Page 68: ...eather may also affect the function of RSS RSS may have reduced performance or be activated in inclement weather The reverse sensing system detects obstacles within approximately 1 8 meters 5 9 ft of...

Page 69: ...indicate a failure of the reverse sensing system Always keep the sensors located on the rear bumper fascia free from dirt snow and ice do not clean the sensors with sharp objects These elements may c...

Page 70: ...lectrical circuits operational Warning lights illuminated Key position when driving 5 START cranks the engine Release the key as soon as the engine starts SPEED CONTROL IF EQUIPPED To turn speed contr...

Page 71: ...speed This is normal Speed control cannot reduce the vehicle speed if it increases above the set speed on a downhill If your vehicle speed is faster than the set speed while driving on a downhill you...

Page 72: ...ET ACCEL You can accelerate with the accelerator pedal at any time during speed control usage Releasing the accelerator pedal will return your vehicle to the previously programmed set speed To set a l...

Page 73: ...t erase the previously programmed set speed Pressing OFF will erase the previously programmed set speed To return to a previously set speed Press RES RSM RESUME For RES RSM RESUME to operate the vehic...

Page 74: ...ent wipers When in this position rotate the control upward for fast intervals and downward for slow intervals Push the control on the end of the stalk to activate washer Push and hold for a longer was...

Page 75: ...rdrive is the normal drive position for the best fuel economy The overdrive function allows automatic upshifts to second third and fourth gear Deactivating overdrive Press the Transmission Control Swi...

Page 76: ...trol while adjusting the wheel to the desired position then release the control to lock the steering wheel in position Never adjust the steering wheel when the vehicle is moving HAZARD FLASHER For inf...

Page 77: ...s Press the top portion of the rocker switch to close Press the bottom portion of the rocker switch to open One touch down Press AUTO completely down and release quickly The driver s window will open...

Page 78: ...if equipped Your vehicle may be equipped with rear power vent windows which are operated the same as the front power windows POWER SIDE VIEW MIRRORS IF EQUIPPED To adjust your mirrors 1 Select to adju...

Page 79: ...irrors with a scraper or attempt to readjust the mirror glass if it is frozen in place These actions could cause damage to the glass and mirrors Fold away mirrors Pull the side mirrors in carefully wh...

Page 80: ...door will not automatically set the lock for both doors Move lock control up to engage the lock Move control down to disengage childproof locks If your vehicle is equipped with Power Sliding Door s r...

Page 81: ...transmitters to operate garage doors entry gates security systems entry door locks and home or office lighting When programming your HomeLinkt Universal Transceiver to a garage door or gate be sure th...

Page 82: ...HomeLinkt button Do not release the buttons until step 4 has been completed 4 The red light will flash slowly and then rapidly Release both buttons when the red light flashes rapidly 5 Follow steps 2...

Page 83: ...ured after 1996 may be determined by the following Reference the device owner s manual for verification The hand held transmitter appears to program the HomeLinkt Universal Transceiver but does not ac...

Page 84: ...red light begins to flash after 20 seconds 2 Release both buttons Reprogramming a single HomeLinkT button To program a device to HomeLinkt using a HomeLinkt button previously trained follow these step...

Page 85: ...e whenever a front door is opened If either front door has been opened from the outside the lamp will remain on for 15 seconds after the door is shut If any other door has been opened from the inside...

Page 86: ...he conversation mirror allows the driver to view the rear seating area This does not replace your rear view mirror Refer to Power Sliding Doors PSD if equipped in this chapter for operation of doors I...

Page 87: ...ivate the lamps Power Sliding Door if equipped The overhead console consists of the Power Sliding Door PSD ON OFF control with indicator light and the right and left hand side PSD control s With this...

Page 88: ...passenger controls by pushing the overhead console control to OFF When the key is in the ignition in RUN the PSD will only open if the transaxle is in PARK P The transaxle does not have to be in PARK...

Page 89: ...y Obstructions If anything obstructs the Power Sliding Door while it is closing the door will automatically reverse to the open position provided it meets sufficient resistance Resetting the PSD The p...

Page 90: ...This lock is on both doors if equipped The child safety lock lever is located in the inside of the sliding door on the front edge of the door Lift the control up to engage the child lock If you have t...

Page 91: ...ehicle carpeting Exert pressure while turning to pierce the carpeting When installed properly the locator will not screw down tightly but will rotate freely Use only Ford original Equipment floor mats...

Page 92: ...anti theft system if equipped The interior lamps will illuminate Press the control again within three seconds to unlock all doors and liftgate If the control is pressed a third time within three secon...

Page 93: ...this control twice within three seconds to open the power sliding door if equipped The interior lamps will illuminate Press this control another two times within three seconds to close the power slidi...

Page 94: ...re on and arm the perimeter anti theft system if equipped To confirm doors hood are closed and locked press the control a second time within three seconds The door s will lock again and the horn will...

Page 95: ...Press this control to activate the personal panic alarm The personal panic alarm will cycle the horn and turn signals on off plus illuminate the interior lights To deactivate the alarm press the cont...

Page 96: ...omatically turns off after 25 seconds or when the ignition is turned to the RUN position The panel dimmer control must not be set to the OFF position for the illuminated entry to operate The inside li...

Page 97: ...parked next to the vehicle To replace the battery 1 Twist a thin coin between the two halves of the transmitter near the key ring DO NOT TAKE THE FRONT PART OF THE TRANSMITTER APART 2 Place the posit...

Page 98: ...to purchase additional transmitters for your vehicle up to four may be programmed take all your vehicle s transmitters to your dealer or perform the reprogramming procedure yourself It will be necess...

Page 99: ...This feature automatically locks all doors when all vehicle doors are closed the ignition is in the RUN START position you shift into or through R Reverse Relock The autolock feature repeats when the...

Page 100: ...lock the doors with a key Turn a programmed SecuriLock key to RUN START SECURILOCKY PASSIVE ANTI THEFT SYSTEM Your vehicle is equipped with a coded key anti theft system Only the correct key will be a...

Page 101: ...r dealership for reinitialization Theft indicator The theft indicator on top of the instrument panel will operate as follows When the ignition is OFF the theft indicator will flash briefly every 2 sec...

Page 102: ...OFF to RUN maintain ignition in RUN for at least one second but no more than 5 seconds 4 Turn the ignition to OFF and remove the second SecuriLocky key from the ignition 5 Within 10 seconds of turnin...

Page 103: ...liftgate in a garage or other enclosed area with a low ceiling If the liftgate is opened the liftgate could be damaged against a low ceiling Do not leave the liftgate open while driving Doing so could...

Page 104: ...ped The cargo net secures lightweight objects in the cargo area Attach the net to the anchors provided Do not put more than 22 kg 50 lbs in the net This net is not designed to restrain objects during...

Page 105: ...restraint so that it is located directly behind your head or as close to that position as possible Refer to the following to raise and lower the head restraints The head restraints can be moved up and...

Page 106: ...ever up to adjust seatback Tip slide seat if equipped This feature allows convenient access into the second row seats through the driver s door and is only available on 3 door models Never adjust the...

Page 107: ...ush on the seatback to move the seat assembly forward to gain access to the second row To return the driver s seat and seatback to their original position 1 Push the seatback to move the seat assembly...

Page 108: ...racks If the seat has not latched check under the seat and in the tracks for possible obstructions Adjusting the power seats if equipped Never adjust the driver s seat or seatback when the vehicle is...

Page 109: ...ad motion in the event of a rear collision To properly adjust your head restraints lift the head restraint so that it is located directly behind your head or as close to that position as possible Refe...

Page 110: ...cup holders if equipped Your vehicle may be equipped with cupholders mounted on the outboard sides of the second row seat s The cupholder is designed to detach from the seat when subjected to a heavy...

Page 111: ...2nd 3rd row bench seat Pull control up to adjust seatback position Pull control up to flip seatback to forward flat position Seating and safety restraints 111...

Page 112: ...llow seatback to flip forward 2 Push seatback toward front of vehicle This releases the seat track automatically and the seat will move forward 3 After entering the 3rd row seat pull back the seatback...

Page 113: ...ow bench seat only Disengage the lap shoulder belt from the side of the seat belt detach anchors if equipped by inserting the seatbelt tongue or a key into the slot in the detachable anchor and liftin...

Page 114: ...lder belt must be clipped in order to keep it from striking anything during vehicle operation If your bench seat is equipped with the forward fold down seatback position the seatback in the full down...

Page 115: ...e tub cover where indicated upward and out of the floor tub To install the tub cover s first insert the tabs located on the opposite side of the pry location into the slots of the floor tub then press...

Page 116: ...atch into place Be sure that the seat is locked in place both front and back 4 Make sure the safety belt is not twisted then insert the seat belt tongue into detachable anchor if equipped until you he...

Page 117: ...t the seats are on the correct side of the vehicle They cannot be interchanged from one side to the other Each seat base has a bracket on the outboard side that extends into a depression on the floor...

Page 118: ...ride in a cargo area inside or outside of a vehicle In a collision people riding in these areas are more likely to be seriously injured or killed Do not allow people to ride in any area of your vehic...

Page 119: ...oard safety belts have locking cinch tongues described below Safety belts with locking cinch tongue The locking cinch tongue will slide up and down the belt webbing when the belt is in the stowed posi...

Page 120: ...the belt is twisted remove the twist 3 Insert the belt tongue into the proper buckle for your seating position until you hear a snap and feel it latch 4 Make sure the tongue is securely fastened to th...

Page 121: ...lt does not adjust automatically The lap belts should fit snugly and as low as possible around the hips not around the waist Insert the tongue into the correct buckle the buckle closest to the directi...

Page 122: ...risk of injury in a collision Safety belt extension assembly If the safety belt assembly is too short even when fully extended 20 cm 8 inches can be added to the safety belt assembly by adding a safe...

Page 123: ...kles front seat belt buckle assemblies slide bar if equipped shoulder belt height adjusters if equipped child safety seat tether bracket assemblies if equipped and attaching hardware should be inspect...

Page 124: ...injury in the event of a subsequent collision Failure to inspect and if necessary replace the safety belt assembly under the above conditions could result in severe personal injuries in the event of...

Page 125: ...ways transport children 12 years old and under in the back seat and always use appropriate child restraints NHTSA recommends a minimum distance of at least 25 cm ten 10 inches between an occupant s ch...

Page 126: ...n a child seat NEVER place a rear facing child seat in front of an active air bag If you must use a forward facing child seat in the front seat move the seat all the way back How does the air bag supp...

Page 127: ...s injuries such as fractures facial and eye injuries or internal injuries particularly to occupants who are not properly restrained or are otherwise out of position at the time of air bag deployment T...

Page 128: ...ly after ignition is turned on A series of five beeps will be heard The tone pattern will repeat periodically until the problem and light are repaired If any of these things happen even intermittently...

Page 129: ...ttached to the floor Side air bags in combination with seat belts can help reduce the risk of severe injuries in the event of a significant side impact collision The side air bags are fitted on the ou...

Page 130: ...h the vehicle service manual If the air bag is not replaced the unrepaired area will increase the risk of injury in a collision Determining if the system is operational The SRS uses a readiness light...

Page 131: ...in your vehicle Never let a passenger hold a child on his or her lap while the vehicle is moving The passenger cannot protect the child from injury in a collision Always follow the instructions and w...

Page 132: ...lt positioning booster should be used if the shoulder belt rests in front of the child s face or neck or if the lap belt does not fit snugly on both thighs or if the thighs are too short to let the ch...

Page 133: ...child safety seat having a top tether strap Install the child safety seat in a seating position which is capable of providing a tether anchorage For more information on top tether straps refer to Att...

Page 134: ...ear facing seats should NEVER be placed in the front seats 2 Grasp the belt webbing below the tongue and pull as much of the belt out of the retractor as possible Hold the belt out 3 With your other h...

Page 135: ...twisted 5 Insert the belt tongue into the proper buckle for that seating positions until you hear a snap and feel it latch Make sure the tongue is securely latched to the buckle by pulling on the tong...

Page 136: ...through the child seat according to the child seat manufacturer s instructions 4 Insert the belt tongue into the proper buckle for the center seating position until you hear a snap and feel it latch...

Page 137: ...h a passenger air bag deactivate switch and the switch is turned to OFF When using forward facing child safety seats in vehicles with only two seating positions so the forward facing child safety seat...

Page 138: ...ion 1 Position the child safety seat on the passenger seat cushion 2 Route the child safety seat tether strap over the back of the seat 3 Grasp the tether strap and position it to the seat frame Seati...

Page 139: ...e child safety seat may not be retained properly in the event of a collision 6 Rotate the tether strap clip 7 Refer to the instructions in this section under Installing child safety seats in cinch ton...

Page 140: ...ety seat tether strap according to the manufacturer s instructions Rear seating positions Follow steps 1 8 as described above for the following available seats 2nd row bucket 2nd row bench Seating and...

Page 141: ...and the child s shoulders top are below the shoulder harness slots in the built in child seat Children not meeting these requirements should be secured in an approved aftermarket seat Refer to Child...

Page 142: ...seat s lap and shoulder harness belts for correct placement and tightness Use the child seat only if the harness belts will stay snug when belts are placed into the lock mode with a child in the seat...

Page 143: ...ded down 2 Read the information and warnings on both sides of the child seat cushion protector flap Check the child s size weight and age to be sure the child is not too small or too large for the chi...

Page 144: ...en to ensure proper safety belt connections 6 Fasten the right and left chest clip halves together and adjust the clip to comfortably hold the shoulder belts in place over the child s chest The chest...

Page 145: ...the safety belt is now in the automatic locking mode Deactivating the automatic locking mode on the built in child safety seat 1 Disconnect the chest clip and remove the left and right safety belt ton...

Page 146: ...child seat is not properly stowed Inspecting the built in child seat after a collision Inspect all built in child restraints including seats buckles retractors and seat latches Interlocks and attachin...

Page 147: ...nt and exhaust system which can start a fire Do not start your vehicle in a closed garage or in other enclosed areas Exhaust fumes can be toxic Always open the garage door before you start the engine...

Page 148: ...Park 5 Turn the key to 4 ON without turning the key to 5 START Make sure the corresponding lights illuminate briefly If a light fails to illuminate have the vehicle serviced 1 2 3 4 5 40 40 80 120 16...

Page 149: ...epress the accelerator and start the engine while holding the accelerator down to the floor Release the accelerator when the engine starts 4 After idling for a few seconds apply the brake and release...

Page 150: ...dy ventilation systems checked whenever the vehicle is raised for service the sound of the exhaust system changes the vehicle has been damaged in a collision Engine exhaust some of its constituents an...

Page 151: ...e from the hydraulic pump motor and pulsation in the pedal may be observed during ABS braking events Pedal pulsation coupled with noise while braking under panic conditions or on loose gravel bumps we...

Page 152: ...y from the ABS is required apply continuous full force on the brake The ABS will be activated immediately thus allowing you to retain full steering control of your vehicle and providing there is suffi...

Page 153: ...e brakes to wear out quickly and reduce fuel economy TRACTION CONTROLY IF EQUIPPED Traction Controly helps the driver maintain the stability and steerability of the vehicle It is especially useful on...

Page 154: ...portion of the system will shut down to prevent the front brakes from overheating A limited Traction Controly function using only engine torque reduction will still control wheels from over spinning W...

Page 155: ...rating properly Refer to Fuses and relays in the Roadside emergencies chapter Do not drive your vehicle until you verify that the brakelamps are working If your vehicle gets stuck in mud or snow it ma...

Page 156: ...D Overdrive gives the best fuel economy for normal driving conditions For manual control start in 1 First and then shift manually To put your vehicle in gear start the engine depress the brake pedal...

Page 157: ...ft with O D off switch The Overdrive position with the O D OFF switch not depressed is the normal driving position for this automatic overdrive transaxle When your vehicle cruises at a constant speed...

Page 158: ...gear Operating in D O D OFF provides more engine braking than Overdrive for descending hills or city driving To return the transaxle to the normal Overdrive operation press the O D OFF control again U...

Page 159: ...standing water is unavoidable proceed very slowly Never drive through water that is higher than the bottom of the hubs Once through the water always try the brakes Wet brakes do not stop the vehicle...

Page 160: ...gned to tow Maximum Trailer Weight Rating Maximum weight of a trailer the vehicle is permitted to tow The maximum trailer weight rating is determined by subtracting the vehicle curb weight for each en...

Page 161: ...al Axle Reserve Capacity TARC weight You should NEVER exceed the Total Axle Reserve Capacity Always ensure that the weight of passengers cargo and equipment being carried is within the weight limitati...

Page 162: ...is chapter Service your vehicle more frequently if you tow a trailer Refer to Special Operating Conditions in the Scheduled Maintenance Guide Do not tow a trailer until your vehicle has been driven at...

Page 163: ...pter Remember to figure in the tongue load of your loaded trailer when figuring the total weight Towing trailers beyond the maximum recommended gross trailer weight exceeds the limit of the vehicle an...

Page 164: ...rease The braking system of the tow vehicle is rated for operation at the GVWR not GCWR Trailer lamps Trailer lamps are required on most towed vehicles Ensure that your trailer lamps conform to local...

Page 165: ...guide for more information Trailer towing tips Practice turning stopping and backing up in an area before starting on a trip to get the feel of the vehicle trailer combination When turning make wider...

Page 166: ...Slide cross bar to the desired location 3 Tighten thumbwheel at both ends of the cross bar To remove the cross bar assembly from the roof rack side rails 1 Loosen the thumbwheel at both ends of the cr...

Page 167: ...collision if the engine cranks but does not start the fuel pump shut off switch may have been activated The shut off switch is a device intended to stop the electric fuel pump when your vehicle has b...

Page 168: ...e are not working a fuse may have blown Blown fuses are identified by a broken wire within the fuse Check the appropriate fuses before replacing any electrical components Always replace a fuse with on...

Page 169: ...the left of the steering wheel by the brake pedal Remove the panel cover to access the fuses To remove a fuse use the fuse puller tool provided on the fuse panel cover Your vehicle is equipped with a...

Page 170: ...if equipped keyless entry system if equipped When the pull fuse is reinstalled the following features will need to be reset radio pre sets power sliding door s if equipped Please refer to the Using Y...

Page 171: ...ompact Disc Changer Remote Keyless Entry Module PSD Power Sliding Door Module RH and LH Rear Seat Radio Controller 7 15A Left Rear Turn Lamp Right Backup Lamp Right Stop Lamp Right Rear Park Lamp Righ...

Page 172: ...onsole Switch 15 Not Used 16 10A Cluster Rear Electronic Module 17 20A Cigar Lighter Powerpoint Datalink Connector 18 10A LH Quarter Window Motor RH Quarter Window Motor RH Window Switch Backlighting...

Page 173: ...h current fuses that protect your vehicle s main electrical systems from overloads Always disconnect the battery before servicing high current fuses Always replace the cover to the Power Distribution...

Page 174: ...nt Washer Pump FEM 7 25A Rear Wiper Motor Rear Washer Pump Rear Wiper Relay coil 8 Not Used 9 Not Used 10 Not Used 11 Not Used 12 Not Used 13 Not Used 14 Not Used 15 15A Right Headlamp Low and High Be...

Page 175: ...ont Cornering Lamp 24 Not Used 101 40A ABS Module 102 40A ABS Module 103 40A SSP4 Relay SSP4 Relay coil 104 40A LH Power Seat Motors LH Power Lumbar Motor 105 30A Starter Motor Solenoid Ignition Switc...

Page 176: ...witch Rear Defrost Relay coil 122 40A RH Power Seat Motors RH Power Lumbar Motor 201 Not Used 202 Front Wiper ON OFF Relay 203 Rear Wiper Relay 204 A C Clutch Relay 205 Horn Relay 206 Not Used 207 Fue...

Page 177: ...utions the tire could fail causing you to lose control of the vehicle possibly injuring yourself or others When driving with the temporary spare tire do not exceed 80 km h 50 mph under any circumstanc...

Page 178: ...ing the jack and tools 1 Locate the access panel on the interior trim Rotate the two panel retaining clips and remove the panel 2 Remove the jack and lug nut wrench by turning the thumbscrew countercl...

Page 179: ...er and slide the wheel under the vehicle 3 Turn the lug nut wrench clockwise until the tire is raised to its original position underneath the vehicle The hex nut ratchets when the tire is raised to th...

Page 180: ...side and end of the vehicle to the tire being changed If the vehicle slips off the jack you or someone else could be seriously injured 1 Park on a level surface activate hazard flashers and set parkin...

Page 181: ...the jack notch next to the door closest to the tire you are changing then place the jack on the frame rail directly behind the notch 7 Turn the jack handle clockwise until the wheel is completely off...

Page 182: ...equipped located on the left hand side of the radio JUMP STARTING YOUR VEHICLE The gases around the battery can explode if exposed to flames sparks or lit cigarettes An explosion could result in injur...

Page 183: ...he battery cables Ensure that vent caps are tight and level 5 Turn the heater fan on in both vehicles to protect any electrical surges Turn all other accessories off Connecting the jumper cables 1 Con...

Page 184: ...rburetor The preferred locations of an exposed metal part to ground the circuit are the alternator mounting brackets or an engine lifting eye Do not use fuel lines engine rocker covers or the intake m...

Page 185: ...of the disabled vehicle 3 Once the disabled vehicle has been started run both engines for a further three minutes before disconnecting the jumper cables Removing the jumper cables Remove the jumper c...

Page 186: ...ery 4 Remove the jumper cable from the positive terminal of the disabled vehicle s battery After the disabled vehicle has been started and the jumper cables removed allow it to idle for several minute...

Page 187: ...is recommended that your vehicle be towed by wheel lift or flatbed equipment However a slingbelt with T hooks can also be used A towing manual is available from Ford Motor Company for all authorized t...

Page 188: ...hen the engine is running make sure that loose clothing jewelry or long hair does not get caught up in moving parts Do not work on a vehicle with the engine running in an enclosed space unless you are...

Page 189: ...corner of the instrument panel 2 Go to the front of the vehicle and release the auxiliary latch that is located under the front center of the hood 3 Lift the hood and secure it with the prop rod Your...

Page 190: ...ssion fluid dipstick 2 Brake fluid reservoir 3 Air filter assembly 4 Power distribution box 5 Battery 6 Engine oil filler cap 7 Engine oil dipstick 8 Power steering fluid reservoir 9 Windshield washer...

Page 191: ...3 Power distribution box 4 Battery 5 Automatic transmission fluid dipstick 6 Engine oil dipstick 7 Engine oil filler cap 8 Windshield washer fluid reservoir 9 Engine coolant reservoir 10 Power steeri...

Page 192: ...Set the parking brake and ensure the gearshift is securely latched in P 4 Open the hood Protect yourself from engine heat 5 Locate and carefully remove the engine oil indicator dipstick 6 Wipe the in...

Page 193: ...k in and ensure it is fully seated Adding engine oil 1 Check the engine oil For instructions refer to Checking the engine oil in this chapter 2 If the engine oil level is not within the normal range a...

Page 194: ...h is not covered by your warranty Change your engine oil and filter according to the appropriate schedule listed in the Scheduled Maintenance Guide Ford production and aftermarket Motorcraft oil filte...

Page 195: ...ill above this line 4 Use only brake fluids certified to meet Ford specifications Refer to Lubricant specifications in the Capacities and specifications chapter DOT 3 fluid is recommended However if D...

Page 196: ...If the level is low add enough fluid to fill the reservoir In very cold weather do not fill the reservoir all the way Do not put engine coolant in the container for the windshield washer fluid Checkin...

Page 197: ...coolant maintenance refer to Adding engine coolant in this chapter Automotive fluids are not interchangeable do not use engine coolant antifreeze or windshield washer fluid outside of its specified fu...

Page 198: ...ap a thick cloth around the cap Slowly turn cap counterclockwise until pressure begins to release 3 Step back while the pressure releases 4 When you are sure that all the pressure has been released us...

Page 199: ...components Always dispose of used automotive fluids in a responsible manner Follow your community s regulations and standards for recycling and disposing of automotive fluids Coolant refill capacity...

Page 200: ...LUID 3 0L V6 Vulcan engine 3 8L OHV V6 engine Check the power steering fluid Refer to the Scheduled Maintenance Guide for the service interval schedules If adding fluid is necessary use only MERCONt A...

Page 201: ...id in small amounts continuously checking the level until it reaches the correct operating range Be sure to put the cap back on the reservoir TRANSMISSION FLUID Checking automatic transmission fluid R...

Page 202: ...ot drive the vehicle if the fluid level is at the bottom of the dipstick and the outside temperatures are above 10 C 50 F Correct fluid level The transmission fluid should be checked at normal operati...

Page 203: ...necessary add fluid in 250 mL 1 2 pint increments through the filler tube until the level is correct If an overfill occurs excess fluid should be removed by a qualified technician An overfill conditio...

Page 204: ...To replace the filter perform the following procedure 1 Release and open the hood 2 Locate the cabin air filter HOOD Maintenance and care 204...

Page 205: ...ng proper orientation of the filter The black rubber seal around the filter perimeter should be closer to the bottom of the opening when installed 6 With your fingertips ensure that the filter is push...

Page 206: ...as long as you do not use hard water water with a high mineral or alkali content If possible however try to only fill the battery cells with distilled water If the battery needs water often have the c...

Page 207: ...iately To account for customer driving habits and conditions your automatic transaxle electronically controls the shift feel by using an adaptive learning strategy This feature is designed to optimize...

Page 208: ...Door Resetting the PSD in the Controls and Features chapter Always dispose of automotive batteries in a responsible manner Follow your local authorized standards for disposal Call your local authorize...

Page 209: ...escribed below molded into the tire s sidewall These Tire Quality Grades are determined by standards that the United States Department of Transportation has set Tire Quality Grades apply to new pneuma...

Page 210: ...s based on straight ahead braking traction tests and does not include acceleration cornering hydroplaning or peak traction characteristics Temperature A B C The temperature grades are A the highest B...

Page 211: ...fety Compliance Certification Label located on the B pillar Improperly inflated tires can affect vehicle handling and can fail suddenly possibly resulting in loss of vehicle control Tire rotation Beca...

Page 212: ...follow these precautions your vehicle may not drive properly and safely Make sure that all replacement tires are of the same size type load carrying capacity and tread design e g All Terrain etc as or...

Page 213: ...may chip aluminum wheels Follow these guidelines when using snow tires and chains Do not use tire chains with size P225 60R16 or P215 70R15 tires Use only SAE Class S chains Install chains securely v...

Page 214: ...or mishandled Observe the following guidelines when handling automotive fuel Extinguish all smoking materials and any open flames before fueling your vehicle Always turn off the vehicle before fueling...

Page 215: ...with soap and water Consult a physician immediately if you experience an adverse reaction Fuel Filler Cap Your fuel tank filler cap has an indexed design with a one eighth turn on off feature When fu...

Page 216: ...ns Control Information label are designed to operate on California cleaner burning low sulfur gasolines If you have a California certified vehicle and California cleaner burning gasoline is not availa...

Page 217: ...rent brand of Regular unleaded gasoline Premium unleaded gasoline is not recommended particularly in the United States because it may cause these problems to become more pronounced If the problems per...

Page 218: ...ENTIALS OF GOOD FUEL ECONOMY Measuring techniques Your best source of information about actual fuel economy is you the driver You must gather information as accurately and consistently as possible Fue...

Page 219: ...e same every time Your results will be most accurate if your filling method is consistent Calculating fuel economy 1 Fill the fuel tank completely and record the initial odometer reading 2 Each time y...

Page 220: ...speeds traveling at 105 km h 65 mph uses 15 more fuel than traveling at 88 km h 55 mph Revving the engine before turning it off may reduce fuel economy Use of the air conditioner or defroster may redu...

Page 221: ...boards ski luggage racks may reduce fuel economy Use of fuel blended with alcohol may lower fuel economy Fuel economy may decrease with lower temperatures during the first 12 16 km 8 10 miles of drivi...

Page 222: ...formance of your vehicle and to its emissions system If other than Ford Motorcraft or Ford authorized parts are used for maintenance replacements or for service of components affecting emission contro...

Page 223: ...ne Service Engine Soon light is on refer to the description in the Warning Lights and Chimes section of the Instrumentation chapter Your vehicle may not pass the I M test with the Check Engine Service...

Page 224: ...e Handle a halogen bulb carefully and keep out of children s reach Grasp the bulb only by its plastic base and do not touch the glass the oil from your hand could cause the bulb to break the next time...

Page 225: ...n to free it from the bulb socket and slide the ring off the plastic base Keep the ring to retain the new bulb 6 Without turning remove the old bulb from its socket by gently pulling it straight back...

Page 226: ...rrectly aligned before you changed the bulb you should not need to align it again Replacing front parking turn signal bulbs Note size and location of retainer pins for installation 1 At the back of th...

Page 227: ...cedure in the reverse order Replacing license plate lamp bulbs To change the license plate bulbs 1 Remove two screws and the license plate lamp assembly from the liftgate 2 Remove bulb socket by pulli...

Page 228: ...vehicle is equipped with a Vehicle Headlamp Aim Device VHAD on each headlamp body Each headlamp may be properly aimed in the horizontal direction left right and the vertical position up down A non zer...

Page 229: ...ge the aim outboard left and turning the adjusting screw counterclockwise will change the aim inboard right For the right hand passenger side headlamp turning the adjusting screw clockwise will change...

Page 230: ...justing screw on the outer top of the headlamp 4 Using an E8 Torx socket rotate the adjusting screw until the bubble in the vial is centered between the two white lines which represent the 0 mark when...

Page 231: ...in Cleaning the wiper blades and windshield After washing apply the brakes several times to dry them Waxing your vehicle Wax when water stops beading on the surface This could be every three or four...

Page 232: ...washing Take care when using a power washer to clean the engine The high pressure fluid could penetrate the sealed parts and cause damage Do not spray with cold water to avoid cracking the engine blo...

Page 233: ...ter Do not use abrasive cleansers on glass as they may cause scratches The windshield is clean if beads do not form when you rinse it with water The windshield and wiper blades should be cleaned on a...

Page 234: ...nd discolor the fabric Use a mild soap and water solution if necessary Cleaning leather seats if equipped To clean simply use a soft cloth dampened with water and a mild soap Wipe the leather again wi...

Page 235: ...ty restraints chapter Cleaning the built in child seat if equipped Clean with mild soap and water Do not use household cleaning products because they may weaken the safety belt webbing or damage the v...

Page 236: ...for inspection it must be reinstalled in the same cylinder Cylinders No 1 2 and 3 have a PG suffix Cylinders No 4 5 and 6 have a P suffix If a spark plug needs to be replaced use only spark plugs with...

Page 237: ...torcraft MERCONtV ATF All 11 6L 12 25 quarts Windshield washer fluid Ultra Clear Windshield Washer Concentrate All Fill to line on reservoir 1 Use only brake fluids certified to meet Ford specificatio...

Page 238: ...ge in color F6AZ 19544 AA WSS M97B44 D or DEX COOLt equivalent Engine oil Motorcraft 5W30 Super Premium Motor Oil XO 5W30 QSP WSS M2C153 G with API Certification Mark Door latch hood latch auxiliary h...

Page 239: ...recommended However if DOT 3 is not available DOT 4 fluid can be used ENGINE DATA Engine 3 0L V6 Vulcan engine 3 8L OHV V6 engine Cubic inches 182 232 Horsepower 150 5000 rpm 200 4900 rpm Torque 186 l...

Page 240: ...n mm in Van mm in 3 Overall height 1 727 2 68 0 1 678 9 66 1 4 Wheelbase 3 065 8 120 7 3 065 8 120 7 5 Track Front 1 643 4 64 7 1 643 4 64 7 5 Track Rear 1 600 2 63 0 1 600 2 63 0 2 5 3 1 4 Capacities...

Page 241: ...tion number is stamped on the engine block transmission frame and transfer case if equipped MFD BY FORD MOTOR CO IN U S A EXT PNT XXXXXX XXXXXX RC XX DSO XXXX F0000 BAR INT TR TP PS R AXLE TR SPR T000...

Page 242: ...it finds that a safety defect exists in a group of vehicles it may order a recall and remedy campaign However NHTSA cannot become involved in individual problems between you your dealer or Ford Motor...

Page 243: ...31 234 exterior lamps 233 interior 234 plastic parts 232 washing 231 waxing 231 wheels 232 windows 235 wiper blades 233 Compass electronic set zone adjustment 22 23 24 Console 90 overhead 86 Controls...

Page 244: ...ming 25 interior lamps 85 87 replacing bulbs 224 226 227 Lane change indicator see Turn signal 74 Liftgate 103 Lights warning and indicator air bag 8 anti lock brakes ABS 8 anti theft 7 brake 9 chargi...

Page 245: ...plugs specifications 236 Specification chart lubricants 238 Speed control 70 Speedometer 13 Starting your vehicle 147 149 jump starting 182 183 185 Steering wheel tilting 76 Tachometer 12 Tires 209 21...

Page 246: ...246...

Page 247: ...247...

Page 248: ...rcraft MERCONt ATF Automatic transmission fluid capacity AX4S 2 11 6L 12 25 quarts Use Motorcraft MERCONtV ATF 1 If your engine coolant is green in color use Ford Premium Cooling System Fluid If your...

Reviews: