


36
MyCrown Design
4.5
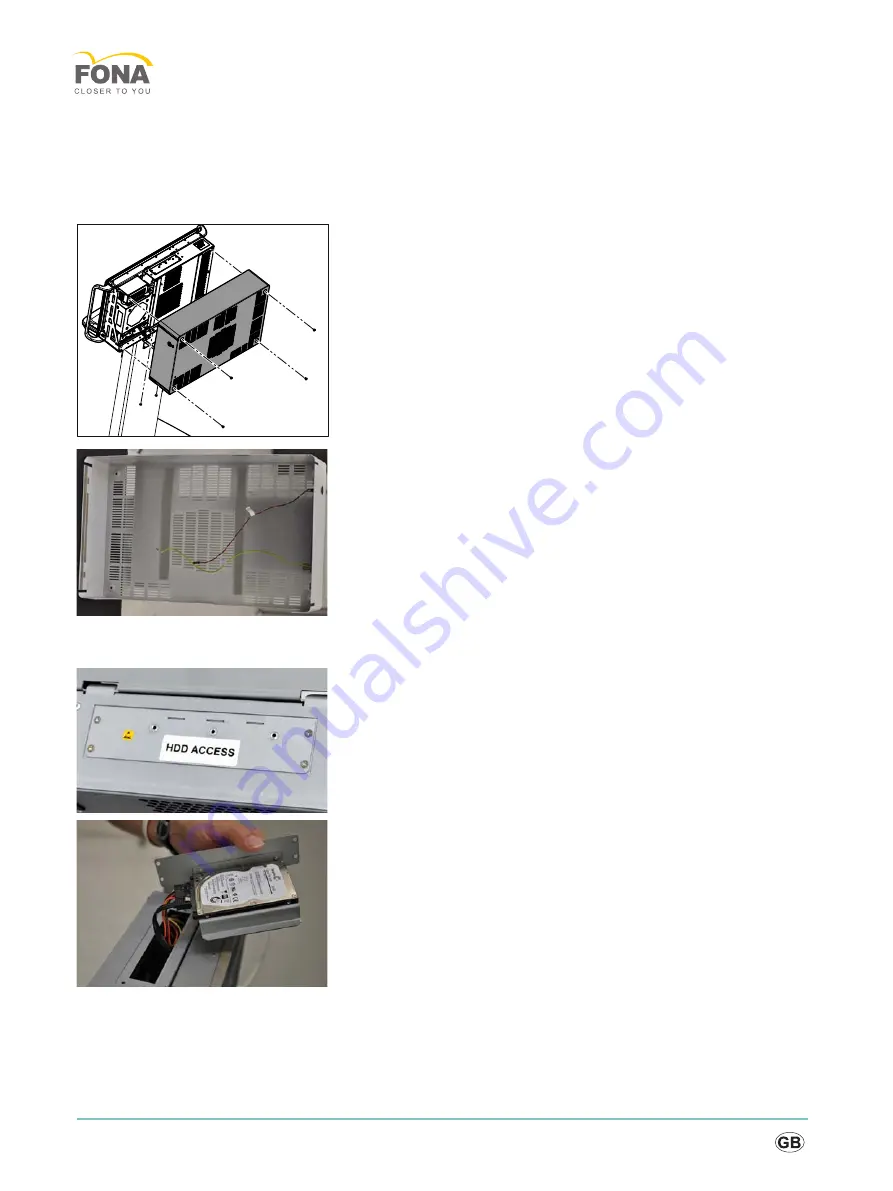
Replacing the hard disk
4.5.1
Removing the back panel
✔
The unit is switched off and the power cable is disconnected.
1. Remove the 6 screws from the back panel.
2. Pull off the back panel parallel to the back. NOTICE! Observe the
ground cable and button connection.
3. Carefully pull away the ground cable on the device side and
disconnect the link to the button connection.
4. Put aside the rear panel.
4.5.2
Dismantling the hard disk
1. Unscrew and remove the 4 screws at the top.
2. Turn the sheet metal part out.
Summary of Contents for MyCrown Design
Page 1: ...j a p j b Service manual...
Page 70: ...70 MyCrown Design 4 Attach the rear panel 5 Attach the back cover...
Page 72: ...72 MyCrown Design 3 Remove the LAN cable from the respective coupling on both sides...
Page 74: ...74 MyCrown Design 3 Attach the lower cover 4 Mount the upper cover...
Page 76: ...76 MyCrown Design 4 Remove the strain relief 5 Carefully pull the cable plug upwards...


