7
On Windows XP, go to Start > Control Panel > Sounds, Speech and Audio Devices > Sounds and
Audio Devices > Audio tab and set 'Sound Playback' and 'Recording' to 'Saffire 6USB'.
3.2
Connecting Your Saffire 6 USB
The Saffire 6 USB has a single USB port on the back. Once installation is complete, simply
connect Saffire 6 USB to your computer using the provided USB cable. Whilst Saffire 6 USB is a
USB 2.0 device, the USB connection will work with any USB 2.0 or USB 3.0 compliant connector
on your computer.
3.3
Audio Set-up in your DAW
Saffire 6 USB is compatible with any DAW that supports ASIO or WDM on Windows and any DAW
that uses Core Audio on Mac. After installing the drivers and connecting the hardware, you can
start using Saffire 6 USB with your DAW of choice. Ableton Live Lite is included with the Xcite+
Pack to get you started.
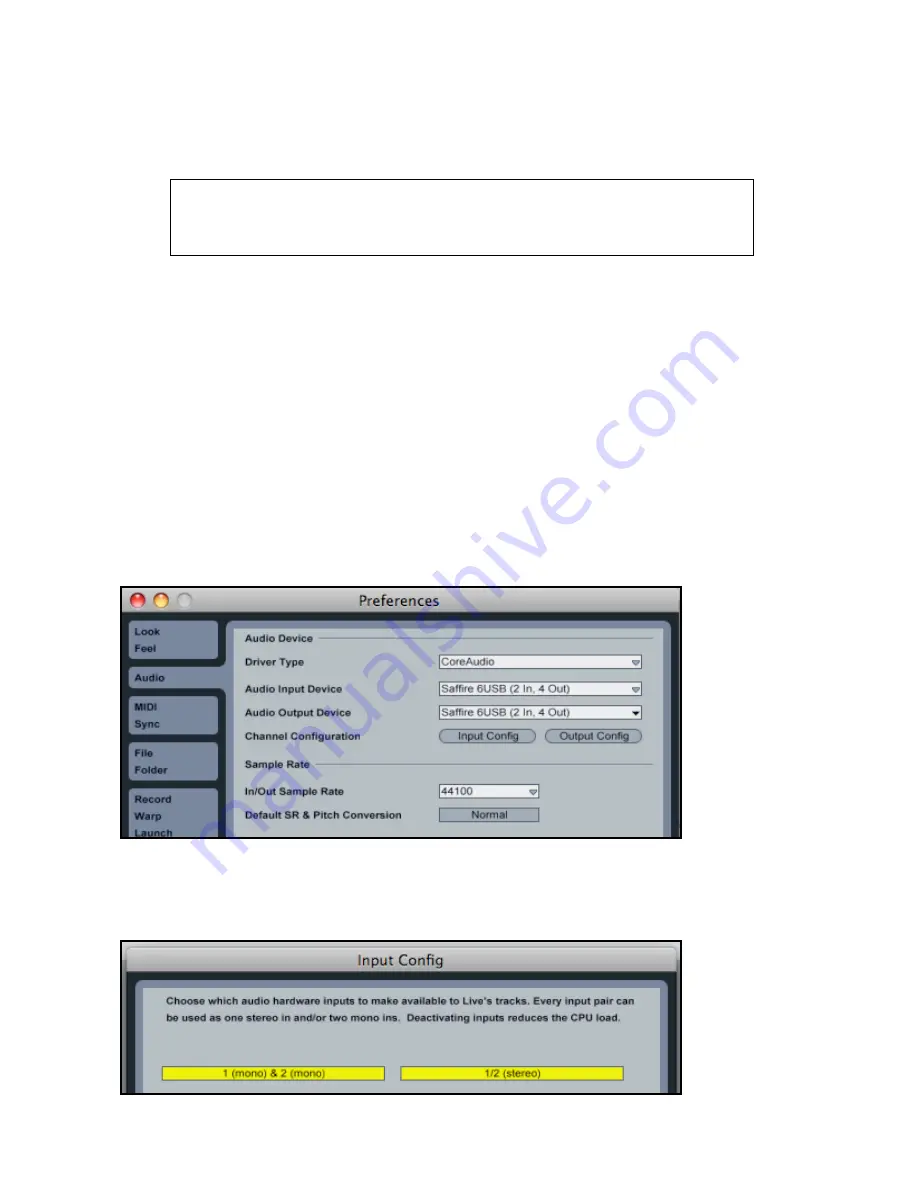
Please note - your DAW may not automatically switch to Saffire 6 USB as its default device. In
this case, you must ensure that you select 'Saffire 6 USB' as the driver in your DAW's audio set-
up page. Please refer to your DAW's documentation if you are unsure where to select the ASIO
/ Core Audio driver. The example below shows correct configuration of Saffire 6 USB within the
Ableton Live Preferences panel.
Once Saffire 6 USB has been selected in your DAW, audio inputs 1-2 and audio outputs 1-4 will
appear within your DAW's audio I/O preferences. Depending on your DAW, you may need to
enable certain inputs or outputs before use. The two examples below show inputs 1-2 and
outputs 1-4 enabled in the Ableton Live Audio Preferences.
IMPORTANT: Before you connect Saffire 6 USB to your computer, please
complete the installer according to the instructions. This will ensure that the
correct drivers are used, thus preventing unexpected behaviour.


