EN
5
Instr tions
Transmitter s e i ation
After setting up, follow the instructions below to operate the system.
1. Auto ati ode at hin (the t ans itte and e eive have been su essfully oded befo e leavin the fa to y.)
1. hen the t ans itte powe is on and the ode at hin ode is on, the li ht eeps flashin
2. he powe supply of the e eivin boa d is tu ned on, and the f ont li hts eep flashin to ente the ode
at hin ode
3. hen the ode at hin is su essful, all the t ans itte li hts a e on and all the li hts on the a a e off
f you need to epla e anothe t ans itte o e eive , please follow the followin steps to ode:
ote: when ode at hin , please ope ate the t ans itte to ente the ode at hin state st, and then
ope ate the e eive to ente the ode at hin state.
2
E
1.Dis onne t the e eive powe .
2. o le the t ans itte s powe swit h to the off position.
ollow the steps below to tu n off the syste :
Note
a e su e to dis onne t the e eive powe
befo e tu nin off the t ans itte . ailu eto
do so may lead to damage or serious injury.
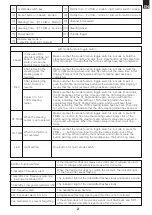
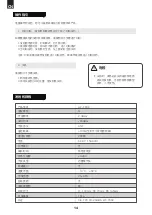
odu t odel
Adaptive odel
Transmitting power
Wireless protocol
Distan e
hannel esolution
Battery
ha in nte fa e
Life time
Low Voltage Warning
Antenna Type
Data inte fa e
Temperature Range
Humidity Range
Online Update
olo
i e
Weight
e ti ation
-
02
a
2.4
<20dBm
A
100 ( ound)
256 Grade
6V D 1.5AAA 4
According to battery type
<4.45V
Built-in single antenna
-10 +60
20-95%
Black
11
3
145
151g
E,
D: 2A
-
-
02
Summary of Contents for HT-TX02
Page 1: ...1 18 Toyota Hilux 1983 Instruction Manual...
Page 13: ...CN AAA 1 2 4 AAA 3 4 2v LED 10 2 10 2 4 5V 4 5V 6 3 6 4V LED 1 I II III IV V LED 2 I II 12...
Page 14: ...CN 14 2 10 15 1 2 LED 3 13...
Page 16: ...CN 1 2 3 15...
Page 17: ...CN 1 2 LED LED 3 4 1 2 16...
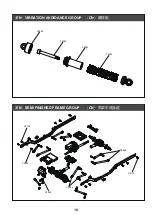
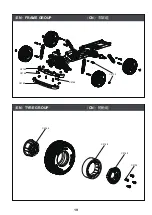
Page 20: ...C2102 C2168 C2168 C2168 EN FRAME GROUP EN TYRE GROUP CN CN C2102 C2163 C2164 C2164 C2163 19...
Page 22: ...C2166 C2164 C2160 C2165 C2164 C2173 C2163 EN CAR BODY GROUP CN 21...
Page 23: ...EN VEHICLE GROUP 22...
Page 28: ......

