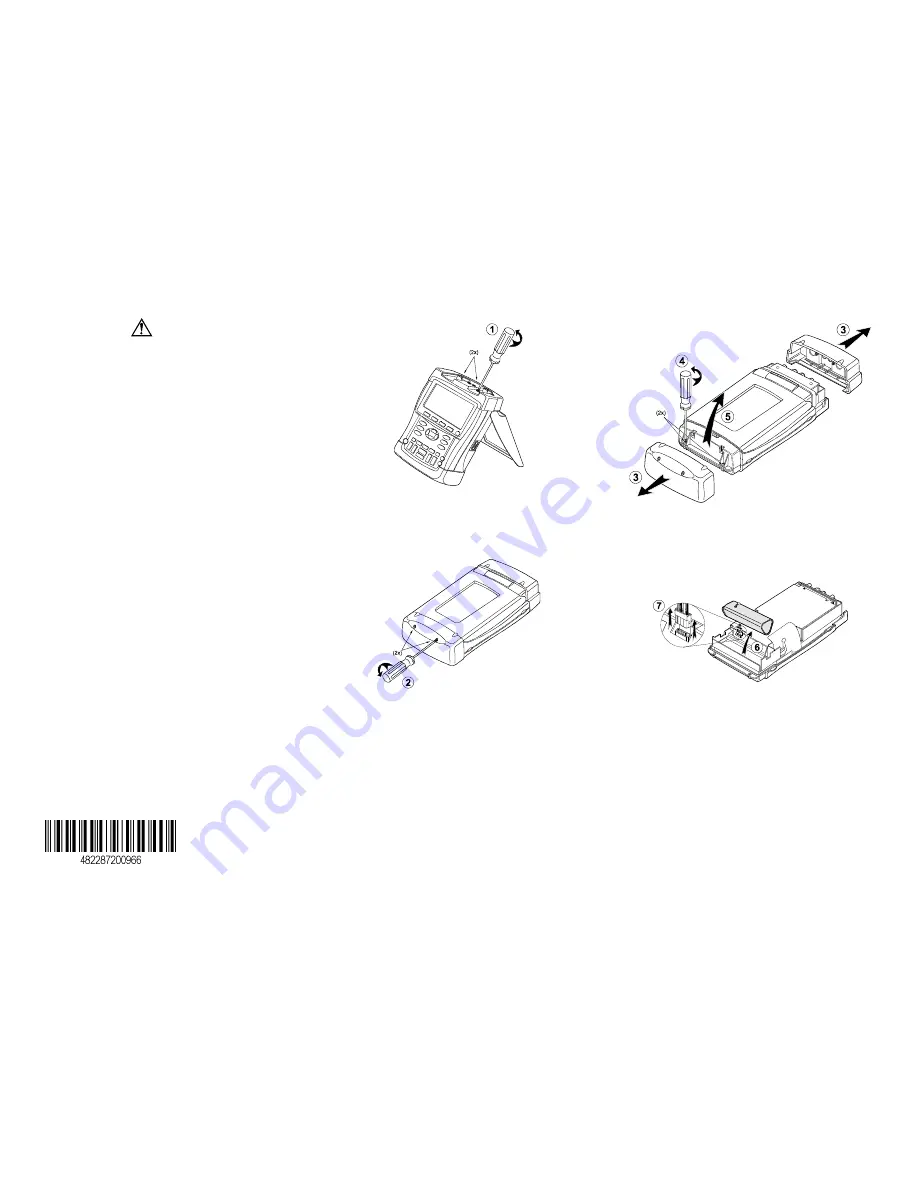
Replacing the Battery Pack
Warning
To avoid electrical shock, remove the test
leads and probes before replacing the
battery pack.
Usually it should not be necessary to replace the
battery pack. However, if you replace the battery pack,
follow steps 1 to 9. (See the figures.) Use a #10 Torx
screwdriver for all screws.
Disconnect the test leads and probes both at the source
and at the test tool before you open the test tool.
1. Loosen the two screws of the top cover.
2. Place the test tool face down and loosen the two
screws of the bottom cover.
3. Remove the top cover and bottom cover.
4. Loosen the two screws of the back cover
.
5. Lift the back cover away from the test tool.
6. Take the battery out of the battery compartment.
7. Remove the battery plug from the connector.
8. Install a new battery pack.
Note
Ensure that the battery pack is placed in the
battery compartment as shown in step
. Use
only the Fluke BP190 NiMH Battery Pack.
9. Reinstall all covers in reversed order.
Note
When new, the NiMh battery may be empty
and must be charged for 4 hours (test tool is
off) to fill it completely.


