

ACCESSING THE MODES & SETTINGS
You can turn your flower stick on/off, change, adjust and save modes, adjust settings and
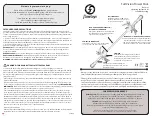
more by pressing the vision core button from the outside of the flowcap - there’s a vision
cap adaptor inside the silicone flowcap to help access the button. It is a white 3D-printed
part that should be firmly fitted inside the flowcap - don’t remove or lose it!
We recommend wirelessly grouping the 2 ends of your flower stick and getting a capsule
remote, so you can more easily change modes and settings.
Please refer to the flowOS pocket for basic operating instructions for the electronics, and
check out
flowtoys.com/product-support
for more in-depth instructions.
CHARGING YOUR VISION FLOWER STICK
There are 2 vision boards in your flower stick. To access the charging port for each board,
detach the flowcap from each end.
To detach the flowcap, twist cap firmly to release the buttons, then pull cap off tube. You
should see the USB charging port at the edge of the vision board under the cap.
Your vision prop should take approx. 3-4 hours to fully charge, but 90% of the charge hap-
pens in 2.5 hours.
To install cap, place over tube, push and twist until the snap-buttons click in.
Checking your battery charge level:
When off, press and hold the button. The light will
blink a color indicating your charge level - ranging from red to green - until you let go. Your
battery may be low when you first receive your lights - if so, please charge before use.
Red = really low, less than 10% left
Orange = OK, maybe 50% left
Yellow = should last a while, 50-90%
Green = good to go! 90% or more
Note:
Colors are approximate. Runtimes vary greatly with different modes.
Low battery mode:
When the battery gets low, the prop will exhibit a dim red flicker for
awhile, so your prop doesn’t go totally dark immediately.
Dead battery indicator:
If your light blinks red and turns off, the battery is out of juice.
A NOTE ON THE BUTTON
Pressing the button multiple times through the flowcap can be challenging. There is some
variation in the button press, sometimes it’s almost too easy and sometimes it’s quite hard.
We highly recommend using a capsule remote to navigate and perform more complex
functions that require multiple button presses. Plus it’s fun to be able to hand the remote to
someone else, while you’re spinning, and have them VJ your light modes.
You can also remove the flowcap to make button pressing easier, for complex navigation
like adjusting settings, saving favorites etc. Remember to replace cap fully to protect the
electronics.
2
TROUBLESHOOTING
My flowcap won’t release from the tube.
Make sure to grip the top end of your flowcap when removing it. If you grip lower down the cap,
the silicone can press against the tubing, making it harder to remove.
Issues with your vision core lights.
You can find many tips and troubleshooting on flowtoys.com/product-support for various po-
tential isses. Or contact us at [email protected], and we’d be happy to help you.
TIPS
Do not use glowsticks or WD-40 with tubing
.
While polycarbonate is very strong, it breaks down in the presence of certain esters, including
those produced by chemical glowsticks, mineral spirits and WD-40. Do NOT put chemical glow-
sticks into the tubes, otherwise they can become brittle and shatter.
Clean your grip!
Grip can wear out with use and is affected by oils from our skin. To prolong the life of your grip,
clean it after heavy use and before long periods of storage. Use rubbing alcohol and a cloth, OR
a cloth with warm soapy water to remove oils from the grip. Wipe away any soap residue with
clean water.
WARNING: Use care and be gentle when fastening and unfastening the button.
If you see the
silicone turn opaque white, it’s in danger of tearing! Be careful when storing your flowers. Petals can
tear off if they catch on other items, but flowers are still usable with several missing petals. You can
contact [email protected] for half price replacements.
MODULARITY
Vision parts are not meant to be repeatedly swapped out. The core may be removed from the
tube for servicing if needed, but is not intended to be removed frequently. The electronics will
be unprotected, it is possible to damage the button or USB jack during removal and insertion,
and the diffusion layer is easily damaged during insertion if you’re not super careful.
The reset pads can be pressed with a key without removing the core. You can also charge and
update firmware without removal. While it is possible, the core is not intended to be switched
between props/housings in a spontaneously modular way. Any physical damage - e.g. dam-
age to button or usb jack incurs a 50% replacement fee for warranty service.
3
INSTALLING YOUR FLOWERS
Flowers are designed to be installed on 1” tube. Tips of flowers should point towards
the end/cap of your prop.
• If installing on a
composite prop
, keep the straight edge of the flower flush with
the edge of the tube.
• If installing on a 1”
tube-based prop
, position the entire flower just below the
flowcap for maximum functional effect.
• Start at the end with no button; text facing up.
• Roll the flower around the tube, using one hand to roll your prop, while
holding the flower and wrapping with the other hand.
Tip:
Keep some tension, but do not stretch flowers while installing.
• At the end, tighten the tension enough so the looks like a circle.
Tip: Do NOT pull flower at the button hole! This might tear the hole.
• Align the button holes, and fasten the button through both holes.
• Repeat at the other end of your prop, and you’re ready to flow!
Notes:
Flowers may show burn or heat marks from the laser-cutting process. It’s not dirty. It’s lasers :)
Be careful when storing your flowers. Petals can tear off if they catch on other items, but flowers are still
usable with several missing petals. You can contact [email protected] for half price replacements.