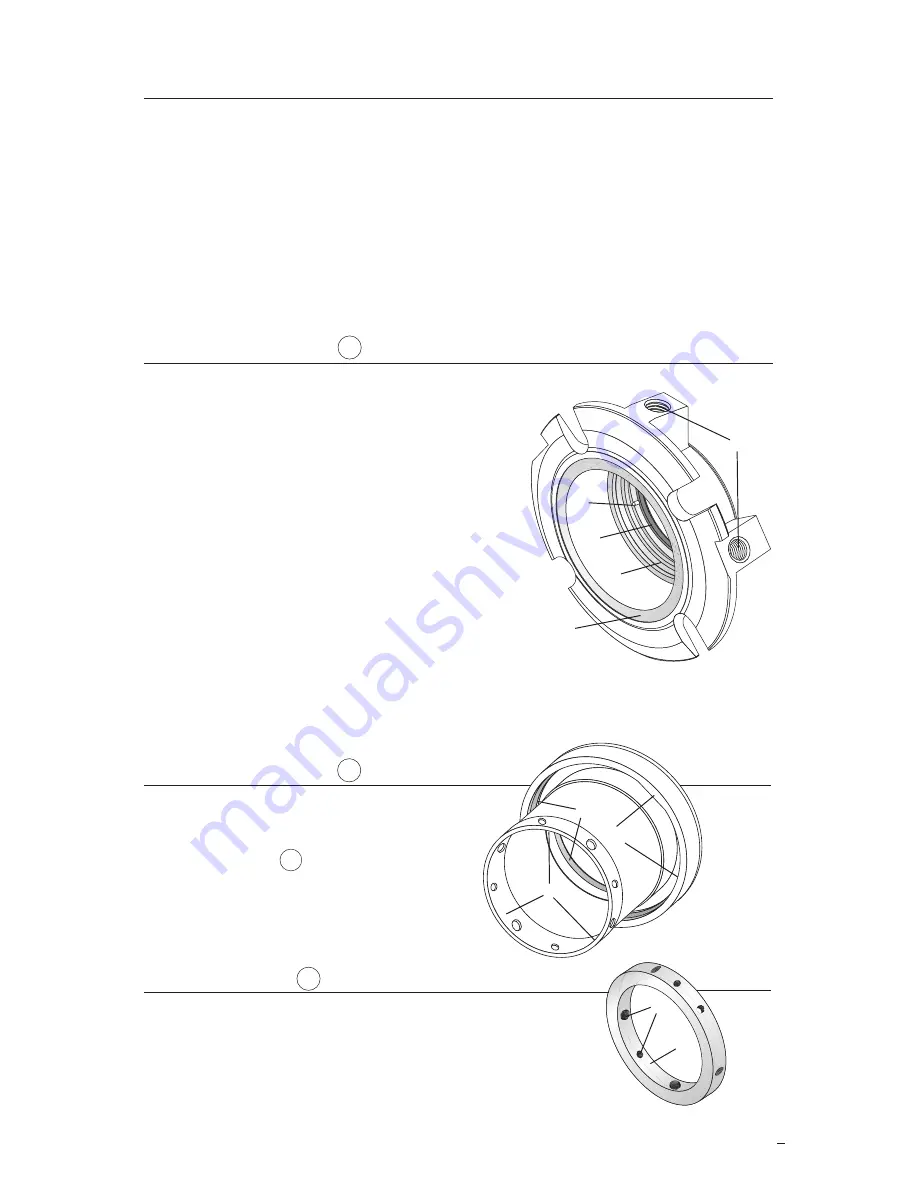
3
A
Dynamic O-ring surface - Inspect for wear,
fretting, nicks, scratches, or corrosion.
Required surface finish:
32 RMS
B
Gasket surface - Remove the old gasket
and clean the gasket surface. Inspect for
nicks, scratches, or corrosion.
C
Pipe taps and other threaded holes -
Inspect for damaged threads or corrosion.
Taps must be clean and free of debris and
corrosion. Re-tap as necessary.
D
Bushing - Inspect for wear, breakage, or
loosened bond with gland. Replace using
Loctite
®1
7471 Primer T and Loctite RC
TM
/
640 or equivalent to adhere the bushing if any of these conditions exist. A
ten minute cure at 400°F (204°C) is required to achieve full bond strength.
E
Anti-rotation pins - Inspect for wear or corrosion. If worn or corroded,
contact your Flowserve representative.
3.3 Sleeve Assembly
1
(
Figure 3
)
A
O-ring surfaces - Inspect for wear,
nicks, scratches, or corrosion.
Required surface finish:
63 RMS.
3.2 Gland Assembly
11
(
Figure 2
)
3 Inspection and Reconditioning
1 Registered Trademark of Loctite Corporation
Figure 2
B
Seal Drive
2
- Inspect for wear or
corrosion, especially at drive flat
surfaces on ID of drive ring.
C
Drive end roundness
-
No greater than 0.001" TIR
3.1 There are certain critical areas of each part where special attention should
be paid to the condition. If any of the areas listed in 3.2, 3.3 or 3.4 show
signs of wear, corrosion, or other defects that cannot be removed without
affecting the dimensional size of the surfaces by more than 0.001 to 0.002",
then the respective part should be replaced. If grit blasting is performed, it
may be necessary to polish the O-ring surfaces to achieve the required
surface finish (see 3.2A and 3.3A for the required surface finish). If any
parts require machining to correct damage, please contact your Flowserve
representative for dimensional requirements, or for any other questions
regarding repair.
3.4 Drive Collar
58
(
Figure 4
)
A
Threaded holes - Inspect for thread damage and
re-tap as necessary.
B
ID bore roundness - no greater than 0.002" TIR
C
Set screws - Replace cup point and dog point set
screws with those included with the repair kit. Make
sure the same threaded holes are used with the same type set screws.
Figure 3
Figure 4
E
D
A
C
B
A
C
B
A
B


