background image

Legal disclaimer

All products manufactured by FLIR Systems are warranted against defective materials and workmanship for a period of one (1) year from the
delivery date of the original purchase, provided such products have been under normal storage, use and service, and in accordance with
FLIR Systems instruction.

All products not manufactured by FLIR Systems included in systems delivered by FLIR Systems to the original purchaser carry the warranty,
if any, of the particular supplier only and FLIR Systems has no responsibility whatsoever for such products.

The warranty extends only to the original purchaser and is not transferable. It is not applicable to any product which has been subjected to
misuse, neglect, accident or abnormal conditions of operation. Expendable parts are excluded from the warranty.

In the case of a defect in a product covered by this warranty the product must not be further used in order to prevent additional damage. The
purchaser shall promptly report any defect to FLIR Systems or this warranty will not apply.

FLIR Systems will, at its option, repair or replace any such defective product free of charge if, upon inspection, it proves to be defective in
material or workmanship and provided that it is returned to FLIR Systems within the said one-year period.

FLIR Systems has no other obligation or liability for defects than those set forth above.

No other warranty is expressed or implied. FLIR Systems specifically disclaims the implied warranties of merchantability and fitness for a
particular purpose.

FLIR Systems shall not be liable for any direct, indirect, special, incidental or consequential loss or damage, whether based on contract, tort
or any other legal theory.

Copyright

© FLIR Systems, 2006. All rights reserved worldwide. No parts of the software including source code may be reproduced, transmitted, transcribed
or translated into any language or computer language in any form or by any means, electronic, magnetic, optical, manual or otherwise,
without the prior written permission of FLIR Systems.

This manual must not, in whole or part, be copied, photocopied, reproduced, translated or transmitted to any electronic medium or machine
readable form without prior consent, in writing, from FLIR Systems.

Names and marks appearing on the products herein are either registered trademarks or trademarks of FLIR Systems and/or its subsidiaries.
All other trademarks, trade names or company names referenced herein are used for identification only and are the property of their respective
owners.

Quality assurance

The Quality Management System under which these products are developed and manufactured has been certified in accordance with the
ISO 9001 standard.

FLIR Systems is committed to a policy of continuous development; therefore we reserve the right to make changes and improvements on
any of the products described in this manual without prior notice.

Patents

This product is protected by patents, design patents, patents pending, or design patents pending.

One or several of the following patents, design patents, patents pending, or design patents pending apply to the products and/or features
described in this manual:

Reg. No.

Status

Designation

00809178.1

Application

China

01823221.3

Application

China

01823226.4

Application

China

235308

Design Patent

China

ZL02331553.9

Design Patent

China

ZL02331554.7

Design Patent

China

200530018812.0

Pending

China

1188086

Patent

EPC

01930377.5

Application

EPO

01934715.2

Application

EPO

27282912

Application

EPO

000279476-0001

Design Patent

EU

1188086

Patent

France

viii

Publ. No. 1557978 Rev. a155 – ENGLISH (EN) – February 6, 2006

Summary of Contents for ThermaCam P25

Page 1: ...U ivatelsk p ru ka Gebruikershandleiding User s manual Benutzerhandbuch Manual del usuario Manuel de l utilisateur Manuale dell utente Manual do utilizador Felhas zn l i k zik nyv K ytt j n opas Betje...

Page 2: ......

Page 3: ...verview 5 Connecting system components 6 Introduction to thermographic inspections of electrical installations 7 Tutorials 8 Camera overview 9 Camera program 10 Folder and file structure 11 Electrical...

Page 4: ......

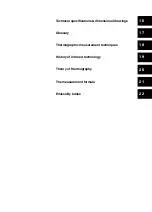
Page 5: ...nical specifications dimensional drawings 16 Glossary 17 Thermographic measurement techniques 18 History of infrared technology 19 Theory of thermography 20 The measurement formula 21 Emissivity table...

Page 6: ......

Page 7: ...ThermaCAM P25 User s manual Publ No 1557978 Rev a155 ENGLISH EN February 6 2006...

Page 8: ...eory Copyright FLIR Systems 2006 All rights reserved worldwide No parts of the software including source code may be reproduced transmitted transcribed or translated into any language or computer lang...

Page 9: ...Pending Japan PCT SE01 00983 Application PCT PCT SE01 00984 Application PCT PCT SE02 00857 Application PCT PCT SE03 00307 Application PCT PCT SE 00 00739 Application PCT 0302837 0 Application Sweden...

Page 10: ...Reg No Status Designation 29 233 400 Pending U S x Publ No 1557978 Rev a155 ENGLISH EN February 6 2006...

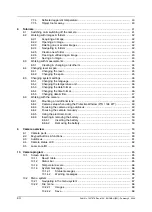
Page 11: ...rical installations 22 7 3 1 How to correctly set the equipment 22 7 3 2 Temperature measurement 24 7 3 3 Comparative measurement 25 7 3 4 Normal operating temperature 26 7 3 5 Classification of fault...

Page 12: ...rmat 47 8 5 5 Changing date time 48 8 6 Working with the camera 48 8 6 1 Mounting an additional lens 49 8 6 2 Camera setup when using the Protective Window P N 1 194 977 49 8 6 3 Focusing the camera u...

Page 13: ...85 12 Electrical power system 86 12 1 Internal battery charging 87 12 2 External battery charging 88 12 3 Battery safety warnings 91 13 A note on LEMO connectors 91 13 1 How to connect disconnect LEM...

Page 14: ...Step 2 Determining the emissivity 129 18 3 Reflected apparent temperature 129 18 4 Distance 129 18 5 Relative humidity 129 18 6 Other parameters 131 19 History of infrared technology 135 20 Theory of...

Page 15: ...energy sources such as devices emitting laser radiation or reflections from such devices may affect the accuracy of the camera readings or even harm or irreparably damage the detector Note that this s...

Page 16: ...INTENTIONALLY LEFT BLANK 1 2 Publ No 1557978 Rev a155 ENGLISH EN February 6 2006 1 Warnings cautions...

Page 17: ...he packing list is subject to specific customer configuration and may contain more or less items FLIR Systems reserves the right to discontinue models parts and accessories and other items or change s...

Page 18: ...INTENTIONALLY LEFT BLANK 2 4 Publ No 1557978 Rev a155 ENGLISH EN February 6 2006 2 Important note about this manual...

Page 19: ...ck A high resolution infrared color image is provided in real time in the integral viewfinder The camera is very easy to use and is operated by using a few buttons which are conveniently placed on the...

Page 20: ...ated portable IR scanner for industrial applications predictive maintenance Model 750 1975 1st TV compatible system Model 525 1978 1st dual wavelength scanning system capable of real time analog recor...

Page 21: ...nality 2004 1st camera models specially designed for building thermography B1 B2 and B20 10401603 a3 Figure 3 3 LEFT FLIR Systems Thermovision Model 661 The photo is taken on May 30th 1969 at the dist...

Page 22: ...es 10401303 a1 Figure 3 4 LEFT Development of system electronics RIGHT Testing of an FPA detector 10401403 a1 Figure 3 5 LEFT Diamond turning machine RIGHT Lens polishing 3 8 Publ No 1557978 Rev a155...

Page 23: ...10401503 a1 Figure 3 6 LEFT Testing of IR cameras in the climatic chamber RIGHT Robot for camera testing and calibration 3 Publ No 1557978 Rev a155 ENGLISH EN February 6 2006 9 3 Welcome...

Page 24: ...features and specifications have changed since the time of printing Please let us know about any errors you find as well as your suggestions for future editions by sending an e mail to documentation...

Page 25: ...the local FLIR Systems representative immediately Qty Part number Description 1 1 909 820 Adapter for CompactFlash card 2 1 195 268 Battery 1 1 195 267 Battery charger 1 1 909 653 CompactFlash card 1...

Page 26: ...INTENTIONALLY LEFT BLANK 4 12 Publ No 1557978 Rev a155 ENGLISH EN February 6 2006 4 Packing list...

Page 27: ...System overview This system overview shows all accessories that are possible to order for a Therma CAM P25 10570703 a3 Figure 5 1 System overview 5 Publ No 1557978 Rev a155 ENGLISH EN February 6 2006...

Page 28: ...y battery charger 1 195 267 11 External power supply 1 909 528 12 Automotive cigarette lighter 12 VDC adapter 1 195 143 13 Shoulder strap 117 132 14 Adapter for CompactFlash card 1 909 820 15 CompactF...

Page 29: ...t connectors 10438803 a2 Figure 6 1 How to connect system components Front connectors Figure 6 2 Explanations of callouts Explanation Callout USB or RS 232 cable 1 Not implemented 2 6 Publ No 1557978...

Page 30: ...omponents Rear connectors Figure 6 4 Explanations of callouts Explanation Callout CompactFlash card 1 Power supply cable 2 CVBS cable i e composite video 3 Remote control cable 4 6 16 Publ No 1557978...

Page 31: ...lable It all began in 1964 more than 40 years ago The technique is now established throughout the whole world Industrialized countries as well as developing countries have adopted this technique Therm...

Page 32: ...that the healthy part is taking the entire load and therefore becomes overheated A similar example is shown in section 7 5 7 Overheating in one part as a result of a fault in another on page 33 Defec...

Page 33: ...ithin an area in the image or the difference between the maximum temperature in the chosen area and a reference which can be chosen by the operator for example the ambient temperature 10712703 a3 Figu...

Page 34: ...trical components safely with the equipment under normal oper ating conditions there are many other sources of information the maintenance or the production manager has to consider The priority of rep...

Page 35: ...heduled IR survey represents an unnecessary risk for the plant Besides increasing the efficiency of the maintenance cycle measured in terms of lower risk for the plant the immediate control of the rep...

Page 36: ...etting the temperature scale values 7 3 2 Temperature measurement Some cameras today can automatically find the highest temperature in the image The image below shows how it looks to the operator 1071...

Page 37: ...However the real hot spot is most probably hidden inside the box see the in yellow encircled area This fault is reported as a 23 0 C 41 4 F excess temperature but the real problem is probably essenti...

Page 38: ...t materials at increasing or decreasing conductor areas or on circuit breakers where the current path is encapsulated The image below shows three fuses the temperatures of which are very close to each...

Page 39: ...g temperature given the load and the ambient temperature Consider the following definitions Operating temperature the absolute temperature of the component It depends on the current load and the ambie...

Page 40: ...indoor substa tions the operating temperatures vary a lot more This fact is clearly shown by the bottom image as well Here the left phase is the one which shows an excess temperature The operating tem...

Page 41: ...sible but think about the load situa tion before a decision is made 5 30 C 9 54 F II Acute overheating Must be re paired immediately but think about the load situation before a decision is made 30 C 5...

Page 42: ...ction site address city and so on Date of inspection Date of report Name of thermographer Signature of thermographer Summary or table of contents Inspection pages containing IR images to document and...

Page 43: ...10713603 a3 Figure 7 10 A report example 7 Publ No 1557978 Rev a155 ENGLISH EN February 6 2006 29 7 Introduction to thermographic inspections of electrical installations...

Page 44: ...see is a reflection or not is for you to move Look at the target from a different angle and watch the hot spot If it moves when you do it is a reflection Measuring temperature of mirror like details i...

Page 45: ...agnetic fields which will eventually heat up the weight The overheating in the image is less than 5 C 9 F This however need not necessarily always be the case 7 5 4 Load variations 3 phase systems are...

Page 46: ...about 5 C 9 F hotter than those which do not No fault to be reported in these examples 7 5 5 Varying cooling conditions 10714103 a3 Figure 7 15 An infrared image of bundled cables When for example a n...

Page 47: ...image to the right shows another overheating situation this time again due to a loose connection It is an outdoor connection hence it is exposed to the cooling effect of the wind and it is likely tha...

Page 48: ...bad contact in the near finger of the contactor Thus the far finger carries more current and gets hotter The component in the infrared image and in the photo is not the same however it is similar 7 34...

Page 49: ...ind is stronger than 8 m s 16 knots There are many windy places in the world islands mountains and so on but it is important to know that overheated components found would have shown a considerably hi...

Page 50: ...tance to 20 meters 66 ft which was done afterwards is shown in the image to the right where the corrected temperature is 38 8 C 101 8 F The difference is not too crucial but may take the fault into a...

Page 51: ...t is not possible to measure correct values if the object is too small Distance was properly set to 10 meters 33 ft 10714603 a3 Figure 7 20 Temperature readings from a blackbody at 85 C 185 F at incre...

Page 52: ...ffect is due to imperfections in the optics and to the size of the detector elements It is typical for all infrared cameras and can not be avoided 7 38 Publ No 1557978 Rev a155 ENGLISH EN February 6 2...

Page 53: ...the plastic cover Some camera models have a separate External optics transmission entry 7 7 3 Emissivity You have to determine the emissivity for the material which you are measuring Mostly you will...

Page 54: ...5 Object too far away Are you in doubt that the camera you have is measuring correctly at the actual dis tance A rule of thumb for your lens is to multiply the IFOV by 3 IFOV is the detail of the obj...

Page 55: ...see section 8 6 6 Inserting removing the battery on page 50 1 Briefly press the green ON OFF button to switch on the camera 2 Press and hold down the green on off button for a few seconds to switch of...

Page 56: ...a selected image press the joystick 4 For more information about opening images see section 10 2 2 1 Images on page 68 8 2 3 Deleting one or several images Action Step Press the joystick to display t...

Page 57: ...tory where you want to create a new folder 3 Press and hold down the joystick for two seconds to display a shortcut menu 4 On the shortcut menu select Create new folder to create a new folder at the c...

Page 58: ...nalysis menu and press the joystick An isotherm will now be added to your image The isotherm levels will be displayed in the result table in the top right corner of the screen You are now in edit mode...

Page 59: ...formation about level see section 10 2 4 3 Level Span on page 75 8 4 2 Changing the span Action Step Press the joystick to display the horizontal menu bar 1 If the camera is in continuous adjust mode...

Page 60: ...e joystick 2 Move the joystick up down to select Temp unit 3 Move the joystick left right to change the temperature unit 4 Press the joystick to confirm your changes and leave the dialog box 5 8 5 3 C...

Page 61: ...s the joystick to display the horizontal menu bar 1 Point to Date time on the Setup menu and press the joystick 2 Move the joystick up down to select year month day minute and second 3 Move the joysti...

Page 62: ...4 2 Lenses on page 93 10592203 a1 Figure 8 2 Mounting an additional lens Action Step Make sure the index mark on the IR lens is lined up with the index mark on the camera 1 Carefully push the lens int...

Page 63: ...the lens in the Optics temperature text box by moving the joystick left right Usually this temperature is the same temperature as the camera s ambient temperature However in some situations such as wh...

Page 64: ...f times You can do this by using the camera until the battery is fully depleted 8 6 6 1 Inserting the battery 10592303 a1 Figure 8 3 Inserting the battery Action Step Open the lid of the battery compa...

Page 65: ...e battery release spring will push out the battery from the battery compartment 2 Close the lid of the battery compartment 3 For more information about the battery system see section 12 Electrical pow...

Page 66: ...INTENTIONALLY LEFT BLANK 8 52 Publ No 1557978 Rev a155 ENGLISH EN February 6 2006 8 Tutorials...

Page 67: ...uttons For more information about the functionality of this button see section 9 2 Keypad buttons functions on page 60 1 F1 button For more information about the functionality of this button see secti...

Page 68: ...this button see section 9 2 Keypad buttons functions on page 60 3 Camera status LCD For more information about the LCD see section 9 4 Camera status LCD on page 62 4 Connector for remote control 5 Vi...

Page 69: ...page 60 1 Lid of the battery compartment 2 S button For more information about the S button see section 9 2 Keypad buttons functions on page 60 3 A button For more information about the A button see s...

Page 70: ...Description of part Callout Not implemented 7 Lens 8 9 56 Publ No 1557978 Rev a155 ENGLISH EN February 6 2006 9 Camera overview...

Page 71: ...k For more information about the joystick see section 9 2 Keypad buttons functions on page 60 2 ON OFF button green For more information about the ON OFF button see section 9 2 Keypad buttons function...

Page 72: ...10394603 a4 Figure 9 4 Camera parts 4 Description of part Callout Spring loaded locking latch for the remote control 1 9 58 Publ No 1557978 Rev a155 ENGLISH EN February 6 2006 9 Camera overview...

Page 73: ...n aiming aid Always check the LCD to make sure the camera captures the desired target Do not look directly into the laser beam When not in use the Laser LocatIR should always be protected by the lens...

Page 74: ...without changing any settings Press twice to leave edit mode If the camera is in manual adjust mode press to change the function of the joystick to level up down and span left right C Press to displa...

Page 75: ...a that the camera uses when autofocusing is a 80 60 pixel box centered vertically and horizontally on the screen The camera will have difficulties autofocusing when the image has low contrasts between...

Page 76: ...a battery is inserted flashing if the battery is being charged internally 2 CompactFlash card indicator Switched on if a CompactFlash card is inserted 3 CompactFlash status bar All segments switched o...

Page 77: ...ter will vary by the target distance Laser LocatIR should only be used as an aiming aid Always check the LCD to make sure the camera captures the desired target Do not look directly into the laser bea...

Page 78: ...INTENTIONALLY LEFT BLANK 9 64 Publ No 1557978 Rev a155 ENGLISH EN February 6 2006 9 Camera overview...

Page 79: ...been started The symbol disap pears after 15 seconds 10 1 2 Status bar 10388403 a2 Figure 10 2 Status bar showing atmospheric temperature relative humidity distance to target zoom factor date time tem...

Page 80: ...Message Message is displayed when the image is frozen Frozen Message is displayed when the camera is currently in manual adjust mode Manual Message is displayed when the software is restarted i e aft...

Page 81: ...es Press the C button to exit the menu system Press the C button to cancel selections in menus and dialog boxes Move the joystick up down to move up down in menus submenus and dialog boxes Move the jo...

Page 82: ...tick to display a thumbnail view of the files on the CompactFlash card The following files are displayed infrared images 10565603 a4 Figure 10 7 Images folder showing the context menu In the Images fo...

Page 83: ...g Delete For more information see see section 8 2 3 Deleting one or several images on page 42 Delete all images by selecting an image then pressing and holding down the joy stick and selecting Delete...

Page 84: ...s of the shortcut menu for Spot Explanation Command Point to Delete and press the joystick to delete the spot Delete Point to Exit edit mode and press the joystick to exit the edit mode Exit edit mode...

Page 85: ...is enabled If not this option will be shaded User defined Distance 10 2 3 3 Add isotherm The isotherm command colors all pixels with a temperature above below or between one or more preset temperatur...

Page 86: ...as ref temp All pixels with a temperature higher than a set temperature will be colored with the same preset isotherm color Above All pixels with a temperature lower than a set temperature will be co...

Page 87: ...lors used for the isotherm Configuration depen dent Color Selecting Transparent will add some transparency to an isotherm color making it easier for you to see objects through the color To make the is...

Page 88: ...ctory has to be selected in order to store the emissivity file in the camera memory If the camera software does not find an emissivity file at directory level it searches for similar files at root lev...

Page 89: ...downwards in the temperature scale Move the joystick left right to change the span indicated by two arrows pointing away from each other or towards each other 10392103 a3 Figure 10 19 Symbols in the...

Page 90: ...Explanations of the Palette dialog box Comments Value Label Move the joystick left right to change the palette Configuration depen dent Palette Move the joystick left right to reverse the current pale...

Page 91: ...Adjust method Move the joystick left right to enable or disable the scale On Off Scale Move the joystick left right to enable or disable the status bar On Off Status bar Move the joystick left right...

Page 92: ...e 10 25 Explanations of the Save Setup dialog box Comments Value Label For a detailed explanation see below Unique counter Date Directory Image naming If On is selected all on screen graphics will be...

Page 93: ...age IR The first four letters in the directory name DIRE Counter within directory nnn IR_ COMP_003 jpg Example 10 2 5 3 Power 10392703 a3 Figure 10 29 Power Setup dialog box Figure 10 30 Explanations...

Page 94: ...he joystick left right to enable disable this label on the status bar On Off Emissivity Move the joystick left right to enable disable this label on the status bar On Off T Reflected Move the joystick...

Page 95: ...gs in the Local settings dialog box Hour 00 59 Minute 00 59 Second 10 2 5 6 Local settings 10393903 a3 Figure 10 35 Local settings dialog box Figure 10 36 Explanations of the Local settings dialog box...

Page 96: ...shows information about memory usage battery status serial numbers software revision etc No changes can be made 10 2 5 8 Factory default Point to Factory default and press the joystick to reset the ca...

Page 97: ...d file structure The figure below shows the typical folder and file structure on the CompactFlash card as it is appears using Windows Explorer 10726803 a1 11 Publ No 1557978 Rev a155 ENGLISH EN Februa...

Page 98: ...INTENTIONALLY LEFT BLANK 11 84 Publ No 1557978 Rev a155 ENGLISH EN February 6 2006 11 Folder and file structure...

Page 99: ...te the following The camera is shipped with charged batteries To increase the battery life the battery should be fully discharged and charged a couple of times by using the camera or leaving the camer...

Page 100: ...battery is correctly inserted into the camera 1 Connect the power supply cable to the camera 2 The message Charging battery will appear on the screen 3 While charging the battery status symbol will pu...

Page 101: ...1 The charger is under power but no battery is inserted Fixed green light 1 The charger is under power and a battery is inserted Flashing green light 1 The battery is too cold or too warm Flashing re...

Page 102: ...ediately seek medical care If left untreated the battery fluid could cause damage to the eye When charging the battery only use a specified battery charger Do not attach the batteries to a power suppl...

Page 103: ...be discharged is 15 45 C 18 8 113 F Use of the battery outside of this temperature range may damage the performance of the battery or may reduce its life expectancy 12 Publ No 1557978 Rev a155 ENGLISH...

Page 104: ...INTENTIONALLY LEFT BLANK 12 90 Publ No 1557978 Rev a155 ENGLISH EN February 6 2006 12 Electrical power system...

Page 105: ...nnector consists of a fixed inner tube and a sliding outer tube The outer tube controls the locking teeth To unlock the connector pull the outer tube in the indicated direction See the figure below Ne...

Page 106: ...10403003 a1 Figure 13 2 Unlocking a LEMO connector 13 92 Publ No 1557978 Rev a155 ENGLISH EN February 6 2006 13 A note on LEMO connectors...

Page 107: ...l alcohol C2H5OH may be used to clean the lenses The lenses should be wiped once with the solution then the cotton wool should be discarded If ethyl alcohol is unavailable DEE i e ether diethylether C...

Page 108: ...INTENTIONALLY LEFT BLANK 14 94 Publ No 1557978 Rev a155 ENGLISH EN February 6 2006 14 Maintenance cleaning...

Page 109: ...power supply connector is properly insert ed If you are using the power supply the power supply connector may not be prop erly inserted into the power connector on the camera Verify that the mains pl...

Page 110: ...tor on the camera When connecting the in frared camera to an exter nal video monitor no image appears Verify that the video cable connector is properly insert ed The video cable connector may not be p...

Page 111: ...crobolome ter 320 240 pixels Type 7 5 13 m Spectral range 16 3 Image presentation Built in high resolution color LCD TFT Viewfinder 16 4 Temperature ranges Temperature range is subject to customer con...

Page 112: ...tand by sleep and deep sleep mode Power management 16 8 Environmental specifications 15 50 C 5 122 F Operating temperature range 40 70 C 40 158 F Storage temperature range Operating storage 10 95 non...

Page 113: ...DC when charging standard 2 5 mm DC connector Polarity protected Power input Standard RCA connector for composite video CVBS ITU R BT 470 PAL SMPTE 170M NTSC CVBS CompactFlash card Removable storage m...

Page 114: ...s side LEMO 1B 8 pins Connector type Pin number Type Signal name 1 POWER P8VA 2 I O SCL_D 3 GND GNDD 4 OUT LVDS_DISP 5 OUT LVDS_DISP 6 GND GNDD 7 I O SDA_D 8 POWER P8VA 16 11 3 Power connector 1040250...

Page 115: ...r 10402503 a1 Figure 16 4 Pin configuration for CVBS connector on camera operator s side A Center pin B Chassis RCA PHONO Connector type Pin number Type Signal name CENTER PIN VIDEO CVBS CHASSIS POWER...

Page 116: ...ical field of view 3 HFOV horizontal field of view 4 IFOV instantaneous field of view size of one detector element 10586403 a2 Figure 16 6 Horizontal vertical and instantaneous fields of view for cert...

Page 117: ...Horizontal vertical and instantaneous fields of view for certain distances to targets 124 mm lens camera type 234 16 Publ No 1557978 Rev a155 ENGLISH EN February 6 2006 103 16 Technical specification...

Page 118: ...Horizontal vertical and instantaneous fields of view for certain distances to targets 124 mm lens camera type 253 16 104 Publ No 1557978 Rev a155 ENGLISH EN February 6 2006 16 Technical specification...

Page 119: ...9 Horizontal vertical and instantaneous fields of view for certain distances to targets 72 mm lens camera type 218 16 Publ No 1557978 Rev a155 ENGLISH EN February 6 2006 105 16 Technical specification...

Page 120: ...0 Horizontal vertical and instantaneous fields of view for certain distances to targets 72 mm lens camera type 234 16 106 Publ No 1557978 Rev a155 ENGLISH EN February 6 2006 16 Technical specification...

Page 121: ...1 Horizontal vertical and instantaneous fields of view for certain distances to targets 72 mm lens camera type 253 16 Publ No 1557978 Rev a155 ENGLISH EN February 6 2006 107 16 Technical specification...

Page 122: ...2 Horizontal vertical and instantaneous fields of view for certain distances to targets 36 mm lens camera type 218 16 108 Publ No 1557978 Rev a155 ENGLISH EN February 6 2006 16 Technical specification...

Page 123: ...Horizontal vertical and instantaneous fields of view for certain distances to targets 36 mm lens camera type 234 281 16 Publ No 1557978 Rev a155 ENGLISH EN February 6 2006 109 16 Technical specificati...

Page 124: ...4 Horizontal vertical and instantaneous fields of view for certain distances to targets 36 mm lens camera type 253 16 110 Publ No 1557978 Rev a155 ENGLISH EN February 6 2006 16 Technical specification...

Page 125: ...5 Horizontal vertical and instantaneous fields of view for certain distances to targets 18 mm lens camera type 218 16 Publ No 1557978 Rev a155 ENGLISH EN February 6 2006 111 16 Technical specification...

Page 126: ...6 Horizontal vertical and instantaneous fields of view for certain distances to targets 18 mm lens camera type 234 16 112 Publ No 1557978 Rev a155 ENGLISH EN February 6 2006 16 Technical specification...

Page 127: ...7 Horizontal vertical and instantaneous fields of view for certain distances to targets 18 mm lens camera type 253 16 Publ No 1557978 Rev a155 ENGLISH EN February 6 2006 113 16 Technical specification...

Page 128: ...18 Horizontal vertical and instantaneous fields of view for certain distances to targets 9 mm lens camera type 218 16 114 Publ No 1557978 Rev a155 ENGLISH EN February 6 2006 16 Technical specification...

Page 129: ...19 Horizontal vertical and instantaneous fields of view for certain distances to targets 9 mm lens camera type 234 16 Publ No 1557978 Rev a155 ENGLISH EN February 6 2006 115 16 Technical specification...

Page 130: ...pe 253 Figure 16 21 F number and close focus limits for various lenses 9 0 mm 18 mm 36 mm 72 mm 124 mm Lens 0 15 0 1 0 3 1 2 4 Close focus limit m 0 49 0 32 0 98 3 93 13 11 Close focus limit ft 1 0 1...

Page 131: ...asic dimensions battery charger 10388003 a4 Figure 16 22 Overall dimensions of the battery charger 16 Publ No 1557978 Rev a155 ENGLISH EN February 6 2006 117 16 Technical specifications dimensional dr...

Page 132: ...16 14 Basic dimensions battery 10388103 a4 Figure 16 23 Overall dimensions of the battery 16 118 Publ No 1557978 Rev a155 ENGLISH EN February 6 2006 16 Technical specifications dimensional drawings...

Page 133: ...Figure 16 24 Overall dimensions of the camera For camera type 253 replace 234 mm 9 21 with 241 mm 9 49 Three digit camera type number is stated on configuration label 16 Publ No 1557978 Rev a155 ENGL...

Page 134: ...of the standard tripod mount 1 4 20 For camera type 253 replace 100 mm 3 94 with 107 mm 4 21 Three digit camera type number is stated on configuration label 16 120 Publ No 1557978 Rev a155 ENGLISH EN...

Page 135: ...tive humidity of air and the distance to the object calculated atmospheric transmission A bottle shaped radiator with an absorbing inside viewed through the bottleneck cavity radiator The temperature...

Page 136: ...age that fall above below or between one or more temperature intervals isotherm A bottle shaped radiator with a uniform temperature viewed through the bottleneck isothermal cavity An electrically powe...

Page 137: ...A number between 0 and 1 reflection Percentage of water in the air relative to what is physically possible Air temperature dependent relative humidity The areas that contain temperatures outside the p...

Page 138: ...otherm showing a linear spread of colors instead of cover ing the highlighted parts of the image transparent isotherm Refers to the video mode of a IR camera as opposed to the normal thermographic mod...

Page 139: ...ity of the object The reflected apparent temperature The distance between the object and the camera The relative humidity Temperature of the atmosphere 18 2 Emissivity The most important object parame...

Page 140: ...method Action Step Look for possible reflection sources considering that the incident angle reflection angle a b 10588903 a1 Figure 18 1 1 Reflection source 1 If the reflection source is a spot source...

Page 141: ...does not measure radiation intensity A thermocouple requires a very good thermal contact to the surface usually by gluing and covering the sensor by a thermal isolator 18 2 1 1 2 Method 2 Reflector me...

Page 142: ...en 4 Focus and auto adjust the camera and freeze the image 5 Adjust Level and Span for best image brightness and contrast 6 Set emissivity to that of the tape usually 0 97 7 Measure the temperature of...

Page 143: ...following two facts That radiation from the target is absorbed by the athmosphere between the object and the camera That radiation from the atmosphere itself is detected by the camera 18 5 Relative h...

Page 144: ...INTENTIONALLY LEFT BLANK 18 130 Publ No 1557978 Rev a155 ENGLISH EN February 6 2006 18 Thermographic measurement techniques...

Page 145: ...t he risked eye damage after only a few seconds observation Herschel was soon convinced of the necessity of setting up a systematic experiment with the objective of finding a single material that woul...

Page 146: ...use of glass in the prism of his original experiment led to some early controversies with his contemporaries about the actual existence of the infrared wavelengths Different investigators in attemptin...

Page 147: ...the heat from a person standing 3 meters away 10 ft The first so called heat picture became possible in 1840 the result of work by Sir John Herschel son of the discoverer of the infrared and a famous...

Page 148: ...able to detect an approaching airplane at a distance of 1 5 km 0 94 miles or a person more than 300 meters 984 ft away The most sensitive systems up to this time were all based upon variations of the...

Page 149: ...e all governed by the same laws and the only differences are those due to differences in wavelength 10067803 a1 Figure 20 1 The electromagnetic spectrum 1 X ray 2 UV 3 Visible 4 IR 5 Microwaves 6 Radi...

Page 150: ...presents almost exactly the properties of a blackbody A practical application of the principle to the construction of a perfect absorber of radiation consists of a box that is light tight except for a...

Page 151: ...the radiation emitted from a blackbody 20 3 1 Planck s law 10399203 a1 Figure 20 3 Max Planck 1858 1947 Max Planck 1858 1947 was able to describe the spectral distribution of the radiation from a blac...

Page 152: ...t law By differentiating Planck s formula with respect to and finding the maximum we have This is Wien s formula after Wilhelm Wien 1864 1928 which expresses mathemati cally the common observation tha...

Page 153: ...trogen 77 K the maximum of the almost insignificant amount of radiant emittance occurs at 38 m in the extreme infrared wavelengths 10327203 a3 Figure 20 6 Planckian curves plotted on semi log scales f...

Page 154: ...formula to calculate the power radiated by the human body at a temperature of 300 K and an external surface area of approx 2 m2 we obtain 1 kW This power loss could not be sustained if it were not fo...

Page 155: ...simplifies to Another factor called the emissivity is required to describe the fraction of the radiant emittance of a blackbody produced by an object at a specific temperature Thus we have the definit...

Page 156: ...the total emissive power of a graybody is the same as a blackbody at the same temperature reduced in proportion to the value of from the graybody 10401203 a1 Figure 20 8 Spectral radiant emittance of...

Page 157: ...o the interior The back reflected radiation is again partially absorbed but some of it arrives at the other surface through which most of it escapes part of it is reflected back again Although the pro...

Page 158: ...INTENTIONALLY LEFT BLANK 20 144 Publ No 1557978 Rev a155 ENGLISH EN February 6 2006 20 Theory of thermography...

Page 159: ...ortunately small enough to be neglected In case they are not negligible the measurement configuration is likely to be such that the risk for disturbance is obvious at least to a trained operator It is...

Page 160: ...er to derive a workable formula and Trefl can at least theoretically be given a value that represents an efficient temperature of a complex surrounding Note also that we have assumed that the emittanc...

Page 161: ...task could sometimes be a heavy burden for the operator since there are normally no easy ways to find accurate values of emittance and atmospheric transmittance for the actual case The two temperature...

Page 162: ...s now assume that the object is not black it has an emittance of 0 75 and the transmittance is 0 92 We also assume that the two second terms of Equation 4 amount to 0 5 volts together Computation of U...

Page 163: ...g measurement conditions SW camera 1 Object temperature 2 Emittance Obj Object radiation Refl Reflected radiation Atm atmosphere radiation Fixed parameters 0 88 Trefl 20 C 68 F Tatm 20 C 68 F 21 Publ...

Page 164: ...g measurement conditions LW camera 1 Object temperature 2 Emittance Obj Object radiation Refl Reflected radiation Atm atmosphere radiation Fixed parameters 0 88 Trefl 20 C 68 F Tatm 20 C 68 F 21 150 P...

Page 165: ...Paljak Pettersson Thermography of Buildings Swedish Building Research Institute Stockholm 1972 6 Vlcek J Determination of emissivity with imaging radiometers and some emissivities at 5 m Photogrammet...

Page 166: ...ongly Aluminum 1 0 04 0 06 T 50 100 polished Aluminum 2 0 05 T 100 polished sheet Aluminum 4 0 05 T 100 polished plate Aluminum 3 0 28 3 m 27 roughened Aluminum 3 0 18 10 m 27 roughened Aluminum 1 0 0...

Page 167: ...100 oxidized Brass 1 0 59 0 61 T 200 600 oxidized at 600 C Brass 1 0 03 T 200 polished Brass 2 0 03 T 100 polished highly Brass 2 0 20 T 20 rubbed with 80 grit emery Brass 1 0 06 T 20 sheet rolled Bra...

Page 168: ...radiating Brick 1 0 66 T 1230 silica 95 SiO2 Brick 1 0 29 T 1500 sillimanite 33 SiO2 64 Al2O3 Brick 5 0 87 SW 17 waterproof Brick 9 0 06 LW 70 phosphor bronze Bronze 9 0 08 SW 70 phosphor bronze Bronz...

Page 169: ...l ished Copper 1 0 13 0 15 T 1100 1300 molten Copper 1 0 6 0 7 T 50 oxidized Copper 4 0 78 T 27 oxidized black Copper 2 0 78 T 20 oxidized heavily Copper 1 0 88 T oxidized to black ness Copper 1 0 02...

Page 170: ...carefully Gold 2 0 02 T 100 polished highly Gold 8 0 849 LLW 20 polished Granite 8 0 879 LLW 21 rough Granite 9 0 77 0 87 LW 70 rough 4 different samples Granite 9 0 95 0 97 SW 70 rough 4 different s...

Page 171: ...y polished Iron and steel 1 0 24 T 20 freshly worked with emery Iron and steel 1 0 55 0 61 T 950 1100 ground sheet Iron and steel 2 0 69 T 20 heavily rusted sheet Iron and steel 1 0 77 T 20 hot rolled...

Page 172: ...250 wrought carefully polished Iron and steel 9 0 85 LW 70 heavily oxidized Iron galvanized 9 0 64 SW 70 heavily oxidized Iron galvanized 4 0 07 T 92 sheet Iron galvanized 1 0 23 T 30 sheet burnished...

Page 173: ...3 0 4 T Lime 4 0 07 T 22 Magnesium 4 0 13 T 260 Magnesium 4 0 18 T 538 Magnesium 2 0 07 T 20 polished Magnesium 1 0 86 T Magnesium pow der 1 0 08 0 13 T 600 1000 Molybdenum 1 0 19 0 26 T 1500 2200 Mol...

Page 174: ...l 4 0 11 T 22 electroplated on iron unpolished Nickel 2 0 37 T 200 oxidized Nickel 4 0 37 T 227 oxidized Nickel 4 0 85 T 1227 oxidized Nickel 1 0 37 0 48 T 200 600 oxidized at 600 C Nickel 4 0 045 T 1...

Page 175: ...6 0 96 SW 20 oil gray gloss Paint 1 0 92 0 96 T 100 oil various colors Paint 2 0 94 T 100 oil based average of 16 colors Paint 6 0 95 SW 20 plastic black Paint 6 0 84 SW 20 plastic white Paint 9 0 92...

Page 176: ...ted circ board Plastic 9 0 55 LW 70 polyurethaneisola tion board Plastic 9 0 29 SW 70 polyurethaneisola tion board Plastic 9 0 93 LW 70 PVC plastic floor dull structured Plastic 9 0 94 SW 70 PVC plast...

Page 177: ...02 0 03 T 200 600 pure polished Silver 2 0 98 T 32 human Skin 1 0 97 0 93 T 0 100 boiler Slag 1 0 89 0 78 T 200 500 boiler Slag 1 0 76 0 70 T 600 1200 boiler Slag 1 0 69 0 67 T 1400 1800 boiler Slag S...

Page 178: ...T 20 50 burnished Tin 2 0 07 T 100 tin plated sheet iron Tin 1 0 40 T 200 oxidized at 540 C Titanium 1 0 50 T 500 oxidized at 540 C Titanium 1 0 60 T 1000 oxidized at 540 C Titanium 1 0 15 T 200 poli...

Page 179: ...w Water 5 0 98 SW 17 Wood 8 0 962 LLW 19 Wood 1 0 5 0 7 T ground Wood 9 0 81 0 89 LW 70 pine 4 different samples Wood 9 0 67 0 75 SW 70 pine 4 different samples Wood 1 0 8 0 9 T 20 planed Wood 2 0 90...

Page 180: ...6 5 4 3 2 1 1 0 04 0 05 T 200 300 polished Zinc 1 0 20 T 50 sheet Zinc 22 166 Publ No 1557978 Rev a155 ENGLISH EN February 6 2006 22 Emissivity tables...

Page 181: ...attery 85 in packing list 11 battery continued inserting 50 operating time 98 removing 51 type 98 battery charger external 85 in packing list 11 internal 85 battery charging external 87 internal 86 ba...

Page 182: ...5 system settings date time 47 date format 46 language 46 temperature unit 46 changing continued system settings continued time format 46 temperature unit 46 time format 46 charging battery externally...

Page 183: ...d 35 E Edit mode command 70 electrical power system 85 power management 98 specifications 98 voltage 98 electromagnetic spectrum 135 emissivity 39 data 151 explanation 125 tables 151 emissivity correc...

Page 184: ...aybody 141 Gustav Robert Kirchhoff 136 H hand strap 55 heating inductive 31 heating continued solar 30 heat picture 133 Herschel William 131 Hide graphics command 76 history 6 E series 7 first thermo...

Page 185: ...ued distance 63 function 60 location on camera 59 output power 63 type 98 warning 63 wavelength 63 laws Planck s law 137 Stefan Boltzmann s formula 140 Wien s displacement law 138 LCD protection 1 80...

Page 186: ...actFlash card 11 battery 11 battery charger 11 packing list continued CompactFlash card 11 lens cap camera body 11 power supply 11 shoulder strap 11 USB cable 11 video cable 11 Palette command 76 dial...

Page 187: ...location 55 scale screen object 66 screen objects result table 65 status bar 65 screen objects continued temperature scale 66 selections canceling 67 confirming 67 semi transparent body 143 Setup menu...

Page 188: ...2 thermos bottle 134 time date changing 47 time format changing 46 trademarks viii tripod mount 99 turning off camera 41 turning on camera 41 tutorials acquiring image 42 adjusting focus 49 changing d...

Page 189: ...nty viii weight 98 Wien Wilhelm 138 Wilhelm Wien 138 William Herschel 131 wind 35 wind speed 19 working with level 45 span 45 working with camera adjusting focus 49 inserting battery 50 mounting lens...

Page 190: ...elance graphic artist in Z rich 1956 Eduard Hoffmann the director of the Haas sche Schriftgie erei commissions Miedinger to develop a new sans serif typeface 1957 The Haas Grotesk face is introduced 1...

Page 191: ......

Page 192: ...flirthermography com Phone 49 0 69 95 00 900 E mail IRCanada flir com USA Primary sales service contact in USA Fax 49 0 69 95 00 9040 E mail info flir de Web www flirthermography com Web www flirther...

Reviews: