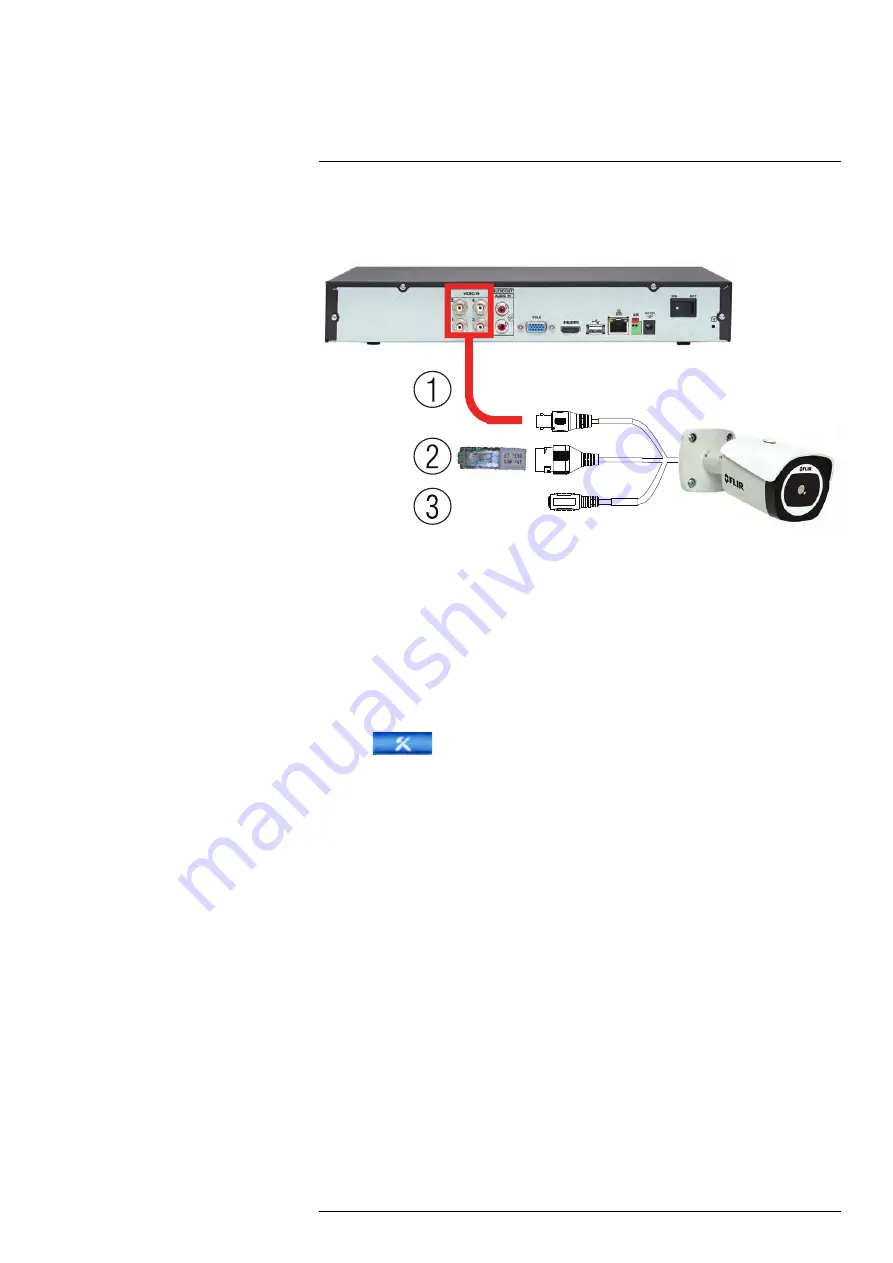
When your TCX Series thermal camera is in MPX mode, you can connect it to a FLIR
MPX DVR. To set your camera to MPX mode, insert the MPX terminator before powering
on the camera. See the diagram below for details.
1. Connect the BNC video connector to a
Video IN
port on the DVR using a coaxial ca-
ble (not included),
2. Connect the MPX terminator to the Ethernet port.
3. Connect the camera to the appropriate power source (not included).
After powering on your DVR, you will have to set communication parameters for your
camera.
To set communication parameters for a camera in MPX mode:
1. Double-click on the channel of the MPX camera.
2. Right-click and click Main Menu.
3. Click
and select
Setting
. Click
Pan/Tilt/Zoom
.
4. Configure the following settings:
• Under
Channel
, select the channel your MPX camera is connected to.
• Under
Control Mode
, select
HDCVI
.
• Under
Protocol
, select
DH-SD1
.
5. Click
OK
to save changes.
8.1
MPX On-Screen Display (OSD)
TCX Series thermal cameras feature an on-screen display (OSD) menu that allows you
to configure thermal image settings and set the video standard to NTSC or PAL.
8.1.1
Accessing the OSD Menu
You can use your a FLIR MPX DVR’s PTZ controls to access the OSD menu.
To access the OSD menu:
1. In Live View, double-click the channel that has the MPX camera connected to open
in full-screen.
#LX400062; r.30885/35920; en-US
61
Summary of Contents for TCX series
Page 1: ...Instruction Manual FLIR TCX Thermal Cameras...
Page 2: ......
Page 3: ...Instruction Manual FLIR TCX Thermal Cameras LX400062 r 30885 35920 en US iii...
Page 4: ......
Page 8: ......
Page 148: ......
Page 149: ......


