


427-0075-01-12 Revision 140
October 2019
22
This document does not contain any export-controlled information.
Basic Operation and Configuration
Once the camera is connected to a network and powered on, set camera network parameters using
the FLIR Discovery Network Assistant (DNA) software, perform a bench test by using a web browser
to view the video and control the camera, or view video in the local Network Video Management
System (for example, FLIR Latitude). The FLIR Discovery Network Assistant (DNA) software does
not require a license to use and is a free download from the individual product web page at:
.
2.2.1
Set IP Address using the FLIR Discovery Network Assistant (DNA)
The PT-Series HD camera is shipped with Dynamic Host Configuration Protocol (DHCP) enabled to
assign IP addresses. Assuming the existing network has a DHCP server, the camera will be
assigned an appropriate IP address. If the network does not have a DHCP server, the PT-Series HD
camera will default to 192.168.0.250. Configuring the camera for IP communications generally
involves the following steps:
Step 1
Connect the Ethernet port of the camera to the existing IP camera network.
Step 2
Connect a PC or laptop to the same network.
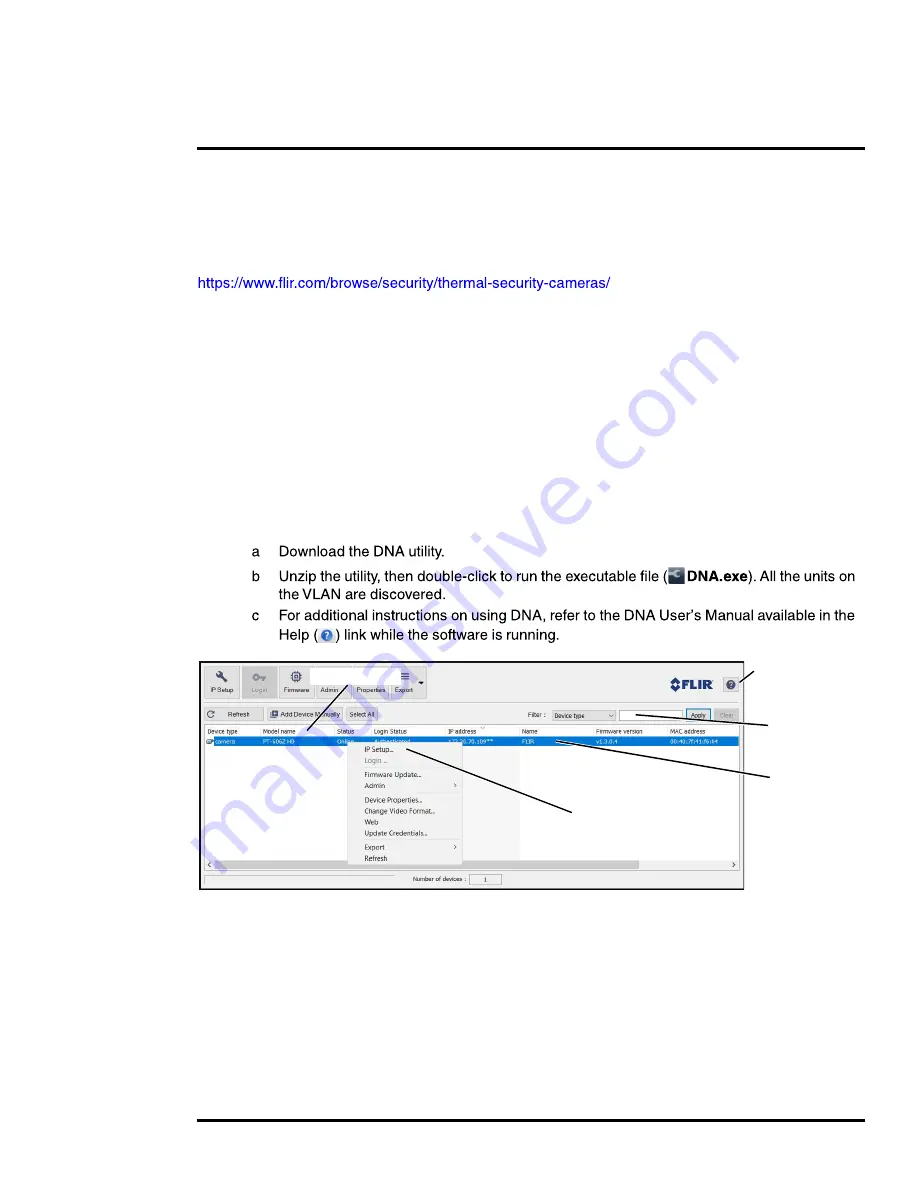
Step 3
From the PC connected to the camera network, use the DNA utility to discover and display
the camera’s current IP address.
Online manual
Select a filter
Click to sort
Select IP Setup
Right-click


