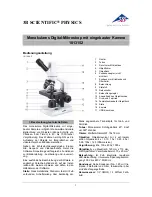
Flinn Basic Microscope Manual
continued
3
Objective Specifications
Objective
Numerical
Aperature (NA)
Color-Coded
Ring
Total Magnification
with WF10X eyepiece
Total Magnification
with WF25X eyepiece
4X
0.10
Red
40X
100X
10X
0.25
Yellow
100X
250X
40X
0.65
Light Blue
400X
1000X
9. Each objective has a colored ring indicating the magnification. The color of the objective can be used to indicate which
objective should be used to view the specimen.
10. The NA value is the resolving power of the objective lens. Magnification and resolving power result in an image that is
both large and clear. The NA value multiplied by the total magnification gives the maximum resolving power.
11. Do not let the 40X objective lens come into contact with a wet slide surface, as prolonged contact with any moisture could
damage the lens. If lens is exposed to moisture, promptly wipe with soft tissue to remove moisture.
Maintenance
WARNING: For your own safety, remove the batteries and unplug the microscope before performing maintenance.
1. Optical maintenance
Note: Do not attempt to disassemble any lens components. Consult a microscope service technician when any repairs not
covered by instructions are needed.
a. Fingerprints or other matter on the front lens element of the objective lens is the single most common reason that you
will have difficulty in focusing the microscope. Before having costly servicing done, make certain to examine the front
lens element with a magnifying glass.
b. Prior to cleaning any lens surface, brush dust or dirt off lens surfaces using a camel hair brush or compressed air.
c. Clean only the outer lens surface. Breathe on lens to dampen surface, then wipe with lens paper or lint free tissue. You
may also use a cotton swab moistened with distilled water. Wipe lenses with a circular motion, applying as little pressure
as possible. Avoid wiping a dry lens surface as lenses are scratched easily. If excessive dirt or grease gets on lens surfaces,
a small amount of lens cleaner can be used on a cotton swab or lens tissue.
2. Mechanical maintenance
a. The rack stop screw has been pre-adjusted at the factory and should not require re-adjustment. However, if you do
attempt re-adjustment, note the following procedure:
• Loosen the rack stop screw by rotating in a counterclockwise direction.
• With fine focus adjustment at mid-range, focus on a standard slide until sharp image is obtained.
• Rotate rack stop screw in clockwise direction until tight.
b. To clean metal and plastic parts, use a clean, damp cloth to remove dust or dirt, followed by a dry cloth.
© 2016 Flinn Scientific, Inc. All Rights Reserved.


