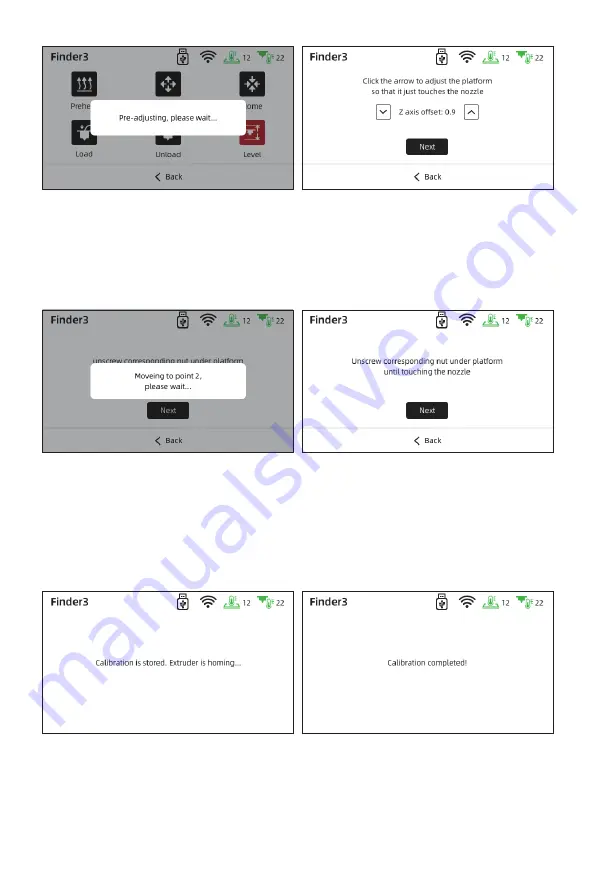
Lightly pull the A4 paper and feel the friction. If the friction is too big to move, tap [↓]
to increasethe distance between nozzle and build plate; if the friction is too small, tap
[↑] to reduce the distance between nozzle and build plate. It is better that pull the
paper to feel the significant frictional resistance until the slight scratches appear
without damage. Tap [Next] to do the second level point.
2.
When the extruder moves to the second point, pull the A4 paper to feel the friction
resistance. If the friction is too big to move, rotate nut anticlockwise to increase the
distance between nozzle and build plate; if the friction is too small, rotate nut
clockwise to reduce the distance between nozzle and build plate. It is better that pull
the paper to feel the significant frictional resistance until the slight scratches appear
without damage. Tap [Next] to do the third level point.
3.
The third leveling point repeats the second point leveling operation until the
three-point leveling is completed.
4.
10
Summary of Contents for Finder 3
Page 2: ......
Page 23: ...50mm 1 2 3 4 5 6 7 8 9 10 11 12 13 2022 1 Copyright 2021 21...
Page 25: ...U X Y 1 2 3 4 5 6 7 8 9 10 11 23...
Page 28: ...2 1 1 2 26...
Page 29: ...115 230V 2 2 Finder 3 2 3 1 2 3 3 2 1 27...
Page 30: ...2 4 A4 1 28...
Page 31: ...A4 A4 A4 2 A4 A4 A4 3 4 29...
Page 32: ...2 5 2 6 U FlashPrint www sz3dp com 30...
Page 33: ...1 2 3 3D U stl U U U 3 1 31...
Page 34: ...3 2 3 3 Wi Fi 32...
Page 35: ...Wi Fi Wi Fi Wi Fi 1 Wi Fi IP 2 FlashPrint 5 IP 3 3 4 Wi Fi 33...
Page 36: ...3 5 1 2 3 4 U U 3 U U support ashforge com 1 3 3 Wi Fi 2 34...
Page 37: ...3 6 ABS ABS Z Z 18 30 X 1 2 3 4 5 6 7 Q A Q A Q A Q A 1 2 3 1 2 1 2 1 2 35...
Page 38: ...Q A 1 2 Q A Q A Q A U 1 U 2 U 3 U 1 2 Q A 1 2 3 4 30 Q A Q A Q A 1 5 10 2 1 2 Q A 1 2 3 36...


