VESDA-E VEP-A00-P Product Guide
www.xtralis.com
25
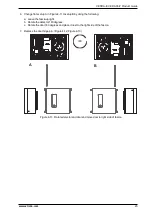
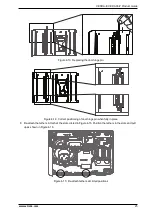
Figure 4-13: Replacing the door hinge pin
Figure 4-14: Correct positioning of door hinge pin when fully in place
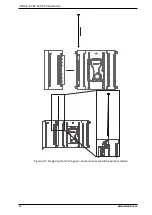
8. Re-attach the tethers. Attach at the slots circled in Figure 4-15. Position the tethers in the slots and pull
up as shown in Figure 4-16.
Figure 4-15: Re-attach tethers at circled positions
Summary of Contents for VESDA-E VEP-A00-1P
Page 2: ......
Page 10: ...VESDA E VEP A00 P Product Guide 4 www xtralis com This page is intentionally left blank ...
Page 20: ...VESDA E VEP A00 P Product Guide 14 www xtralis com This page is intentionally left blank ...
Page 52: ...VESDA E VEP A00 P Product Guide 46 www xtralis com This page is intentionally left blank ...
Page 80: ...VESDA E VEP A00 P Product Guide 74 www xtralis com This page is intentionally left blank ...
Page 106: ...VESDA E VEP A00 P Product Guide 100 www xtralis com This page is intentionally left blank ...
Page 112: ...VESDA E VEP A00 P Product Guide 106 www xtralis com Z zone 56 58 77 101 ...


