


Fixturlaser NXA Pro
Set Up
1.
Turn on the Fixturlaser NXA Display Unit.
2.
Mount the ‘S’ sensor on the stationary shaft or cou-
pling hub and hand tighten the nut. Turn the sensor on
by pressing the power button.
3.
Mount the ‘M’ sensor on the movable shaft or coupling
hub and hand tighten the nut. Turn the sensor on by
pressing the power button.
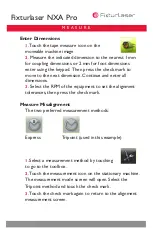
Start the Horizontal Alignment Program
1.
From the main menu on the display
unit touch the horizontal alignment icon.
2.
The lasers will turn on and the screen graphic will
show the orientation of the sensors.
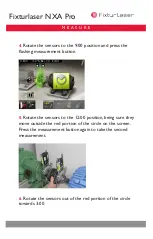
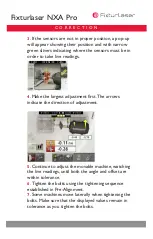
Aim the Lasers
1.
Loosen the green clips and slide the sensors up or
down until the line laser beams hit the middle of the op-
posite sensor. Note that the sensors will be at different
elevations.
2.
The display unit screen will show green lights next
to each sensor to confirm that the lasers have been
acquired by the sensors.
3.
Using the wrench, tighten the nuts another half turn.
S E T U P


