7
ASSEMBLY INSTRUCTIONS
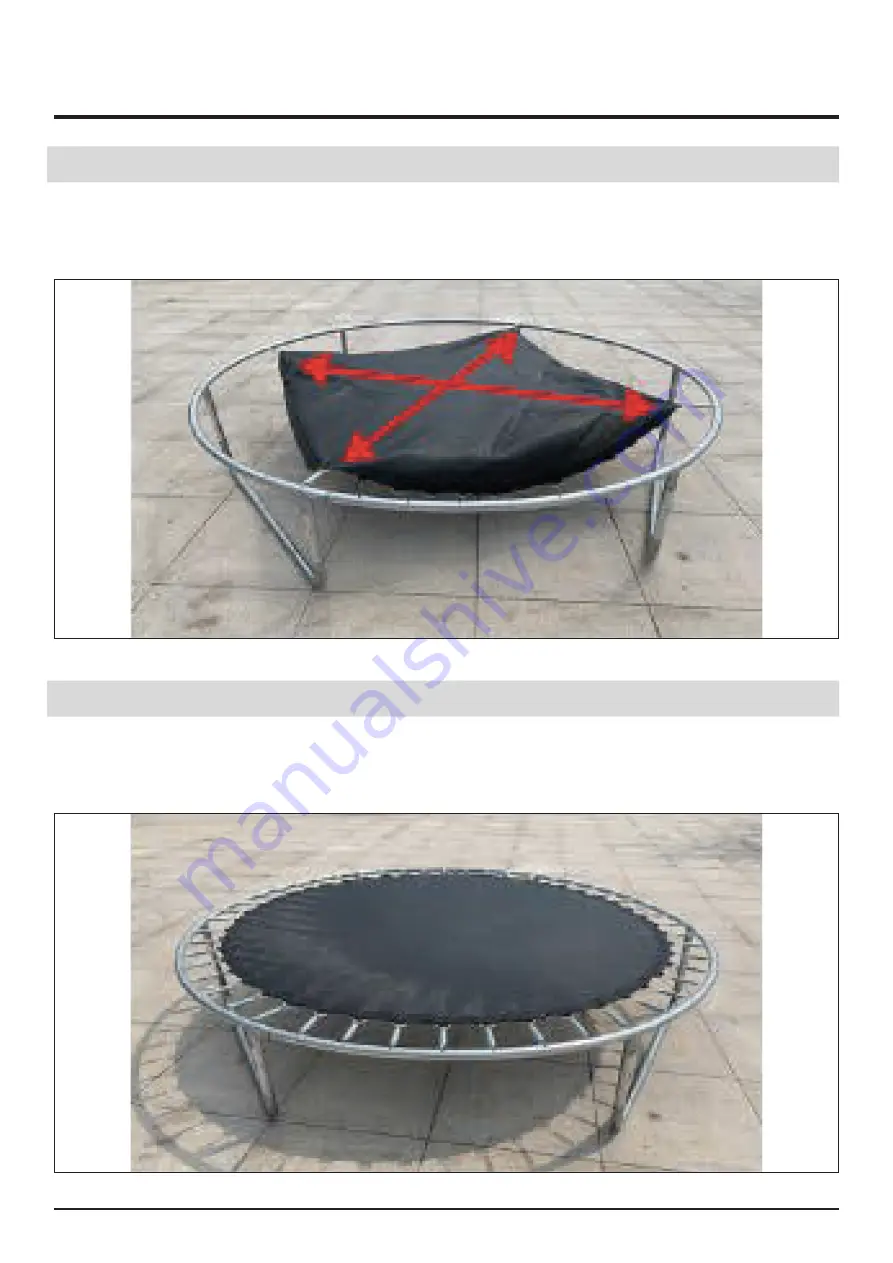
STEP 7
As shown in the figure. the four corners of the black cloth are respeclive ly hung on the coil tube
wilh springs, and then hung diagonally
STEP 8
Hang up all the springs and finish the installation of trampoline mat
Page 1: ...contain important information which will help you get the best from your equipment and ensure safe and correct assembly use and maintenance If you need help or have damaged or missing parts call the C...
Page 2: ...TS Safety Information 03 Assembly Instructions 04 Step 1 2 04 Step 3 4 05 Step 5 6 06 Step 7 8 07 Step 9 10 08 Step 11 12 09 Step 13 14 10 Step 15 16 11 Warm Up and Cool Down 12 13 Fit4Home 14 Declara...
Page 3: ...each other 11 Do not use this product when children are not playing 12 Please make sure that there is at least 1 meter of empty space around you when using it There is a risk of kicking others when bo...
Page 4: ...4 ASSEMBLY INSTRUCTIONS STEP 1 Open the carton and take out all the trampoline accessories STEP 2 Connect all the elbows and assemble them into a circle...
Page 5: ...5 ASSEMBLY INSTRUCTIONS STEP 3 Place the short pipe and U leg STEP 4 Insert the pipe in turn and install the screw hole...
Page 6: ...EP 5 After installation turn the whole back STEP 6 Take out the cloth and spring One end of the spring pulls the triangle ring of lhe cloth and the other end uses the hook to pull the spring and hang...
Page 7: ...S STEP 7 As shown in the figure the four corners of the black cloth are respeclive ly hung on the coil tube wilh springs and then hung diagonally STEP 8 Hang up all the springs and finish the installa...
Page 8: ...8 STEP 10 Lay a layer of cushion and cover the spring ASSEMBLY INSTRUCTIONS STEP 9 Please stand on the trampoline with your slippers and try to see if the trampoline is firm...
Page 9: ...9 ASSEMBLY INSTRUCTIONS STEP 11 Under the spring fix the pad on the spring with a rope STEP 12 Prepare the enclosure station tube...
Page 10: ...10 ASSEMBLY INSTRUCTIONS STEP 13 Install all the enclosure pipes on the U shaped legs with screws STEP 14 Tighten the screws in turn with a wrench...
Page 11: ...15 The Black Purse Seine is pulled down from the top of the pipe in turn and then fixed by the hook below STEP 16 For trampoline with ladder open the cushion a little install the ladder and the trampo...
Page 12: ...state at the end of each exercise session A proper cool down slowly lowers your heart rate and allows blood to return to the heart HEAD ROLLS Rotate your head to the right for one count you should fee...
Page 13: ...S Slowly bend forward from your waist letting your back and shoulders relax as you stretch toward your toes Reach as far as you can and hold for 15 counts HAMSTRING STRETCHES Extend your right leg Res...
Page 14: ...is compact and aesthetically pleasing Fit4Home employs a dedicated customer service team to ensure the consumer is provided with the best service and experience For any queries or issues feel free to...
Page 15: ...16...