background image

English

128

LCD MONITOR BRIGHTNESS

The brightness of the LCD monitor can be adjusted.

Display the Option Mode Screen (see page 36).

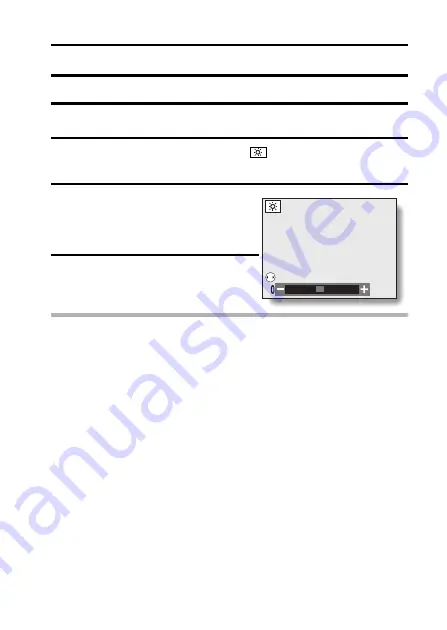
Select the monitor brightness icon 

, and press the SET button.

h

The Monitor Brightness Screen appears.

Press the [

l

] or [

m

] arrow button.

h

Pressing [

l

] makes the screen

darker, and pressing [

m

] makes it

lighter.

Press the SET button.

h

You are returned to the Option
Mode Screen.

NOTE

i

The LCD monitor brightness cannot be adjusted when the LCD monitor is
set to OFF.

LCD BRIGHTNESS

ADJUST

Summary of Contents for VPC-J4

Page 1: ...Make sure to read and understand the section USING YOUR DIGITAL CAMERA SAFELY AND CORRECTLY on pages 7 to 23 Keep this manual in a safe place for later reference Important note This manual explains h...

Page 2: ...correct the interference by one or more of the following measures h Reorient or relocate the receiving antenna h Increase the separation between the equipment and receiver h Connect the equipment int...

Page 3: ...English ii i This Class B digital apparatus complies with Canadian ICES 003 FOR CANADIAN USERS...

Page 4: ...134 NOTE i This camera uses an SD Memory Card instead of photographic film to record images Be sure to install the SD Memory Card before operating the camera A 16MB SD Memory Card is sup plied with t...

Page 5: ...a short list of shooting conditions the suitable settings are automatically completed is available Also only the necessary shooting settings are displayed making it easy even for the novice photograp...

Page 6: ...33 OPERATION BUTTONS 35 SWITCHING THE MENU MODE 36 BASIC MODE SHOOTING BEFORE TAKING PICTURES for best results 38 CAPTURING IMAGES 42 ABOUT THE BASIC MODE SETTING SCREEN 47 SCENE SELECT FUNCTION 51 S...

Page 7: ...HT SHOOTING 93 EXPOSURE CORRECTION 94 FLICKER REDUCTION SETTING VIDEO CLIP SHOOTING ONLY 95 SHOOTING SETTING INFORMATION DISPLAY SHOOTING INFO SCREEN 96 PLAYBACK ABOUT THE EXPERT MODE PLAYBACK SETTING...

Page 8: ...FUNCTIONS 120 LANGUAGE 121 TV SYSTEM SETTING 122 POWER SAVE SETTING 123 FILE NO RESET FUNCTION 125 SHOOTING WITHOUT THE LCD MONITOR 127 LCD MONITOR BRIGHTNESS 128 RECORDING AND PLAYING BACK SOUNDS 129...

Page 9: ...lish 6 OTHER FUNCTIONS AND CONNECTIONS CONNECTING TO A COMPUTER 140 DIRECT PRINT PictBridge PRINT 145 CONNECTING TO A TV 154 APPENDICES COMMONLY ASKED QUESTIONS 155 TROUBLESHOOTING 166 SPECIFICATIONS...

Page 10: ...h risk of fire or electric shock if they are touched Any internal check setting or repair should be performed by the dealer k Do not use while driving i Do not capture images play back images or watch...

Page 11: ...ickly seek ref uge in a place that will protect you from lightning k Do not place on an unstable surface i The digital camera may fall resulting in damage to the digital camera or injury i If the digi...

Page 12: ...e digital camera k Cautions when carrying the digital camera i Do not walk around holding the digital camera by the handstrap It may hit other objects and get damaged When walking around hold the digi...

Page 13: ...y and temperature are high h Places that may get wet h Places close to an air conditioner or heater h Inside a car h Places where there is dust and dirt h Places where there is a fire burning h Places...

Page 14: ...The voltage rating for the power cord supplied with this camera conforms to the standards of the country in which the camera was sold k Do not disassemble or modify the battery pack charger i It is d...

Page 15: ...cord portion may damage the power cord and cause a fire or electric shock k Do not pull on the power cord to unplug it i Do not leave the power cord plugged into the power outlet while the other end...

Page 16: ...e a fire or electric shock i If strange conditions such as these occur immediately unplug the battery pack charger remove the battery pack and wait to make sure no more smoke is emit ted Then contact...

Page 17: ...place of purchase k Do not place on an unstable surface i The battery pack charger may fall causing injury or damage i If the battery pack charger falls and the charger body is damaged remove the bat...

Page 18: ...ansform take apart or modify i Safety mechanisms and protective devices have been in incorporation in the battery pack for the purpose of preventing danger Any modification by transforming disassembli...

Page 19: ...locations in which the temperature reaches 60 C 140 F or higher At high temperatures the safety mechanisms and protective devices inside the battery pack may be damaged by corrosion causing an abnorma...

Page 20: ...c may cause a short circuit inside the battery pack or cause the bat tery pack to catch fire explode leak or spew battery fluid or generate heat k If the battery pack is leaking and the electrolyte ge...

Page 21: ......

Page 22: ...one is used it may damage the digital camera and cause a fire or electric shock i Normally when using an AC adaptor remove the battery pack Otherwise the battery pack may cause excess heat leakage inj...

Page 23: ...ration or paint peeling k Cautions before capturing important images i Before capturing important images make sure that the digital camera is operating properly and in condition to capture the image p...

Page 24: ...tery pack and check the digital camera func tions i If the battery pack is left in the digital camera a small amount of power is still used even if the digital camera is turned off If the battery pack...

Page 25: ...e i It is recommended that any important data be copied onto a separate media such as a hard disk MO disk or CD R disk i Stored data may be lost or corrupted in cases such as those listed below Sanyo...

Page 26: ...ns where strong static electrical charges or electrical noise can be easily generated i Do not allow the edges of the cards to become contaminated with foreign materials Gently wipe away any contamina...

Page 27: ...ck charger and power cord i Dedicated AV cable 1 i Dedicated USB interface cable 1 i SD Memory Card 16MB 1 h Recording images and sounds and eras ing are inhibited accidental erase protect function wh...

Page 28: ...25 English CHECKING THE INCLUDED ACCESSORIES ATTACHING THE HANDSTRAP...

Page 29: ...are i SD Memory Card i Multi Media Card What card means in this manual i In this manual SD Memory Cards and Multi Media Cards that can be used in this digital camera are referred to as card i The card...

Page 30: ...ATION PARTS NAMES Front Shutter release button Viewfinder Mirror i When taking a picture of your self use it to check the angle Speaker Flash Lens cover Tripod stand hole Lens Illumination light Micro...

Page 31: ...Terminal cover Handstrap holder To open the terminal cover DC IN external DC power input terminal For connecting a separately sold AC adaptor model VAR G7EX for the VPC J4EX model VAR G7E for the VPC...

Page 32: ...sert the connector straight and securely 3 Plug the power plug into a power outlet AC 100V to 240V h Recharging begins h During recharge the CHARGE indicator is lit red 4 When the CHARGE indicator tur...

Page 33: ...k will be warm This is nor mal and does not indicate a malfunction If there is interference to your TV or radio during recharging i Move the battery pack and charger further away from the TV or radio...

Page 34: ...turned off and it is therefore recommended that the batteries be removed from the camera if it is not going to be used for a long time Note that when the bat teries are removed for a long period the...

Page 35: ...see page 134 Make sure that the battery pack polarity and and the card ori entation are correct 1 2 3 Open slot cover on the side of the camera Insert the battery pack n mark Press Close the slot cov...

Page 36: ...To shoot video clips 2 Open the lens cover h The power turns on an image appears on the LCD monitor and the accessing indicator next to the viewfinder lights When playing back images 1 Set the main s...

Page 37: ...any of the following operations The main switch is moved The lens cover is closed once then opened The shutter release button MENU button or SET button is pressed i After the power save function has b...

Page 38: ...g a menu h Press n or o on the arrow button i When selecting a setting icon h Press l or m on the arrow button h To make a setting select the desired icon and press the SET button When the selected se...

Page 39: ...you wish to use your camera 1 Turn on the camera see page 33 2 Press the MENU button h The Menu Screen the Shooting Set ting Screen or the Playback Setting Screen appears FULL AUTO USE AUTO SETTINGS P...

Page 40: ...sed the menu mode changes h Set the desired menu mode h For information about the option mode please see page 114 NOTE If no image appears on the LCD monitor i The setting to disable the LCD monitor i...

Page 41: ...settings have not been completed Holding the camera Hold the camera securely with both hands keeping your elbows close to your body and making sure the camera is stable Make sure that the lens lens op...

Page 42: ...Subjects with low contrast very bright subjects at the center of the image or dark subjects or locations Use the focus lock function see page 43 to lock the focus on an object with contrast at the sam...

Page 43: ...nitor you can slow down the rate of battery pack consumption see page 127 Where is the image and audio data saved i All the image and sound data is recorded on the card installed in the cam era see pa...

Page 44: ...ve backward or forward one frame at a time by pressing the l or m arrow button or the pause the image by press ing the n arrow button If you do not want to keep the image you can press the n button at...

Page 45: ...age appears please see page 127 and follow the steps to enable the LCD moni tor 2 Set the camera to the BASIC or EX PERT mode see page 36 3 Select the mode menu To capture still images still image sho...

Page 46: ...g mode 2 Slowly press and hold the shutter release button halfway h The target mark or the focus icon focus lock appears in the LCD monitor h The figures appearing in the lower left area of the LCD mo...

Page 47: ...o take a picture see page 57 When the focus is set to spot focus see page 88 When the focus is set to focus range see page 61 When the Scene Select function is enabled see page 51 i When the camera fo...

Page 48: ...econd A maximum of four images are captured h During shooting appears in the LCD monitor 3 Finish capturing images h Release the shutter release button to end recording NOTE About the focus during seq...

Page 49: ...ss the shutter release button to stop recording h If you finish photographing by closing the lens cover the last photo graphed frames will be black NOTE i The data for a video clip is very large There...

Page 50: ...r the novice digital camera operator to enjoy taking photos It is recommended that the user who is new to digital camera operation or not familiar with the various settings take photos using the basic...

Page 51: ...on Composite icon ID photo icon 2288 1712 pixel 4 million pixels resolution icon 3264 2448 pixel 8 million pixels resolution icon 2880 2160 pixel 6 million pixels resolution icon 1600 1200 pixel 2 mil...

Page 52: ...49 English ABOUT THE BASIC MODE SETTING SCREEN Video Clip Shooting Setting Screen All the icons never appear at the same time...

Page 53: ...ry pack charge is near full or when the AC adaptor sold separately is used i When two mutually exclusive settings are made the later setting has priority and the related settings are changed according...

Page 54: ...ng the background Landscape For beautiful shots of distant scenery Cosmetic Enhance skin tones during close up shots Nightview Photograph the subject while keeping the background night scenery Firewor...

Page 55: ...the scene select menu 2 Select the desired icon and press the SET button NOTE To return to normal shooting Select from the scene select menu and press the SET button Full auto Sports Portrait Landsca...

Page 56: ...the distance photography setting Lamp The resolution setting is fixed at To prevent taking blurred photos use a tri pod or the like to stabilize the camera The focus may not be accurate if the focus...

Page 57: ...to zoom h Maximum magnification is approx 4x Press the n or o button to magnify the image vertically Press the l or m button to magnify the image horizontally 3 Press the shutter release to capture t...

Page 58: ...rame shape and press the SET button h The select frame shape fills the display 4 Capture the image for the back ground frame h Point the lens at the background subject and snap the picture 5 Next capt...

Page 59: ...rom the Scene Select menu and press the SET button 2 Press the MENU button again h The ID photo outline appears on the LCD display 3 Align the subject with the ID photo outline and snap the picture h...

Page 60: ...lf timer setting 3 Press the shutter release button Turns off the self timer function Turns on the self timer function The image is captured about 2 seconds after the shutter release button is pressed...

Page 61: ...al or 10 second interval timed shooting press the shutter release button again i To cancel self timer photography select the self timer off icon and press the SET button When are selected i When the s...

Page 62: ...he BASIC shoot ing mode see page 36 and select the resolution menu 2 Select the desired resolution icon and press the SET button Still image sequential shots shooting modes Video clip shooting mode 8...

Page 63: ...quality As the resolution increases the size of the resulting data also increases and the number of images that can be captured decreases To compensate for this this digital camera is able to compress...

Page 64: ...button o even when the LCD monitor is not on or when the Shooting Setting Screen is not shown The camera automatically focuses on the subject within a range of 20 cm 7 87 in Wide end or 30 cm 11 81 i...

Page 65: ...ed focal length is that as measured from the lens surface i There may be somewhat of a disparity between the focal length numerical value that is set using the manual focus and the actual distance to...

Page 66: ...gher frame rate uses more memory 1 Set the camera to the video clip shooting mode see page 43 2 Set the camera to the BASIC shoot ing mode see page 36 and select the frame rate menu 3 Select the icon...

Page 67: ...ptical zoom factor is at maximum zooming stops temporarily When T on the zoom switch is pressed again the mode changes to the digital zoom mode and zooming contin ues if digital zooming is enabled 3 P...

Page 68: ...k light situation if only the center of the image is very dark the flash will operate to compensate auto flash The flash will operate with every image captured regardless of the conditions Use this se...

Page 69: ...English 66 2 Press the flash button to select the flash mode h Each time the flash button is pressed the flash mode icon changes Flash button Flash...

Page 70: ...on h The LCD monitor turns on briefly to show the currently set flash mode 2 Press the flash button within 5 seconds to set the desired flash mode NOTE In the automatic flash mode i In the automatic f...

Page 71: ...view To display the previous image press the l arrow button To display the next image press the m arrow button 3 Play back a video clip Follow these steps to play back a video clip Normal playback h P...

Page 72: ...i 2x fast forward playback During normal playback press the m arrow button i 20x fast forward playback h During 2x playback press the m arrow button h During fast forward playback the audio is not hea...

Page 73: ...h Press the n o l or m arrow button to move the orange frame to the desired image and press the SET but ton Instead of pressing the SET but ton you can press T on the zoom switch to show the image ful...

Page 74: ...h To return to normal size Press W on the zoom switch h The maximum degree of magnification will depend on the resolution of the original image h The maximum magnification is about 51x at resolution h...

Page 75: ...r m on the arrow button to adjust the volume To view video clips on your computer i You can view video clips taken with this camera on your computer using QuickTime Ver 3 0 or later from Apple i By us...

Page 76: ...ete all the data and adjust the playback volume of voice memos and video clips BASIC MODE Playback Setting Screen 1 Menu mode icon 2 Protect prevent accidental erase 3 Erase icon 4 Volume control 5 HE...

Page 77: ...and sequen tial shots and for video clips can be adjusted 1 Play back an image 2 Display the Playback Setting Screen see page 36 3 Select the volume icon and press the SET button h The volume control...

Page 78: ...quence to a video clip or to an audio recording 1 Display the data that you want to protect 2 Display the Playback Setting Screen see page 36 3 Select the protect icon 4 Press the SET button h LOCK ap...

Page 79: ...y will be erased if the card is reformatted see page 134 HINT To select a different image in steps 4 and 5 i Press l or m To cancel the protect mode for an image i Display the desired data and repeat...

Page 80: ...h The Erase Screen appears For still images sequential shots ONE ERASE Erases one still image at a time ERASE ALL Erases all the images For video clips ONE ERASE Erases the video clip displayed ERASE...

Page 81: ...o select a different data in step 4 i If ONE ERASE is selected select EXIT and press l or m on the arrow button to select different data HINT Audio data i To erase audio data follow steps 1 through 3...

Page 82: ...o the BASIC mode the EXPERT mode allows you much more control over the various shooting settings EXPERT Mode Shooting Setting Screens Still Image Sequential Shots Shooting Setting Screen All the icons...

Page 83: ...s Distance photography Shooting with manual focus Shoot using the continuous auto focus Self timer off icon Image captured 2 seconds after shut ter release button is pressed Image captured 10 seconds...

Page 84: ...81 English ABOUT THE EXPERT MODE SHOOTING SETTING SCREENS Video Clip Shooting Setting Screen All the icons never appear at the same time E G 1 F 2 3 4 5 6 7 8 9 0 A B C D RESOLUTION Main switch...

Page 85: ...ccordingly 640 480 pixel resolution setting 320 240 pixel resolution setting 160 120 pixel resolution setting Shoot at 15 frames sec Shoot at 30 frames sec Shooting with the autofocus Macro photograph...

Page 86: ...res the data with normal com pression normal quality Com pres sion rate Resolution Shoot ing mode Still image Not available Not available Yes Not available Not available Not available Not available No...

Page 87: ...nsitivity automati cally equivalent to ISO50 to 200 video clip shooting mode ISO200 to 800 Sets the sensitivity to ISO50 equivalent still image and sequen tial shots shooting modes only Sets the sensi...

Page 88: ...NG 3 Press the SET button h This completes the ISO sensitivity setting HINT i By setting a higher ISO sensitivity you can set higher shutter speeds and capture images in darker locations but noise in...

Page 89: ...page 36 2 Select the desired white balance setting from the white balance menu The digital camera will make the white balance adjustment auto matically based on the natural and artificial light condit...

Page 90: ...3 3 Press the SET button h This completes the white balance setting h Once the white balance setting is programmed for the icon it is retained even if another white balance setting or is selected If...

Page 91: ...enter of the LCD mon itor 1 Display an EXPERT Mode Shooting Setting Screen see page 36 2 Select the desired focus method from the spot focus menu and press the SET button Multi section focus is select...

Page 92: ...compose the picture and capture the image after first measuring the light only at the center spot of the LCD monitor 1 Display an EXPERT Mode Shooting Setting Screen see page 36 2 Select the desired...

Page 93: ......

Page 94: ...e page 36 2 Select the desired digital zoom set ting from the digital zoom menu 3 Press the SET button h This completes the digital zoom setting HINT i The digital zoom does not function in the follow...

Page 95: ...memo icon from the voice memo menu and press the SET button 3 Press the shutter release button to capture the image and then talk into the microphone h During recording appears in the upper right area...

Page 96: ...ings 1 Display an EXPERT Mode Shooting Setting Screen see page 36 2 Select the desired assist light set ting from the assist light menu The assist light is disabled The assist light is enabled 3 Press...

Page 97: ...to adjust the exposure HINT i Exposure correction setting is canceled in the following cases When the pointer is set to the center position After the shooting mode is changed When the BASIC mode is s...

Page 98: ...creen see page 36 2 Select the desired flicker reduction setting from the flicker reduction menu 3 Press the SET button h This completes the flicker reduction setting HINT i Note that although the fli...

Page 99: ...e current settings while shoot ing To display 1 Put the digital camera in a shooting mode 2 Press the MENU button for at least 1 second h The Shooting Information Screen appears To exit When using the...

Page 100: ...ee page 88 8 Compression rate setting see page 83 9 Light measuring mode setting see page 89 0 Voice memo setting see page 92 A Exposure correction setting see page 94 B Scene select setting see page...

Page 101: ...a erase 4 Volume control 5 Audio dubbing 6 Resize 7 Rotate image 8 Print settings 9 Extract still image 0 Slideshow settings and play back A HELP display B Remaining battery pack charge Not displayed...

Page 102: ...ss the SET button h Slideshow playback is canceled when the SET button MENU button or an arrow button is pressed NOTE If the recorded voice memo is longer than the set slide time i The voice memo is p...

Page 103: ...or more can be changed to 640 480 pixels or 320 240 pixels The resized image is saved as a separate image 1 Display the still image whose size you want to change 2 Display the EXPERT Mode Playback Se...

Page 104: ...The Confirm Size Change Screen appears 6 Select YES and press the SET button h Resizing begins h When resizing is completed you are returned to the EXPERT Mode Playback Setting Screen The saved image...

Page 105: ...ack Setting Screen see page 36 3 Select the rotate image icon and press the SET button h The Rotate Image Screen appears 4 Select the rotate right icon or rotate left icon and press the SET button h E...

Page 106: ...y the Print Settings Screen 1 Display the EXPERT Mode Playback Setting Screen 2 Select the print settings icon and press the SET button h The Print Settings Screen appears ALL IMAGES The specified pri...

Page 107: ...er Format is a print order format You can connect your camera to a DPOF compatible printer to produce your prints You can also set the print settings for the desired images and then have the reserved...

Page 108: ...EACH IMAGE was selected press the l or m arrow button display the desired image to print h Under SETTINGS the settings that are currently active for the dis played image are shown You can press the l...

Page 109: ...date 4 Press the SET button h You are returned to the Date Number Print Screen Specifying the number of prints 1 Press the n or o arrow button to select NUMBER 2 Press the SET button h The Print Numbe...

Page 110: ...were changed Select MODIFY PRINT SETTING and press the SET button Index print Printing out many small images on one sheet is called an index print This is convenient for use as a list of the images y...

Page 111: ...e Print Settings Screen Changing the print settings 1 Follow steps 1 to 4 on pages 105 and 106 2 Select MODIFY PRINT SETTING and press the SET button YES Specify an index print copy EXIT Discontinue t...

Page 112: ...EAR 3 Press the SET button h The Confirm All Clear Screen appears 4 Select YES and press the SET button h All the print settings are cleared and you are returned to the Print Settings Screen YES Clear...

Page 113: ...d 1 Display the still image to which you want to add a voice memo 2 Display the EXPERT Mode Playback Setting Screen see page 36 3 Select the add audio icon and press the SET button h The Add Audio Set...

Page 114: ...o on the arrow button to end recording h While the voice memo is being recorded RECORDING and are displayed HINT i For still images you can also add a voice memo immediately after captur ing an image...

Page 115: ...the SET button h The screen to extract an image appears 4 Press the SET button h The image is extracted h Select EXIT and press the SET button or press the MENU button to return to the EXPERT Mode Pla...

Page 116: ...s pressed again the Playback Information Screen is exited 1 Resolution 2 Scene select setting 3 Compression rate 4 Voice memo indicator 5 Location of data folder number and file name 6 Data size 7 Pro...

Page 117: ...File number reset C Reset settings D Audio playback E Remaining battery charge indication i Icons 7 through C in the shooting mode and icons 8 through C in the playback mode are displayed when you pr...

Page 118: ...mber 23 2004 1 Display the Option Mode Screen see page 36 2 Select the clock set icon and press the SET button h The CLOCK SET menu appears h The current date and time settings appear h Follow the pro...

Page 119: ...Day setting h Press n to increase the num ber h Press o to decrease the number 4 Press the SET button 4 Set the clock 1 Press the arrow button to select TIME 2 Press the SET button h The Set Time Scre...

Page 120: ...while the battery pack is being replaced an inter nal battery will maintain the date and time settings However there is a small chance the settings may be lost The backup will last for about 7 days I...

Page 121: ...The Set Operation Sounds Screen appears MUTE Mute or enable the operation sounds and audio guide TURN ON OFF Mute or enable the sound that is produced when the power is turned on or off SHUTTER Select...

Page 122: ...W sound h You can press the shutter release button to preview the selected operation sound h If OFF is selected no sound is produced h Press n or o on the arrow button to select the desired setting an...

Page 123: ...the n or o arrow button to select the desired setting and press the SET button h The setting screen for the selected setting appears h Press the n or o arrow button to select the setting and press the...

Page 124: ...ET button h The Language Screen appears 3 Select the desired language and press the SET button h You are returned to the Option Mode Screen DEUTSCH Select for German ENGLISH Select for English ESPA OL...

Page 125: ...ET button h The TV System Setting Screen appears 3 Select the appropriate TV system and press the SET button CAUTION i If the TV system setting is not correct for the connected TV you will not be able...

Page 126: ...e standby time before the power save function is activated 1 Display the Option Mode Screen see page 36 2 Select the power save icon and press the SET button h The Power Save Setting Screen appears BA...

Page 127: ...button h The Set Standby Time Screen appears 5 Press n or o on the arrow button to set the standby time 6 Press the SET button h The standby time is set and you are returned to the Power Save Set tin...

Page 128: ...the consecutive num bering of file names continues from the last number recorded by the camera File number reset function ON File number reset function OFF i If Card B already has image data in it whe...

Page 129: ...er Reset Screen appears 4 Select OFF and press the SET button h The file number reset function is deactivated NOTE i Until the file number reset function is turned ON consecutive file names are assign...

Page 130: ...Screen see page 36 2 Select the monitor ON OFF icon and press the SET button h The Monitor Screen appears ON The LCD monitor is on OFF The LCD monitor turns off 3 Select OFF and press the SET but ton...

Page 131: ...htness icon and press the SET button h The Monitor Brightness Screen appears 3 Press the l or m arrow button h Pressing l makes the screen darker and pressing m makes it lighter 4 Press the SET button...

Page 132: ...ion Mode Screen 2 Select the audio recording icon and press the SET button h The Audio Recording Screen appears 3 Press the shutter release but ton h Recording begins when the shutter release button i...

Page 133: ...en the remaining recording time becomes little a countdown of the remaining recording time is shown h To return to the Option Mode Screen in the Audio Recording Screen mode press the MENU button HINT...

Page 134: ...n see page 36 2 Select the audio playback icon and press the SET button h The Select Audio Screen appears 3 Press the n or o arrow button to select the desired audio recording and press the SET button...

Page 135: ...fast forward or rewind playback will start To adjust the volume 1 On the Audio Playback Screen select the volume icon and press the SET button 2 Press l or m to adjust the volume To select a different...

Page 136: ...press the SET button h The Reset Settings Screen appears 3 Select YES and press the SET button h The camera settings are reset to the factory preset settings HINT i Note that the following settings do...

Page 137: ...ocedure after setting the lock switch to the unlocked position see page 24 1 Display the Option Setting Screen see page 36 2 Select the format icon and press the SET button h The Format Screen appears...

Page 138: ...rased Pro tected data see page 75 is also erased so before reformatting a card any data you want to keep should be copied to your personal computer s hard disk or other storage medium Can data be rest...

Page 139: ...ages appears in the upper right of the LCD monitor for the still image and sequential shots shooting modes h The remaining video recording time appears in the upper right of the LCD monitor for the vi...

Page 140: ...g the remaining audio recording time 1 Set the camera to the shooting mode and display the Option Mode Screen see page 36 2 Press the arrow button to select the audio recording icon and press the SET...

Page 141: ...displayed h Due to the battery pack characteris tics when the ambient temperature is low may appear early for an incorrect indication of the remain ing charge Also depending on the conditions of use o...

Page 142: ...times the flash is used the use of the LCD monitor etc or the environ mental conditions temperature etc the number of images that can be saved on a fully charged battery pack will vary greatly NOTE i...

Page 143: ...nt service or access a network print service Using the camera as your computer s external drive 1 Set the main switch to PC 2 Using the supplied dedicated USB interface cable connect the cam era conne...

Page 144: ...USB port on your monitor or keyboard or to the USB hub Be especially careful when installing the driver software In some instances it may not be possible to correctly install the driver software h Mor...

Page 145: ...of data Data format File name structure Still image sequential shots data JPEG File name begins with SANY Extension is jpg SANY jpg Voice memo data WAVE Same file name as corresponding still image or...

Page 146: ...ith the included CD ROM Sanyo Software Pack About file names when the card is replaced i If the file number reset function is set to off even when the card is replaced consecutive numbering of folder...

Page 147: ......

Page 148: ...ning the images you want to print in the digital camera 2 Use the supplied USB interface cable to connect the camera to the printer NOTE Do not turn off the power to the printer while it is connected...

Page 149: ...h The camera changes to the Pict Bridge printing mode and the Print Settings Screen appears CAUTION i During PictBridge printing the camera s button operation response is slower i If the camera is po...

Page 150: ...e to select one still image and print it 1 Complete the print preparations see page 145 2 Select the choose print image icon and press the SET button h The screen to select images for printing appears...

Page 151: ...the number of prints 3 Press the SET button h PRINT is selected 5 Press the SET button h Printing begins NOTE To cancel printing 1 During printing press the o arrow button h The Confirm Cancel Printi...

Page 152: ...te the print preparations see page 145 2 Select the all images print icon and press the SET button h The Print All Images Screen appears 3 Select PRINT and press the SET button h Printing begins NOTE...

Page 153: ...nts index print 1 Complete the print preparations see page 145 2 Select the index print icon and press the SET button h The Index Print Screen appears 3 Select PRINT and press the SET button h Printin...

Page 154: ...ons see page 145 2 Select the print reserved images icon and press the SET button h The Confirm Print Images Screen appears 3 Select PRINT and press the SET button h Printing begins h Printing begins...

Page 155: ...ss the SET button h The Printer Settings Screen appears MEDIA TYPE Specify the type of paper used for printing PAPER SIZE Specify the size of paper used for printing LAYOUT Specify how the images are...

Page 156: ...red h The contents of the settings that can be made for each parameter will differ depending on the printer When PRINTER SETTINGS is selected h The images will be printed according to the setting spec...

Page 157: ...the television set the TV input switch to VIDEO input i When an AV cable is connected no image appears on the camera s LCD monitor i The playback method is the same as when viewing images on the LCD...

Page 158: ...hy is the battery pack consumed so quickly even after it was fully recharged The ambient temperature is very low Keep the battery pack in an environment of 10 to 40 C 50 to 104 F Why doesn t rechargin...

Page 159: ...on is pressed The accessing indicator is lit orange data is being recorded Wait until the accessing indicator lights green to capture the image Why does the accessing indicator light orange Recorded d...

Page 160: ...ng the LCD monitor Why can only the ISO sensitivity setting be selected The ISO sensitivity setting is fixed at in the following case i In the video clip shooting mode flicker reduction is set to on N...

Page 161: ...ich resolution setting should I use Select the resolution setting according to the intended use or Appropriate for printing letter size or larger and for printing a close up of part of a photo trimmin...

Page 162: ...m on the other hand works by magnifying a portion of the image that hits the CCD sensor and may produce a coarser image How can I get the distant view into focus Set the focus range to infinity How ca...

Page 163: ...ge seem to leave traces as it moves Condition due to the liquid crystals Not a malfunction Spots that appear in the LCD monitor only appear in the monitor and will not be recorded with the images Why...

Page 164: ...the digital camera correctly and slowly press the shutter release button halfway to lock the focus Then press the shutter release button all the way to capture the image Why is a part of the image mis...

Page 165: ...the characteristics of the camera magnified images appear less clear Not a malfunction Why isn t the captured image clear The image was captured using the digital zoom Not a malfunction Why is a stran...

Page 166: ...Action Connecting to a TV Why is there no sound The volume on the TV is set to the minimum Adjust the volume on the TV Printing Why does a message appear during PictBridge printing Printer error Plea...

Page 167: ...rase unnecessary data Use a card that has more memory available Why does the CARD LOCKED message appear The write protect tab on the card is in the locked protect position Move the write protect tab t...

Page 168: ...rger and power cord abroad please consult with a dealer near you for advice Why does the SYSTEM ERROR message appear A problem has occurred within the digital camera or card Check the following items...

Page 169: ...y pack 29 32 The battery pack has not been inserted correctly Reinsert the battery pack making sure to orient it correctly The battery compartment cover is not fully closed Close battery compartment c...

Page 170: ...then erase all the images from the card 77 140 The flash does not operate The flash off mode is selected Set the flash to automatic flash mode or forced flash mode 65 The shooting mode is set to a mod...

Page 171: ...age shooting mode Set the camera to the still image shooting mode 42 There is noise in the captured image The ISO sensitivity setting is too high Set the ISO sensitivity to a lower setting 84 The moti...

Page 172: ...tructed 38 The subject was too far away Capture the image in the range of operation of the flash 176 The subject was lit from behind Capture the image using the forced flash mode 65 Use the exposure c...

Page 173: ...itivity to 84 The image is not in focus The subject is too close to the digital camera Select the correct focus setting for your needs 61 88 The focus setting is not correct The digital camera moved w...

Page 174: ...and make sure the lens is not obstructed 38 NO IMAGE or NO AUDIO is shown There is no recorded data for the selected playback mode Playback data after capturing images or making audio recordings No im...

Page 175: ...154 The TV input is not set correctly Set the input on the TV to VIDEO The edge of the image is cut off This is a characteristic of the TV Not a malfunction 154 Image editing You cannot add a voice me...

Page 176: ...d to erase data that is protected from accidental erasure Set the protect setting for the data to OFF 75 The audio guide does not sound The operational sounds MUTE setting is set to ON Set the MUTE se...

Page 177: ...d that all devices will support the DCF standard Video clips QuickTime Movie Photo JPEG Audio wav monaural Data storage media SD Memory Card Multi Media Card Camera effective number of pixels Approx 4...

Page 178: ...rection available from the Shooting Setting Screen 0 1 8EV in 0 3EV steps Light measuring modes Multi section measuring center weighted measuring spot measuring Range 20 cm 7 87 in Wide 30 cm 11 81 in...

Page 179: ...nnected Flash working range 0 15 m to 2 5 m 0 49 to 8 20 ft Wide 0 3 m to 1 8 m 0 98 to 6 89 ft Tele Flash modes Auto flash forced flash flash off red eye reduction Focus TTL type AF Self timer 2 seco...

Page 180: ...communication sound and image output terminal Regrouped jack Audio output 265 mVrms 9 dBs 6 k or less monaural Video output 1 0 Vp p 75 unbalanced sync negative composite video NTSC color TV system PA...

Page 181: ...ing mode Resolu tion setting Compression rate frame rate setting SD Memory Card 16MB 64MB 512MB Still image mode no voice memo Sequential shots mode 5 images 23 images 190 images 8 images 35 images 28...

Page 182: ...ature and shooting conditions etc Shooting recording mode Resolu tion setting Compression rate frame rate setting SD Memory Card 16MB 64MB 512MB Video clip mode 9 sec 42 sec 5 min 44 sec 19 sec 1 min...

Page 183: ...sold Lithium ion battery pack DB L20 Ambient environment Temperature 0 to 40 C 32 to 104 F recharge 20 to 60 C 4 to 140 F storage Humidity 10 to 90 no condensation Dimensions 45 W 32 3 H 85 D mm 1 77...

Page 184: ...nc Windows and Windows NT are registered trademarks of Microsoft Corpora tion All other company and product names are registered trademarks or trade marks of their respective owners Memory capacity 16...

Page 185: ...adhere to the instructions given in this manual or repairs or changes done by those other than a technician authorized by the manufacturer i Sanyo Electric shall not be held responsible for any damag...

Page 186: ...SANYO Electric Co Ltd...

Reviews: