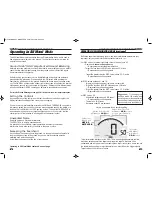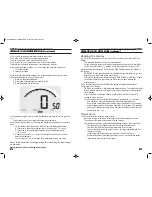
9
Comprehensive Operating Manual & Guide to Metal Detecting
PRO-TECH
QUICK-START DEMONSTRATION
1. Supplies Needed
• a Nail
• a U.S. Zinc Penny (dated after 1982)
• a U.S. Nickel
• a U.S. Quarter
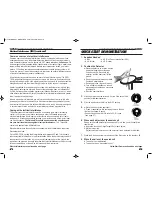
2. Position the Detector
a. Place the detector on a table, with the
searchcoil hanging over the edge.
Or better, have a friend hold the
detector, with the searchcoil off the
ground.
b. Keep the searchcoil away from walls,
floors and metal objects.
c. Remove watches, rings and jewelry.
d. Turn off lights or appliances, whose
electromagnetic emissions may cause
interference.
e. Pivot the searchcoil back.
3.
Click on detector with the left knob. Set the Gain at the 12:00
position for this demonstration.
4.
Click the right knob to the left to the DISC setting.
5.
a. Wave the nail over the searchcoil.
b. Press + repeatedly, while continuing to wave the nail.
• Notice the change in sound.
• Sound changes from a HIGH tone to V.C.O. tones
(see page 21).
6. Wave each object over the searchcoil
Sweep coin flat and parallel to the searchcoil. This is how you will usually find
them buried.
a. Notice the tones and 2-digit Target-IDs for each object.
b. Motion is required.
Objects must be in motion over the searchcoil to be detected in this mode.
7.
Press the
+
button several more times until the Disc value on the display = 60.
8. Wave the nail over the searchcoil
a. The nail will not be detected
b. The nail has been “discriminated out.”
Quick-Start Demo continued on next page
28
PRO-TECH
Comprehensive Operating Manual & Guide to Metal Detecting
Electrical Interference (EMI) (continued)
Common sources of electrical interference
Common sources of electrical interference include: overhead electric power lines,
underground power lines, other metal detectors, telephone lines carrying electronic
data, computer systems, electric fences, old CRT-based televisions,
cell phones
, CB
and emergency communication radios, thunderstorms, fluorescent lights, metal vapor
lamps, military aircraft with electronic warfare countermeasures turned on, electric
motors, VLF military communications systems and automobile ignition systems. At
home, in a store, or in an urban environment, there may be several different sources
of electrical interference present simultaneously.
All metal detectors generate a certain amount of internal electronic noise. The PRO-
TECH is specifically designed to enable you to
work into the noise
. Experienced users,
striving for maximum depth, often adjust the machine to search with a constant audible
background sound, and then listen through that noise for the sound of real targets.
Stricter regulations in recent years have cut down on interference from electric light
dimmers and auto ignition systems. However, there has also been a proliferation of
VLF-UHF wireless communication systems (cell phones, Bluetooth, wi-fi, etc.), which
often affect metal detectors. Overall, the potential for electrical interference is greater
than it was just a few years ago.
Modern high-end metal detectors are a lot more sensitive than older units; this also
increases your detector's vulnerability to electrical interference beyond what you may
be accustomed to with an older detector. Metal detectors are by their nature designed
to detect magnetic fields, and electric current always produces magnetic fields.
Coping with electrical interference
The primary reason metal detectors provide a sensitivity (gain and/or threshold)
control, is so that users can reduce sensitivity in order to eliminate response to
electrical interference.
Some users are reluctant to reduce sensitivity out of fear of
losing depth. At reduced sensitivity settings, you may lose some depth, but at least
you can still search.
The Gain and Threshold knobs control the sensitivity and
are your first line of defense against electrical interference.
The Threshold
control only applies to the All Metal Mode.
Electrical interference is usually more controllable in the All Metal Mode than in the
Discrimination Mode.
On the PRO-TECH, setting the discrimination level between 60 and 70 will usually
reduce electrical interference. In the Discrimination Mode, the detector may chatter if
the searchcoil is not in motion, but once you start sweeping it over the ground, the
signal from the ground will usually suppress the electrical interference chatter, except
for an occasional pop or click which will not sound like a real target.
Electrical Interference continued on next page
ProTechMANUAL_MPROTECH 1/28/15 8:14 AM Page 18


