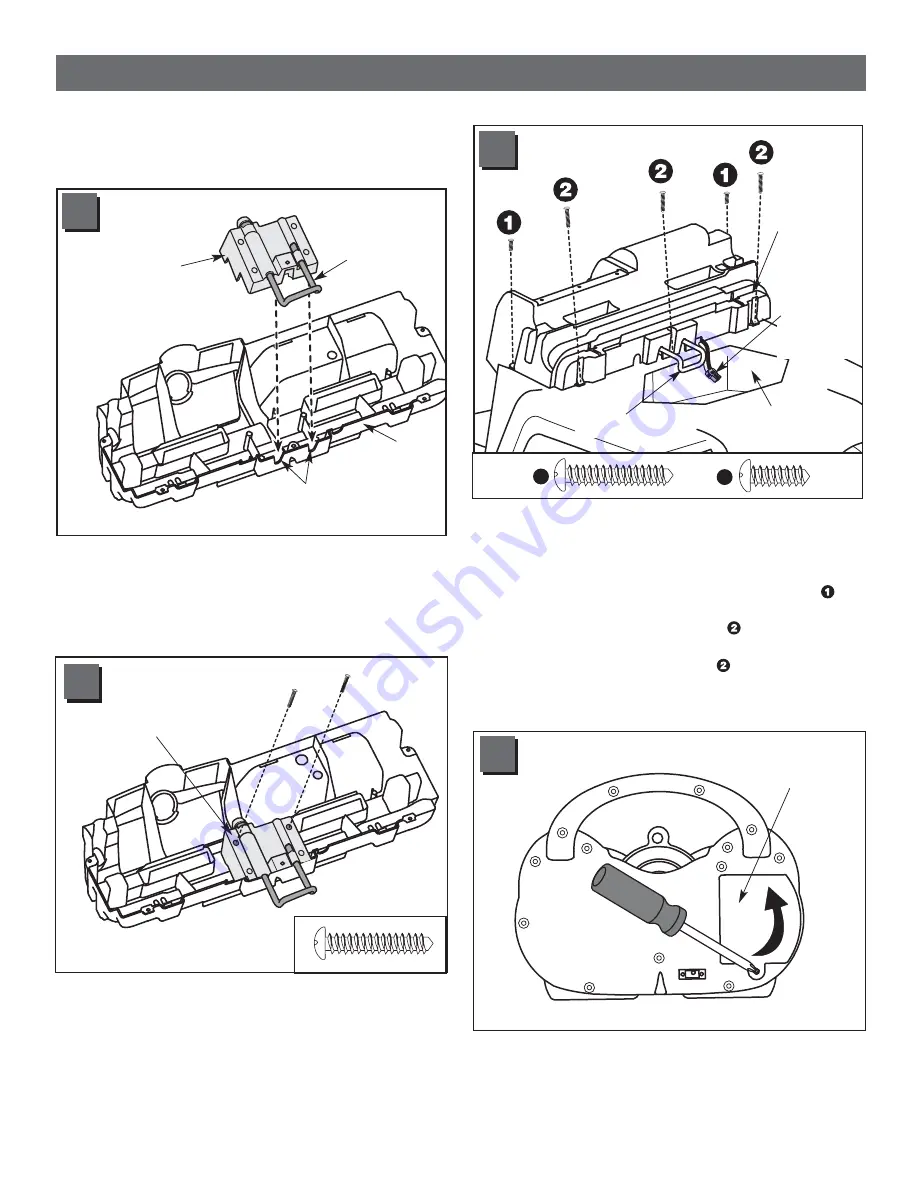
9
2
1
Battery
Compartment
Dash
• Position the dash on the vehicle body.
• Make sure the motor harness connector wire is through
the groove in the dash.
• Insert a #10 x
1
/
2
" screw through each of the two corner
dash tabs nearest to the passenger compartment
.
• Insert a #10 x 1" screw through the two dash tabs
nearest to the battery compartment
.
• Insert a #10 x 1" screw into the hole in the center of the
dash, near the battery retainer clip
.
• Tighten the screws with a Phillips screwdriver. Do not
over-tighten.
Battery Clamp
Assembly
IMPORTANT! The battery clamp unit must be
assembled to the dash before assembling the dash
to the vehicle body.
Battery
Clamp
Unit
Dash
• Position the dash face down.
• Fit the battery clamp unit into the underside of the
dash so that the clamp fits into the grooves in the dash.
Make sure the battery clamp unit is flush against the
surface of the dash.
Battery
Clamp Unit
• Insert two #10 x 1" screws through the holes in the
battery clamp unit and into the pegs in the dash.
• Tighten the screws with a Phillips screwdriver.
Do not over-tighten.
Clamp
Grooves
Motor
Harness
Connector
Wire
2
3
4
• Locate the battery compartment door on the back of
the CD player.
• Loosen the screw in the battery compartment door using
a Phillips screwdriver and lift to open.
Battery
Compartment
Door
5


