background image

10

TROUBLESHOOTING

Warming drawer problems

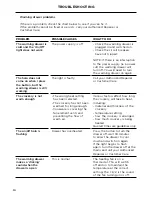
If there is a problem, check the chart below to see if you can fix it. 
If the problem cannot be fixed or persists, call your Authorized Repairer or 
Customer Care. 

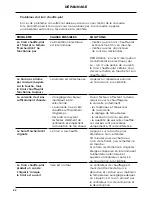
PROBLEM

POSSIBLE CAUSES

WHAT TO DO

The warming drawer is 
cold and the ‘On/Off’ 
light does not work

The power supply is off

-  Check the warming drawer is 

plugged in and switched on.

-  Check the circuit breakers 

have not tripped.

NOTE: if there is an interruption 
to the power supply (ie a power 
cut) the warming drawer will 
turn off. You will need to turn 
the warming drawer on again.

The halo does not 
come on when I press 
the button, but the 
warming drawer is still 
working

The light is faulty

Call your Authorized Repairer 
or Customer Care

The crockery is not 
warm enough

-  The wrong heat setting 

has been selected.

-  The crockery has not been 

warmed for long enough.

-  Cookware is covering the 

fan element vents and 
preventing the flow of 
warm air.

Various factors affect how long 
the crockery will take to heat, 
including: 
-  material and thickness of the 

crockery

-  temperature setting
-  how the crockery is arranged
-  how much crockery is being 

heated.

Quoted times are guidelines only.

The on/off halo is 
flashing

Drawer has overheated

Press the button to turn the 
drawer off, wait 30 minutes 
to allow the drawer to cool 
down and switch on again. 
If the light begins to flash 
again, turn the drawer off at the 
mains and call your Authorized 
Repairer or Customer Care.

The warming drawer 
makes a ‘clicking’ 
sound when the 
drawer is open

This is normal

The heating fan is on a 
thermostat. This will switch 
off and on to maintain the 
temperature at the correct 
setting. The ‘click’ is the sound 
of the fan turning on or off.

Summary of Contents for WB24S

Page 1: ...WARMING DRAWER WB24S models TIROIR CHAUFFE PLAT Modèle WB24S USER GUIDE GUIDE D UTILISATION US CA ...

Page 2: ......

Page 3: ...ct to change at any time For current details about model and specification availability in your country please go to our website fisherpaykel com or contact your local Fisher Paykel dealer Safety and warnings 2 Introduction 4 First use 5 Using your warming drawer 6 Care and cleaning 9 Troubleshooting 10 Warranty and service 11 EN ...

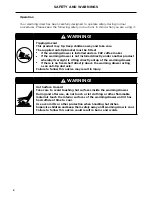
Page 4: ...lt in burns and scalds WARNING Tipping Hazard This product may tip Keep children away and take care The supplied anti tip bracket must be fitted if the warming drawer is installed under a F P coffee maker if the warming drawer is not installed directly under another product whereby its weight is sitting directly ontop of the warming drawer if there is no fixed shelf directly above the warming draw...

Page 5: ...llow children to climb on or play around the warming drawer Do not overload the warming drawer The drawer itself can hold a maximum weight of 66lbs 30kg Do not use the warming drawer for storage Forgotten goods may melt or catch fire when the warming drawer is switched on Do not use the warming drawer to heat up the room Objects near to the warming drawer could catch fire The life of the warming d...

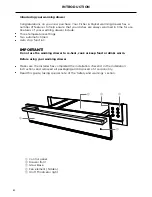
Page 6: ...ays warmed in time for use Features of your warming drawer include Three temperature settings Two automatic timers Auto stop function IMPORTANT Do not use the warming drawer to re heat cook or keep food or drinks warm Before using your warming drawer Make sure the installer has completed the installation checklist in the installation instructions and removed all packaging and disposed of it respon...

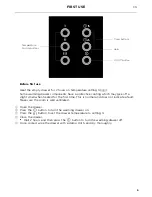
Page 7: ... normal and does not indicate a fault Make sure the room is well ventilated 1 Open the drawer 2 Press the button to turn the warming drawer on 3 Press the button to set the drawer temperature to setting 3 4 Close the drawer Wait 2 hours and then press the button to turn the warming drawer off 5 Once cooled wipe the drawer with a damp cloth and dry thoroughly Timer buttons On Off button Halo Temper...

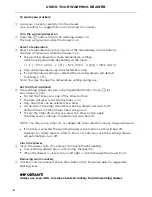
Page 8: ...art the timer press one of the timer buttons The halo will glow red while the timer is on Only one timer can be selected at a time At the end of the timer period the warming drawer will switch off and both the on off and timer halos will go out To turn the timer off during use press the timer button again The drawer will continue to operate until switched off NOTE You may turn a timer on or change...

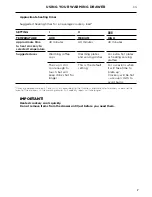
Page 9: ...s or heating serving platters The cup is still cool enough to touch but will keep drinks hot for longer This is the default setting For occasions when it will take time to plate up Crockery will be hot use oven mitts to avoid burns Times are approximate only Times will vary according to the thickness and material of crockery used and the layout of the crockery in the warming drawer Full capacity l...

Page 10: ...s with condensation or the possibility of steam burns As much as possible always distribute dishes over the surface of the drawer Stacks of dishes take longer to heat through The number of plates or cups that can be loaded depends on the size of your dishes Avoid placing large serving dishes next to the fan element vents as they will cover the warm air outlet and the crockery will not heat up even...

Page 11: ...age the appearance of your oven Always rub the stainless steel in the direction of the grain Control panel Wipe with a damp cloth Never spray detergent or liquid onto the buttons on the control panel Liquid may seep behind the button and damage the electronics Glass drawer front Clean with a solution of mild detergent and hot water then wipe dry with a microfiber cloth If necessary use a suitable ...

Page 12: ...y is not warm enough The wrong heat setting has been selected The crockery has not been warmed for long enough Cookware is covering the fan element vents and preventing the flow of warm air Various factors affect how long the crockery will take to heat including material and thickness of the crockery temperature setting how the crockery is arranged how much crockery is being heated Quoted times ar...

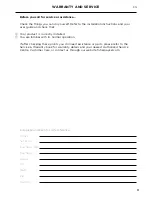
Page 13: ...ly installed 2 You are familiar with its normal operation If after checking these points you still need assistance or parts please refer to the Service Warranty book for warranty details and your nearest Authorized Service Centre Customer Care or contact us through our website fisherpaykel com Complete and keep for safe reference Model Serial No Purchase Date Purchaser Dealer City State Zip Countr...

Page 14: ......

Page 15: ...éavis Pour les plus récentes informations sur la disponibilité des modèles et des caractéristiques dans votre pays veuillez visiter notre site Web fisherpaykel com ou contacter votre détaillant Fisher Paykel local Consignes de sécurité et mises en garde 2 Introduction 4 Première utilisation 5 Utilisation de votre tiroir chauffe plat 6 Entretien et nettoyage 9 Dépannage 10 Garantie et service 11 FR...

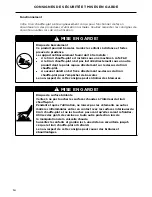
Page 16: ...igne peut causer des brûlures et ébouillantages MISE EN GARDE Risque de basculement Ce produit pourrait basculer Gardez les enfants à distance et faites preuve de prudence Le support antibasculement fourni doit être installé si le tiroir chauffe plat est installé sous une machine à café F P si le tiroir chauffe plat n est pas installé directement sous un autre produit dont le poids repose directem...

Page 17: ...ouer à proximité de celui ci Ne surchargez pas le tiroir chauffe plat Le tiroir peut supporter un poids maximal de 66 lb 30 kg N utilisez pas le tiroir chauffe plat pour le rangement Des objets oubliés pourraient fondre ou s enflammer lors de la mise en marche du tiroir chauffe plat N utilisez pas le tiroir chauffe plat pour chauffer la pièce Des objets à proximité du tiroir chauffe plat pourraien...

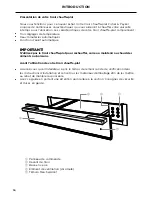
Page 18: ...oir chauffe plat comprennent Trois réglages de température Deux minuteries automatiques Fonction d arrêt automatique IMPORTANT N utilisez pas le tiroir chauffe plat pour réchauffer cuire ou maintenir au chaud des aliments ou boissons Avant l utilisation de votre tiroir chauffe plat Assurez vous que l installateur a pris le temps de remplir la liste de vérification dans les instructions d installat...

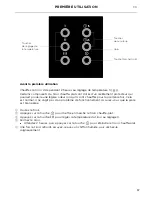
Page 19: ...git pas d un problème de fonctionnement Assurez vous que la pièce est bien aérée 1 Ouvrez le tiroir 2 Appuyez sur la touche pour mettre en marche le tiroir chauffe plat 3 Appuyez sur la touche pour régler la température du tiroir au réglage 3 4 Fermez le tiroir Attendez 2 heures puis appuyez sur la touche pour éteindre le tiroir chauffe plat 5 Une fois le tiroir refroidi essuyez le avec un chiffon...

Page 20: ...appuyez sur l une des touches de minuterie Le halo s allume en rouge pendant que la minuterie est activée Une seule minuterie peut être sélectionnée à la fois Une fois la durée de la minuterie écoulée le tiroir chauffe plat s éteint et les halos de mise en marche arrêt et de minuterie s éteignent Pour désactiver la minuterie pendant l utilisation appuyez de nouveau sur la touche de minuterie Le ti...

Page 21: ...ts de service La tasse est toujours suffisamment froide au toucher mais les boissons seront chaudes plus longtemps Il s agit du réglage par défaut Pour les occasions où la préparation des assiettes prend un certain temps La vaisselle sera chaude utilisez des gants de cuisine pour éviter de vous brûler Les durées sont uniquement approximatives Les durées varient selon l épaisseur et les matériaux d...

Page 22: ...es problèmes de condensation ou la possibilité de brûlures causées par la vapeur Répartissez toujours autant que possible la vaisselle sur la surface du tiroir La vaisselle superposée prend toujours plus de temps à chauffer Le nombre d assiettes ou de tasses pouvant être chargées dépend de la taille de votre vaisselle Évitez de placer de grands plats de service à proximité des fentes d élément de ...

Page 23: ...ini de votre appareil Frottez toujours l acier inoxydable dans le sens des lignes de poli Panneau de commande Essuyez avec un chiffon humide Ne vaporisez jamais de détergent ou de liquide sur les touches du panneau de commande Le liquide pourrait s infiltrer derrière les touches et endommager les circuits électroniques Devant de tiroir en verre Nettoyez à l aide d une solution de détergent doux et...

Page 24: ...glage de chaleur inadéquat a été sélectionné La vaisselle n a pas été chauffée suffisamment longtemps Des plats recouvrent les fentes d élément de ventilation et empêchent la circulation de l air chaud Divers facteurs affectent la durée requise pour le chauffage de la vaisselle notamment les matériaux et l épaisseur de la vaisselle le réglage de température la disposition de la vaisselle la quanti...

Page 25: ...er avec son fonctionnement normal Si après la vérification de ces points vous avez toujours besoin d assistance ou de pièces reportez vous au manuel d entretien et de garantie pour obtenir des informations sur la garantie et les coordonnées d un centre de service autorisé ou de l assistance à la clientèle ou contactez nous par l entremise de notre site Web fisherpaykel com Remplir et conserver pou...

Page 26: ......

Page 27: ......

Page 28: ...Dealer to ensure this booklet correctly describes the product currently available Fisher Paykel Appliances 2017 Tous droits réservés Les caractéristiques de produit présentées dans ce livret s appliquent aux modèles et produits spécifiques qui y sont décrits à la date de publication Dans le cadre de notre politique d amélioration en permanence de nos produits ces caractéristiques peuvent être modi...

Reviews: