


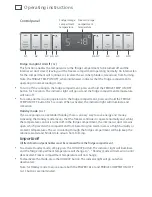


5
Installation instructions
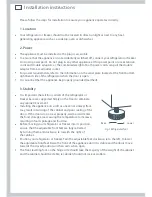
4. Ventilation and installation
To ensure adequate ventilation for your refrigerator,
allow a minimum of 20 mm of airspace on each side of
the cabinet, 75 mm at the rear, and 50 mm at the top of
the cabinet.
The appliance is intended to be placed against a wall
with a free distance not exceeding 75 mm.
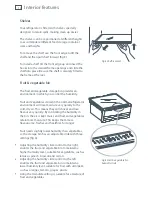
5. Fitting the handles
Your refrigerator is supplied with a set of handles,
4 handle attachment studs and 4 small handle screws.
To fit the handles
1
Insert the handle attachment stud into the fixed
threaded holes (fig.2a) found on the front of each
compartment door and tighten using the Allen key
provided in a clockwise direction.
2
Align and fit the handle on to the handle attachment
studs (fig.2b).
3
Using the Allen key, tighten the small handle screws
fitted to the inside of the wider handle end (fig.2c).
4
Install the 2nd handle in the same way (see fig.2d).
Energy efficiency
Do not cover your appliances with any material that will
prevent air from flowing around the cabinet sides.
Do not leave the door open for any longer than is
necessary.
Allow good clearances in front of the air ducts within the
cabinet for maximum cold air distribution.
Fig.2a Fixed threaded stud hole and
handle attachment stud
Fig.2b Align handle to the handle
attachment stud
Fig.2c Tighten the handle screw with
Allen key
Fig.2d Install the 2nd handle
Summary of Contents for Refrigerator & Freezer
Page 1: ...UK IE Installation instructions and User guide Refrigerator Freezer...
Page 26: ......
Page 27: ......


