


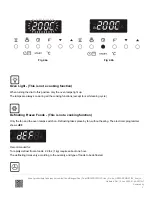


Fig. 4.1
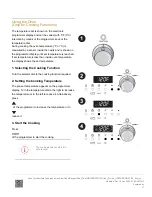
Selecting the Functions (figs. 4.1, 4.2a, 4.2b)
The function is selected by turning the function selector
dial and matching the marking on the dial with the
reference mark on the bezel.
IMPORTANT NOTE FOR THE COOKING FUNCTIONS:
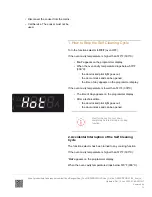
Once selecting the function and temperature (the
temperature flashes on the programmer display - fig.
4.2a), press button
on the programmer to start the cooking (temperature
and symbol
steady lit on the programmer display - fig. 4.2b).
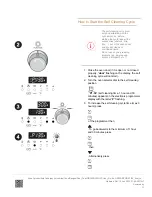
In all cooking functions the
oven must always be used
with the DOOR CLOSED.
If the door stays open “
door
” flashes on the programmer display and after some minutes an audible warning sounds for
about 30 seconds. To silence the audible warning press any programmer button.
The heating elements work even with the door open and this signal just indicates that
energy is being wasted and the control panel/dials are being excessively heated.
Updated: Sat, 15 Jan 2022 21:49:42 GMT
Powered by
4


