Fisher & Paykel DOUBLE DISHDRAWER DD24DDFT Installation Manual Download Page 9

8

7


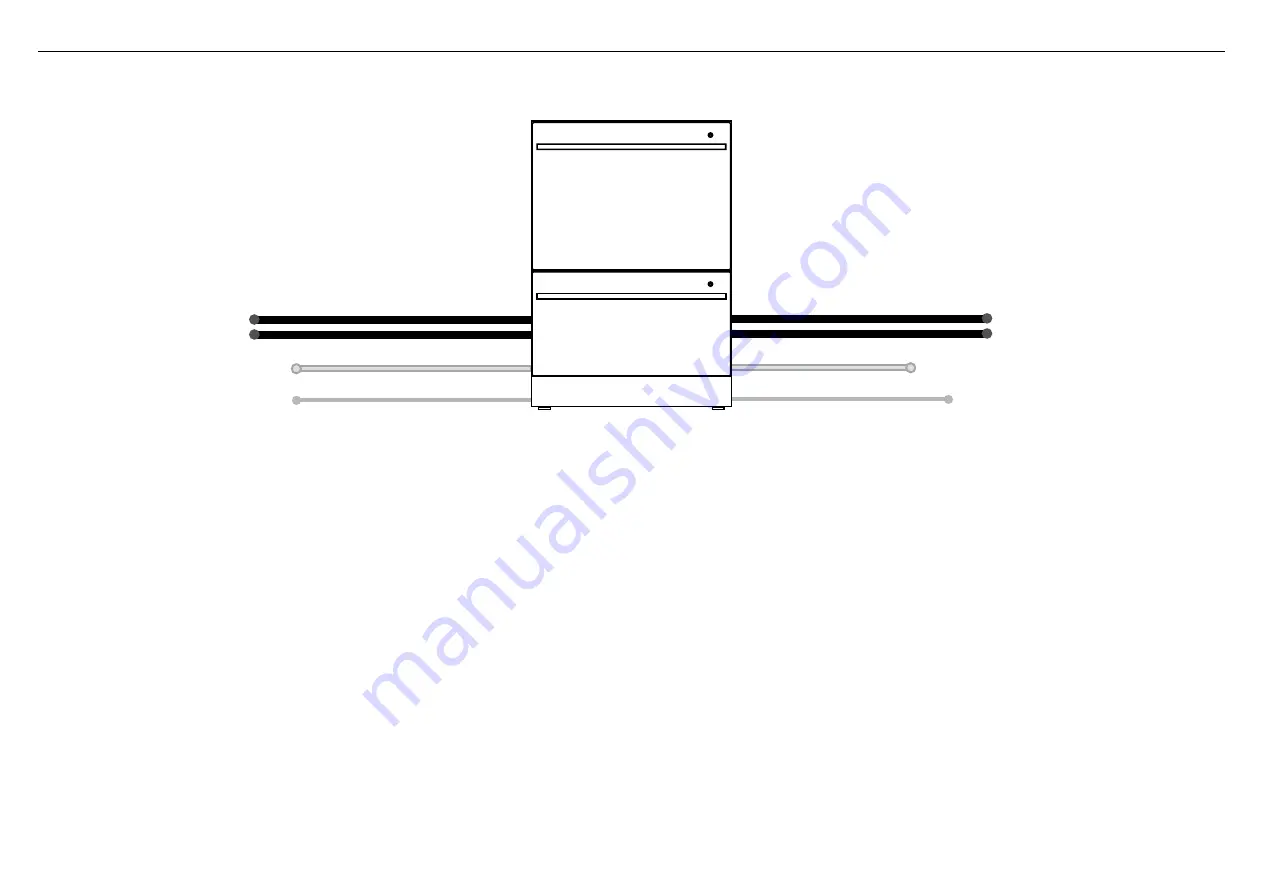
MAXIMUM DISTANCE OF HOSES & CORD FROM CHASSIS EDGE

LEFT HAND SIDE

RIGHT HAND SIDE

Drain hoses - 78 1/2” (2000mm)

Drain hoses - 70 1/2” (1800mm)

Inlet hose - 64 3/4” (1650mm)

Inlet hose - 49” (1250mm)

Power cord (excl.plug) - 29 1/2” (750mm)

Power cord (excl.plug) - 27 1/2” (700mm)

Summary of Contents for DOUBLE DISHDRAWER DD24DDFT

Page 1: ...591385 A 08 17 INSTALLATION GUIDE US CA DOUBLE DISHDRAWERTM DISHWASHER DD24DDFT DD24DV2T models...

Page 2: ...ilar mobile facility you must bring the vehicle boat or mobile facility containing the product to the service shop at your expense or pay the service technician s travel to the location of the product...

Page 3: ...er Wire clip 2 for securing Drain hose joiner Phillips 5 8 16 mm screws 9 Drain hose support 1 Moisture protection tape 1 to prevent moisture damage to cabinetry Drain hose joiner 1 Top mounting brack...

Page 4: ...ide the terminal block cover sideways to unlock and hinge open to access the terminal block 6 Unscrew the Live Neutral and Earth wires as shown 7 Unscrew the three screws on the base as shown and remo...

Page 5: ...d through or under under housing ribs 9 Screw down the Live Neutral and Earth wires correctly 10 Push the plastic harness cover back over It should clip back into place 11 Fold down and slide back the...

Page 6: ...r front panels 30 762 30 762 H Height of upper drawer front panel 17 3 8 442 17 3 8 442 I Height of lower drawer front panel 12 1 4 312 12 1 4 312 J Height from top of drawer front panel to top of cha...

Page 7: ...in 34 864 min 34 864 Q Inside width of cavity 23 5 8 600 24 610 R Inside depth of cavity min 22 1 16 560 min 22 1 16 560 S Recommended height of adjacent cabinet space 30 762 30 762 T Height of toekic...

Page 8: ...120 VAC max 15 A max 1 1 2 38 mm max 17 11 16 450 mm min 7 7 8 200 mm Moisture protection tape must be applied Services hole Can be located either side of dishwasher preferably at the bottom of the ca...

Page 9: ...OSES CORD FROM CHASSIS EDGE LEFT HAND SIDE RIGHT HAND SIDE Drain hoses 78 1 2 2000mm Drain hoses 70 1 2 1800mm Inlet hose 64 3 4 1650mm Inlet hose 49 1250mm Power cord excl plug 29 1 2 750mm Power cor...

Page 10: ...flat bladed screwdriver Ensure they re securely fitted before sliding product into cavity The mounting slots are in pairs one on each side diagonally across the product A bracket must match A slot and...

Page 11: ...ewdriver prise the grey rubber plug out of the trim moulding Replace the grey rubber plug back into the trim moulding and ensure the trim seal is facing forward Repeat for all four brackets Using a sm...

Page 12: ...8 B PULL THROUGH HOSES PUSH INTO THE CAVITY 9 B REMOVE THE LOWER DRAWER To prevent kinked hoses Either sit the drawer down on the left hand side recommended or rotate the drawer clockwise resting it o...

Page 13: ...Ensure product is level and aligning with cabinetry Hexagonal socket The top mounting brackets will only bend upwards a maximum of 10 mm 2 B REFIT THE DRAWER ONTO THE RUNNERS Before refitting the dra...

Page 14: ...pencil Lay the toekick face down on a chopping board or similiar Smooth the edges with a file Be careful of sharp edges Snap off the two end tabs Slide the toekick onto the mounting rails either side...

Page 15: ...IMPORTANT Ensure that drain connection will comply with local plumbing regulations min R 8 200 mm 29 1 2 34 3 4 750 882 5 mm 1 1 2 38 mm 29 1 2 34 3 4 750 883 mm Screw Drain hose support to back wall...

Page 16: ...al Double Air Gap Break Kit This provides totally separate draining for each drawer and eliminates possible cross draining problems DRAINAGE OPTION 2 Dishwasher using Dual Air Gap Break with Drain Hos...

Page 17: ...883 mm step 15 Supplied drain hose joiner to suit 3 4 19 mm waste tee Ensure drain hose is routed straight to joiner Remove excess drain hose material if necessary Do not shorten the inlet hose 29 1...

Page 18: ...ed on If it is and still no indicator ligths up see the Preference options section of the Quick start guide An option called Open drawer auto power on may need to be turned on Water around water suppl...

Page 19: ...igher than the drain hose joiner Ensure any packaging or tape securing the racks is removed from the drawers Water softener models only adjust the water softener setting from the default setting to su...

Reviews: