SSEM
LY
1
Locate
4 Side Panels -
/
/
/
and
Door
D
.
lign
holes in
Side Panels/Door
and insert
olt
K
thru
Washer
M
,
then insert
olt/Washer
thru holes. Slide
Washer
M
over
olt
end, then slide on
Spring Washer
N
and secure with
Nut
O
.
Use
Wrench
Q
to secure. DO NOT OVERTIGHTEN as you will need to
adjust the panels to ensure proper alignment.
Hardware Used:
10 -
olt 6x30mm
20 - Washer M6
10 - Spring Washer M6
10 - Nut M6
PREP
R
TION
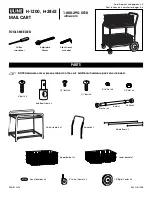
efore beginning assembly, be sure to empty contents of carton and make sure all parts are present. If any parts are missing
or you have any questions regarding the product, please contact
ustomer Service:
all toll-free
(866) 985-7877
9 a.m. – 9 p.m., EST.
Live chat
www.wtliving.com. 9 a.m. – 4 p.m., EST.
Please read and understand this entire manual before attempting to assemble, operate or install this appliance. Place all parts
on a soft, level surface for assembly. You will need a
Phillips screwdriver with Medium
lade
for assembly.
Estimate d
ssembly Time:
60 Minutes
|
DO NOT over tighten hardware!
1
2
2
Once all
Side Panels/Door
have been secured, attached
Gas
Tank Support
to assembled panels by aligning holes in
Gas Tank Support 1
with holes in
Side Panels/Door
. Insert
olt
K
,
thru
Washer
M
, then insert
olt/Washer
thru holes. Slide
Washer
M
over
olt
end, then slide on
Spring Washer
N
and secure with
Nut
O
. Use
Wrench
Q
to secure.
Hardware Used:
2 -
olt 6x30mm
4 - Washer M6
2 - Spring Washer M6
2 - Nut M6
C1 C2
C3
C4
H1
C1
C2
C3
C4
D
O N M MK
H1
ontact us for assistance:
(866) 985-7877
|
www.wtliving.com
5
SSEMbl Y


