Finlux 43-FAE-9060 Owner'S Manual Download Page 42

English

   - 13 -

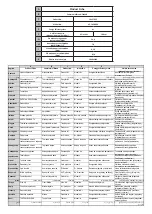
Block Tracking Sites:

 Turn the Block Tracking 

6LWHVIXQFWLRQRQRURႇ

Device ID:

7XUQWKH'HYLFH,'IXQFWLRQRQRURႇ

Reset Device ID:

 Reset the device ID for HBBTV 

VHUYLFHV&RQIÕࡆUPDWÕࡆ

on dialogue will be displayed. 

Press 

OK

 to proceed, 

Back

 to cancel.

Subtitle

Subtitle Tracks:

 Set your subtitle track preference, 

if any available.

Analog  Subtitle:

 Set this option as 

2ႇ

On

 or 

Mute

.


If 

Mute 

option


is  selected,  the  analogue 

subtitle will be displayed on the screen but the 

speakers will be muted simultaneously.

Digital Subtitle Language:

 Set one of the listed 

ODQJXDJHRSWLRQVDV¿UVWGLJLWDOVXEWLWOHODQJXDJH

preference.

2nd Digital Subtitle Language:

 Set one of the 

listed language options as second digital subtitle 

language  preference.  If  the  selected  language 

in  the 

Digital  Subtitle  Language

  option  is  not 

available,  the  subtitles  will  be  displayed  in  this 

language.

Subtitle  Type:

  Set  this  option  as 

Normal

  or 

Hearing  Impaired

. If 

Hearing  Impaired

 option 

is selected, it provides subtitle services to deaf 

and  hard  of  hearing  viewers  with  additional 

descriptions.

Teletext

Digital  Teletext  Language:

  Set  the  teletext 

language for digital broadcasts.

Decoding  Page  Language:

  Set  the  decoding 

page language for teletext display.

OAD:

6HWWKH79WRDXWRGHWHFWWKHODWHVW¿UPZDUH

through the DTV signal. Set the 

Auto Download


option  as 

Yes

 WR HQDEOH WKH DXWRPDWLF ¿UPZDUH

upgrade function. This item may not be available 

depending on the selected country during the initial 

setup process.

BISS Key:


“Click To Add Biss Key”

 message will 

be displayed. Press 

OK

 button to add a biss key. 

Frequency

Symbol Rate (KSym/s)

Polarization

Program  ID

  and 

CW  Key

  parameters  will  be 

available  to  be  set.  Once  you  are  done  with  the 

settings  highlight 

Save  Key

  and  press 

OK

  to 

save and add the biss key. This option will not be 

available if the 

Channel Installation Mode

 under 

the 

Settings>Channel

 menu is not set as 

Preferred 

Satellite

General Satellite 

or 

Satellite

. Available 

RSWLRQVZLOOGLႇHUGHSHQGLQJRQWKH

selected country 

during the initial setup process.

Auto  Sleep: 

'H¿QHDQLGOHWLPHDIWHUZKLFK\RX

want your TV to enter sleep mode automatically. 

Hours

6 Hours

 and 

8 Hours

 options are available. 

Set as 

Never

 to disable.

System  Information: 

Display  detailed  system 

information on the current channel such as 

Signal 

Level

Signal Quality

Frequency

 etc.

Version Info: 

Display system information such as 

Model Name

Version

 and 

Serial Number

.

Settings:

  Refer  to 

Settings

  section  for  detailed 

information.

Record

Record List:

 The recordings will be displayed if any 

available.  Highlight  a  recording  of  your  choice  and 

press the 

Yellow

 button to delete it or press the 

Blue


button to view detailed information. You can use Red 

and Green buttons to scroll the page up and down.

Device  Info:

  Connected  USB  storage  devices  will 

be displayed. Highlight the device of your choice and 

press 

OK

 to see available options. 

Set  TimeShift: 

Tag  the  selected  USB  storage 

device or a partition on it for time shift recording.

Set PVR:

 Tag the selected USB storage device or 

a partition on it for PVR.

Format:

  Format  the  selected  USB  storage 

device. Refer to 

USB Recording

 section for more 

information

Speed Test:

 Start a speed test for the selected USB 

storage  device. The  test  result  will  be  displayed 

when completed.

Schedule List: 

Add reminders or record timers using 

the 

Schedule List

 menu. 

Time Shift Mode: 

Enable or disable


timeshift recording 

feature.  Refer  to 

USB  Recording

  section  for  more 

information.

Settings

You can access the 

Settings

 menu from the Home 

Screen or from the 

TV options

 menu in Live TV mode.

Network & Internet

<RXFDQFRQ¿JXUH\RXU79¶VQHWZRUNVHWWLQJVXVLQJ

the options of this menu. You can also highlight the 

Connected/Not Connected icon on the Home screen 

and press 

OK

 to access this menu.

Wi-Fi:

 Turn  the  wireless  LAN  (WLAN)  function  on 

DQGRႇ

Available networks

When  the  WLAN  function  is  turned  on,  available 

wireless networks will be listed. Highlight 

See all

 and 

press 

OK

 to see all networks. Select one and press 

OK


to connect. You may be asked to enter a password to 

connect to the selected network, in case the network 

English

   - 14 -

is password protected. Additionally you can add new 

networks by using the related options.

Other options

Add new network: 

Add networks with hidden SSID’s.

Scanning always available:

 You can let the location 

service and other apps scan for networks, even when 

:/$1IXQFWLRQLVWXUQHGRႇ3UHVV

OK

 to turn it on 

DQGRႇ

Wow:

7XUQ WKH :DNH2Q/$1 IXQFWLRQ RQ DQG Rႇ

This function allows you to turn on or awaken your 

TV via network. 

Wol:

7XUQWKH:DNH2Q:/$1IXQFWLRQRQDQGRႇ

This function allows you to turn on or awaken your TV 

via wireless network. 

Ethernet

Connected/Not  connected:

  Displays  the  status  of 

the  internet  connection  via  Ethernet,  IP  and  MAC 

addresses.

Proxy settings:

 Set a HTTP proxy for browser manu-

ally. This proxy may not be used by other apps.

IP settings:

&RQ¿JXUH\RXU79¶V,3VHWWLQJV

Channel

Channels

Options of this menu may change or become inac-

tive  depending  on  the 

Channel  Installation  Mode


selection.

Channel Installation Mode - Antenna

Channel Scan:

 Start a scan for analogue and digital 

channels. You can press the 

Back

 button to cancel the 

scan. The channels that have already been found will 

be stored in the channel list.

Update Scan:

 Search for updates. Previously added 

channels  will  not  be  deleted,  but  any  newly  found 

channels will be stored in the channel list.

Analog Manual Scan: 

Start a manual scan for ana-

logue channels. Enter the 

Start Frequency

 and then 

select 

Scan Up

 or 

Scan Down

. When a channel is 

found the scan will be completed and the found channel 

will be stored in the channel list.

Single  RF  Scan: 

Select  the 

RF  Channel

  by  using 

the Right/Left directional buttons. 

Signal  Level

 and 

Signal Quality

 of the selected channel will be shown. 

Press 

OK

 to start scan on the selected RF channel. 

The found channels will be stored in the channel list.

Manual  Service  Update:

  Start  a  service  update 

manually.

LCN:

 Set your preference for LCN. LCN is the Logical 

Channel  Number  system  that  organizes  available 

broadcasts in accordance with a recognizable channel 

number sequence (if available).

Channel Scan Type:

 Set your scan type preference. 

Channel Store Type: 

Set your store type preference. 

Favorite Network Select:

 Select your favourite net-

work. This menu option will be active, if more than only 

one network is available.

Channel  Skip:

  Set  channels  to  be  skipped  when 

switching  the  channels  via 

Programme  +/-

  buttons 

on the remote. Highlight the desired channel/s on the 

list and press 

OK

 to select/unselect.

Channel  Sort:

  Replace  the  positions  of  the  two 

selected  channels  in  the  channel  list.  Highlight  the 

desired channels on the list and press 

OK

 to select. 

When the second channel is selected, the position of 

this channel will be replaced with the position of the 

¿UVWVHOHFWHGFKDQQHO

Channel  Move:

  Move  a  channel  to  the  position  of 

another channel. Highlight the channel you want to 

move and press 

OK

 to select. Then do the same for a 

second channel. When the second channel is selected, 

WKH¿UVWVHOHFWHGFKDQQHOZLOOEHPRYHGWRWKHSRVLWLRQ

of that channel.

Channel Edit:

 Edit channels in the channel list. Edit 

the name and channel number of the selected channel 

and display 

Network Name

Frequency

Color Sys-

tem

 and 

Sound System 

informations related to that 

channel if available. Depending on the channel other 

options may also be editable. You can press the 

Blue


button to delete the highlighted channel.

Analog Channel Fine-tune:

 Fine-tune an analogue 

channel. A list of available analogue channels will be 

displayed.  Select  the  desired  one  from  the  list  and 

press 

OK

 button. Then change the frequency of the 

channel  by  pressing  Left/Right  directional  buttons. 

Press 

OK

 to store the new frequency for that channel. 

Press 

Back

 to cancel. This item may not be visible, 

depending on whether or not the last watched channel 

was analogue.

Clear Channel List:

 Delete all channels stored in the 

channel list of the selected channel installation mode. 

$GLDORJXHZLOOEHGLVSOD\HGIRUFRQ¿LJKOLJKW

OK

 and press 

OK

 button to proceed. Highlight 

Cancel


and press 

OK

 to cancel.

Channel Installation Mode - Cable

Channel Scan:

 Start a scan for analogue and digital 

cable channels. If available, operator options will be 

listed.  Select  the  desired  one  and  press 

OK

Scan 

Mode

Channel Scan Type

Frequency

 and 

Network 

ID

 options may be available. The options may vary 

depending on the operator and the 

Scan Mode 

se-

lections. Set the 

Scan Mode

 as 

Full

 if you don’t know 

how to set up other options. Highlight 

Scan

 and press 

OK

 to start the scan. You can press the 

Back

 button to 

cancel the scan. The channels that have already been 

found will be stored in the channel list.

Summary of Contents for 43-FAE-9060

Page 1: ...43 FAE 9060 v ri tv f rg tv colour television k ytt ohje bruksanvisning owner s manual...

Page 2: ......

Page 3: ...verhojen kaltaisilla esineill Virtajohtoon tulisi olla helppo p sy l sijoita televisiota huonekalua tai muuta esinett s hk johdolle p lle Vaurioitunut s hk johto pistoke voi aiheuttaa tulipalon tai s...

Page 4: ...ill varustettujen laitteiden liit nt n HDMI 2 1a tuki USB tulo Komposiittisis ntulot ulkoisille laitteille kuten DVD soittimet videokamerat pelikonsolit jne Stereo nij rjestelm Teksti TV Kuulokkeiden...

Page 5: ...itt laitteen TV seen varmista ett sek TV ett laite on sammutettu ennen liit nn n suorittamista Kun liit nt on valmis voit kytke laitteet p lle ja k ytt niit Suomi 6 Muut liit nn t Jos haluat liitt lai...

Page 6: ...eet TV vastaanottimeen voit kytke eri sis ntulol hteit Paina L hde painiketta kaukos timess toistuvasti tai k yt suuntapainikkeita ja paina OK painiketta l hteiden vaihtamiseksi Live TV tilassa Tai av...

Page 7: ...n sis ll n n ytt miseen vaaditaan Internet yhteys Viesti jossa ilmoitetaan verkkosivun osoite jolla n m tiedot Suomi 10 voidaan my s n hd n ytet n jos Internet yhteytt ei ole 6 Sijainti Seuraavalla n...

Page 8: ...iasoitin ja paina OK selataksesi liitettyj USB laitteita tai mediapalvelimia ja toistaa n ytt TV seen asennetun mediasis ll n nitiedostot voidaan toistaa TV n kaiuttimien tai siihen liitetyn kaiutinj...

Page 9: ...den tilan Ethernetin IP ja MAC osoitteiden kautta V lityspalvelimen asetukset Aseta HTTP v lityspal velin selaimelle manuaalisesti Muut sovellukset eiv t k yt t t v lityspalvelinta IP asetukset Muokka...

Page 10: ...nnustilasta Lapsilukko Salasana on sy tett v t m n valikon avaamiseksi Oletus salasana on 1234 Jos olet m ritt nyt uuden salasanan Alkuasennuksen j lkeen k yt m ritetty salasanaa Jotkin vaihtoehdot ei...

Page 11: ...omi 18 ja valkoisia alueita yksityiskohtia kadottamatta Aseta t m Paikallinen kontrastin s t minen tilaan Matala Keskitaso Voimakas tai sammuta se asettamalla se Pois OPLWLOD Se on 3 2 tai 2 2 tahdin...

Page 12: ...t n valintasi mukaan Kanavien l yt miseksi korosta Etsi ja paina OK painiketta Virtuaalin pp imist tulee esiin Sy t kanavan koko nimi tai sen osa tai numero jonka haluat l yt korosta valintamerkkisymb...

Page 13: ...ediatiedostojen luettelossa ja paina OK painiketta Seuraa ruudulle tulevia ohjeita saadaksesi lis tietoja muiden painikkeiden toiminnoista Huomautus Odota hetki ennen liitt mist ja irrottamista koska...

Page 14: ...t Asetukset Laiteominaisuudet ni valikkoon Live TV tilassa 2 Selaa Consumer Electronics Control Kuluttajaelektroniikan valvonta osaan Korosta HDMI ohjaus vaihtoehto ja paina OK Google Cast Sis nrakenn...

Page 15: ...ttu tulol hteeksi Varmista ett ulkoinen laite tai l hde on liitetty oikein Varmista kuva asetukset on s detty oikein Kaiuttimet maadoittamattomat nilaitteet korkeat rakennukset ja muut suuret kohteet...

Page 16: ...3UR OH MKV mkv WebM webm RV30 RV40 1080P 60fps 40Mbps RM rm rmvb Suomi 28 ni nikoodekit N ytteenottotaajuus Kanava Bittinopeus S ili Huomautus MPEG1 2 Layer1 16KHz 48KHz Maks 2 32kbit s 448kbit s Elok...

Page 17: ...KHz 11 025KHz 22 05KHz 44 1KHz Maks 5 1 6kbit s 128kbit s Elokuva RM rm rmvb FLAC 8KHz 96KHz Maks 5 1 1 6Mbps Elokuva Matroska mkv mka Musiikki DF DTS LBR 12KHz 22KHz 24KHz 44 1KHz 48KHz Maks 5 1 maks...

Page 18: ...t 85 Langattoman l hiverkkol hettimen ominaisuudet Taajuusalueet Maks ulostuloteho 2400 2483 5 MHz CH1 CH13 100 mW 5150 5250 MHz CH36 CH48 200 mW 5250 5350 MHz CH52 CH64 200 mW 5470 5725 MHz CH100 CH1...

Page 19: ...elektroniset laitteet ja akut joissa symboli esiintyy ei saisi h vitt yleisen talousj tteen sen k ytt i n p tytty Sen sijaan tuote on luovutettava sopivaan s hk ja elektroniikkalaitteiden kierr tykse...

Page 20: ...en som markering f r begr nsningar f rsiktighets tg rder och s kerhetsinstruktioner 9DUMH I UNODU QJ VND HQGDVW WDV EHDNWDQGH GlU SURGXNWHQ KDU PRWVYDUDQGH PlUNQ QJ Anteckna s dan information f r s ke...

Page 21: ...gnalen och an v nda ett h gre dynamiskt f rg och kontrastomr de presenterar Dolby Vision fantastiska verkliga bilder med h pnadsv ckande detaljer som andra efterbe handlingsteknologier i TV n inte kan...

Page 22: ...pen p fj rrkontrollen Tryck p kontrollknappen p TV n TV n sl s sedan p Att ndra TV n till vilol ge TV n kan inte kopplas till standby l ge via kontrollknappen Tryck p och h ll in Standby knappen p fj...

Page 23: ...i vilol ge efter 30 sekunder 1 V lkomstmeddelande och val av spr k Meddelandet V lkommen visas tillsammans med spr kval som visas p sk rmen V lj nskat spr k i listan och tryck p OK f r att forts tta...

Page 24: ...lja endast en operat r fr n listan Markera nskad operat r och tryck p OK eller H ger riktningsknapp f r att forts tta N gra av f ljande alternativ kan vara f rinst llda beroende p den valda operatorn...

Page 25: ...ra en kanal och tryck p OKf r att g ra en markering Vald kanal visas varje g ng TV n sl s p igen fr n snabb v ntel ge Om v ljningsl get r inst llt som Senaste status visas den senast bevakade kanalen...

Page 26: ...OK knappen f r att forts tta Markera Avbryt och tryck p OKf r att avbryta Kanalinstallationsl ge kabel Kanalgenoms kning Starta en skanning f r analoga och digitala kabelkanaler Om tillg ngliga operat...

Page 27: ...beh righeter Apparna sorteras efter kategorier av beh righetstyp Du kan aktivera inaktivera beh righeter f r appar inifr n dessa kategorier S rskild app tkomst RQ JXUHUD YLVVD DSSIXQNWLRQHU och s rski...

Page 28: ...enska 19 H gtalare H r TV ljudet fr n den anslutna kompati bla ljudenheten som r inst lld som External Audio System St ll in som TV h gtalare f r att anv nda h gtalarna p din TV f r ljudutg ng Digital...

Page 29: ...dast kanalen som f r tillf llet tittas p l ggas till eller tas bort Programguide Medhj lpavEPG funktionen ElectronicProgramguide p din TV kan du bl ddra i h ndelseschemat f r de kanaler som f r n rvar...

Page 30: ...OnQJYDULJD SURJUDP Vn VRP OPHU rekommenderas att anv nda USB HDD s Inspelade program sparas p det anslutna USB minnet Om du vill kan du lagra kopiera inspelningar p HQ GDWRU HVVD OHU NRPPHU GRFN LQWH...

Page 31: ...d och ocks ger tillg ng till Internet endast tj nster f r konsumenter som anv nder anslutna TV apparater och set top boxar Tj nster som levereras via HbbTV omfattar traditionella tv kanaler catchup tj...

Page 32: ...ell r en illustration av n gra av de typiska videovisningsl gena Din TV kanske inte st der alla uppl sningar Index 8SSO VQ QJ Frekvens 1 640x480 60Hz 2 640x480 72Hz 3 640x480 75Hz 4 800x600 56Hz 5 800...

Page 33: ...Bit hastighet Beh llare Obs MPEG1 2 Layer1 16KHz 48KHz Upp till 2 32Kbps 448Kbps Film AVI avi ASF asf Matroska mkv MPEG transportstr m ts trp tp MPEG programstr m DAT VOB MPG MPEG Musik MP3 mp3 WAV w...

Page 34: ...Film MPEG transportstr m ts trp tp MP4 mp4 mov DRA 8 kHz 96 kHz Upp till 7 1 1533Kbps Film MPEG transportstr m ts trp Bild Bild Foto Uppl sning bredd x h jd JPEG Baslinje 15360x8640 1920x8 x 1080x8 P...

Page 35: ...ade Denna produkt inneh ller teknologi med f rbeh ll f r vissa av Microsofts immateriella r ttigheter Anv ndning eller distribution av denna teknologi f rutom denna produkt r f rbjuden utan beh riga l...

Page 36: ...tc The power cord plug should be easily accessible Do not place the TV furniture etc on the power cord GDPDJHG SRZHU FRUG SOXJ FDQ FDXVH UH RU JLYH you an electric shock Handle the power cord by the p...

Page 37: ...tion Book Features Remote controlled colour TV AndroidTM operating system Google Cast Voice Search Optional Fully integrated digital terrestrial cable satellite TV DVB T T2 C S S2 HDMI inputs to conne...

Page 38: ...vice to the TV make VXUH WKDW ERWK WKH 79 DQG WKH GHYLFH DUH WXUQHG R before making any connection After the connection is done you can turn on the units and use them English 6 Other Connections I RX...

Page 39: ...have connected external systems to your 79 RX FDQ VZLWFK WR GL HUHQW LQSXW VRXUFHV 3UHVV WKH Source button on your remote control consecutively or use the directional buttons and then press the OK EXW...

Page 40: ...ess OK RQ WKH UHPRWH WR FRQ UP DQG SURFHHG RX FDQ English 10 also view Terms of Service Privacy Policy and Play Terms of Service on this screen To display the content an internet connection is needed...

Page 41: ...time will be displayed RX FDQ FRQ JXUH RXU GDWH DQG WLPH SUHIHUHQFHV using the Date time menu options from the Settings Device Preferences menu First row will be the Apps row Live TV and Multi Media P...

Page 42: ...networks with hidden SSID s Scanning always available You can let the location service and other apps scan for networks even when 1 IXQFWLRQ LV WXUQHG R 3UHVV OK to turn it on DQG R Wow 7XUQ WKH DNH 2...

Page 43: ...elected channel and display Network Name Frequency Color Sys tem and Sound System informations related to that channel if available Depending on the channel other options may also be editable You can...

Page 44: ...preference as Low Medium Strong RU WXUQ LW R E VHWWLQJ DV 2 Adaptive Luma Control Adaptive Luma control adjusts contrast settings globally according to content histogram in order to provide deeper bla...

Page 45: ...Type and press the OK button You can select among Digital Radio Free Encrypted Analogue and Network options to English 20 OWHU WKH FKDQQHO OLVW RU VHOHFW Broadcast option to see all installed channels...

Page 46: ...this menu KLOH EURZVLQJ IRU WKH YLGHR OHV D SUHYLHZ RI WKH highlighted video will be displayed in a small window on the left side of the screen if the view style is set to List View Press the Blue bu...

Page 47: ...The TV supports also ARC Audio Return Channel feature This feature is an audio link meant to replace other cables between the TV and the audio system A V receiver or speaker system Connect the audio E...

Page 48: ...WKH LQIUD UHG LFNHU WKURXJK WKH camera the remote control is working The TV needs to be checked I RX GR QRW QRWLFH WKH LFNHULQJ WKH EDWWHULHV PD be exhausted Replace the batteries If the remote is sti...

Page 49: ...0Mbps 9 Y 9 DYL 6 VZI H 263 1080P 60fps 40Mbps MP4 mp4 mov 3GPP 3gpp 3gp AVI avi MKV mkv H 264 4096x2176 60fps 1080P 60fps 135Mbps 0DLQ 3UR OH LJK 3UR OH HYHO 5 1 9 Y 03 PS PRY 33 3gpp 3gp MPEG transp...

Page 50: ...oska mkv Music ASF wma WMA 10 Pro M2 96KHz Up to 5 1 768kbps Movie ASF wmv asf AVI avi Matroska mkv Music ASF wma VORBIS Up to 48KHz Up to 2 Movie Matroska mkv WebM webm 3GPP 3gpp 3gp MP4 mp4 mov Musi...

Page 51: ...10 THD 2x10 Power Consumption W 120 Networked Standby Power Consumption W 2 TV Dimensions DxLxH with foot mm 274 x 973 x 623 TV Dimensions DxLxH without foot mm 56 81 x 973 x 567 VSOD 43 Operation te...

Page 52: ...ogo is a trademark of CI Plus LLP This product is protected by certain intellectual property rights of Microsoft Corporation Use or distribution of such technology outside of this product is prohibite...

Page 53: ...rsk Produktinformasjon Kommersiell merkevare Produkt nr Modell nr Energieffektivitet klasse Synlig skjermst rrelse diagonal ca tommer cm Portugu s Ficha do produto Marca Comercial Produto N Modelo N C...

Page 54: ...ais Hrvatski Nederlands Espa ol Svenska Italiano Polski Magyar Norsk Portugu s Rom n Srpski Sloven ina Sloven ina Bosanski T rk e Shqip Lietuvi Latvie u Eesti Energy consumption kWh per year based on...

Page 55: ...a TFT IDTV t pus r di berendez s megfelel a 2014 53 EU ir nyelvnek Az EU megfelel s gi nyilatkozat teljes sz vege el rhet a k vetkez internetes c men doc vosshub com IT Il fabbricante VESTEL Elektron...

Page 56: ......

Page 57: ......

Page 58: ......

Page 59: ......

Page 60: ...50535047...

Reviews: