background image

Getting Started

English

   - 6 -

Switching On/Off

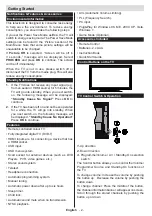
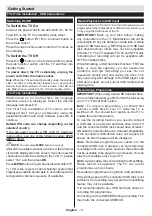
To Switch the TV On

Connect the power cord to the 220-240V AC, 50 Hz. 
To switch on the TV from standby mode either:
Press the “ ” button, 

P+

 / 

P-

 or a numeric button on 

the remote control.
Press the side function switch until the TV comes on 

from standby.

To Switch the TV Off

Press the “ “ button on the remote control or press 

the side function switch until the TV switches into 

standby mode.

To power down the TV completely, unplug the 

power cord from the mains socket.

Note

: When the TV is switched to standby mode, the standby 

LED can blink to indicate that features such as Standby 

Search, Over Air Download or Timer is active. The LED can 

also blink when you switch on the TV from standby mode.

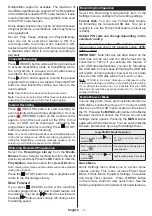
First Time Installation

When turned on for the first time, the language 

selection screen is displayed. Select the desired 

language and press OK.
The First Time Installation (FTI) screen will be 

displayed next. Set your preferences using the 

navigation buttons and when finished, press OK to 

continue.

Default PIN code can change depending on the 

selected country.

If you are asked to enter a PIN code for viewing a 

menu option, use one of the following codes: 

4725

0000

 or 

1234

.

NOTE

: You can press 

MENU

 button to cancel.

After all the available stations are stored, the Channel 

List will be displayed on the screen. If you like how the 

channels are sorted according to the LCN (*), please 

select “Yes” and than press 

OK

.

Press 

MENU

 button to quit channel list and watch TV.

(*) LCN is the Logical Channel Number system that 

organizes available broadcasts in accordance with a 

recognizable channel sequence (if available).

Media Playback via USB Input

You can connect a 2.5” and 3.5” inch (hdd with external power 

supply) external hard disk drives or USB memory stick to your 

TV by using the USB inputs of the TV.

IMPORTANT!

 Back up your files before making 

any connections to the TV. Manufacturer will not be 

responsible for any file damage or data loss. Certain 

types of USB devices (e.g. MP3 Players) or USB hard 

disk drives/memory sticks may not be compatible 

with this TV. The TV supports FAT32 and NTFS disk 

formatting but


recording will not be available with 

NTFS formatted disks.
While formatting a USB hard disk that has 1TB (Tera 

Byte) or more file capacity, you can experience 

problems with the formatting process. Do not 

repeatedly quickly plug and unplug the drive. This 

may cause physical damage to the USB player and 

USB device itself. Do not pull out USB module while 

playing a file.

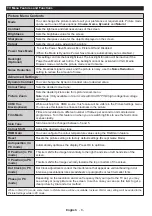
Recording a Programme

IMPORTANT

: When using a new USB hard disk drive, 

it is recommended that you first format the disk using 

your TV’s “Format Disk” option.

Note :

 To record a programme, you should first 

connect a USB disk to your TV while the TV is 

switched off. You should then switch on the TV to 

enable the recording feature.
To use the recording function, you need to connect 

a USB disk or an external hard disk drive to the TV 

and the connected USB disk should have at least 1 

GB capacity and should have 2.0 speed compatibility. 

If the connected USB device does not support 2.0 

speed, an error message will be displayed.

Note

: Recorded programmes are saved into the 

connected USB disk. If desired, you can store/copy 

recordings onto a computer; however, these files will 

not be available to be played on a computer. You can 

play the recordings only via your TV.

Note

: Lip Sync delay may occur during the timeshifting. 

Radio record is supported. The TV can record 

programmes up to ten hours.
Recorded programmes are split into 4GB partitions. 
If the writing speed of the connected USB disk is not 

sufficient, the recording may fail and the timeshifting 

feature may not be available.
It is recommended to use USB hard disk drives for 

recording HD programmes.
Do not plug out the USB/HDD during a recording. This 

may harm the connected USB/HDD.

First Time Installation - USB Connections

Summary of Contents for 22F6050-D

Page 1: ......

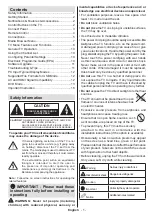
Page 2: ...electric shock Never make a knot in the power cord or tie it with other cords When damaged it must be replaced this should only be done by qualified personnel Do not use this TV in a humid or damp pla...

Page 3: ...switch on the following message will be displayed Standby Cause No Operation Press OK to continue Features Remote controlled colour TV Fully integrated digital TV DVB T HDMI inputs are for connecting...

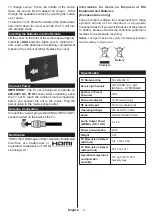
Page 4: ...f the TV Notification HDMI the HDMI logo and High Definition Multimedia Interface are trademarks or registered trademarks of HDMI Licensing LLC Information for Users on Disposal of Old Equipment and B...

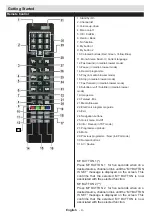
Page 5: ...text Mix 21 Media Browser 22 Electronic programme guide 23 Exit 24 Navigation buttons 25 Quick menu On Off 26 Info Reveal in TXT mode 27 Programme up down 28 Mute 29 Previous programme Now in EPG mode...

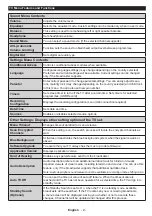
Page 6: ...tput will not be available via the scart socket When using the wall mounting kit optional we recommend that you plug all your cables into the back of the TV before mounting on the wall Insert or remov...

Page 7: ...your files before making any connections to the TV Manufacturer will not be responsible for any file damage or data loss Certain types of USB devices e g MP3 Players or USB hard disk drives memory st...

Page 8: ...Recordings Library Slow Forward If you press PAUSE button while watching recorded programmes the slow forward feature will be available You can use button to slow forward Pressing button consecutivel...

Page 9: ...e Black optional While watching from HDMI source this feature will be visible in the Picture Settings menu You can use this feature to enhance blackness in the picture Film Mode Films are recorded at...

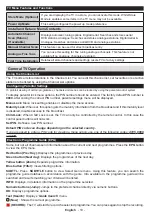
Page 10: ...ime Sources Enables or disables selected source options Other Settings Displays other setting options of the TV set Menu Timeout Changes timeout duration for menu screens Scan Encrypted Channels When...

Page 11: ...parental settings menu will be displayed Menu Lock Menu lock setting enables or disables the menu access Maturity Lock When set this option gets the maturity information from the broadcast and if this...

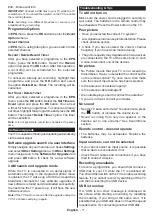
Page 12: ...powers up it will have the new software version Note If the TV fails to come on after the upgrade unplug the TV for 2 minutes and plug in again Troubleshooting Tips Tv will not turn on Make sure the p...

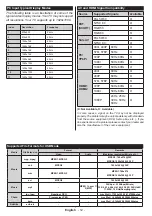
Page 13: ...table is an illustration of some of the typical video display modes Your TV may not support all resolutions Your TV supports up to 1920x1080 Index Resolution Frequency 1 800x600 56 Hz 2 800x600 60 Hz...

Page 14: ...ct sunlight as the temperature can rise quickly and damage the disc After playing store the disc in its case On cleaning Before playing clean the disc with a cleaning cloth Wipe the disc from the cent...

Page 15: ...by the disc C Stop Eject Stop playing disc Eject or Load the disc Note You cannot eject the disc via the remote control While playing a file you should press STOP button three times to eject 1 standby...

Page 16: ...se Fast forward C Clears digit if available My button 1 Displays time Views main setup menu Time counter mode selection during playback Press repeatedly to switch between modes LANG Audio language X X...

Page 17: ...rded on the disc only the available language on the disc will be heard 10 Some DVDs may not contain root and or title menus 11 Reverse stepping is not available 12 For your convenience If you attempt...

Page 18: ...MP3 is recorded as a Digital Signal with better audio quality less distortion and less deterioration of audio quality over time PICTURE CD Video still picture 12 cm It depends on JPEG quality JPEG is...

Page 19: ...reen or green and yellow The wire which is coloured blue or black must be connected to the terminal which is marked with the letter N or coloured Black The wire which is coloured brown or red must be...

Page 20: ...lasse di efficienza energetica Dimensioni visibili dello schermo diagonale circa pollici cm Polski KARTA PRODUKTU Marka produktu Nr produktu Nr modelu Klasa efektywno ci energetycznej Widoczny obraz e...

Page 21: ...ybie wy czonym Wat w Rozdzielczo obrazu pikseli Magyar Energiafogyaszt s bekapcsolva hagyott zemm dban Watt ves energiafogyaszt s kWh ves Energiafogyaszt s standby zemm dban Watt Energiafogyaszt s kik...

Page 22: ...ual provided The product must be used solely for domestic purposes The guarantee will be invalid if the product is re sold or has been damaged by inexpert repair notice On site service is limited to V...

Page 23: ...r and tear This includes but is not limited to parts D This Warranty does not cover any Finlux branded consumer product installed in a moveable dwelling Note that the performance of the product may be...

Page 24: ......

Reviews: