background image


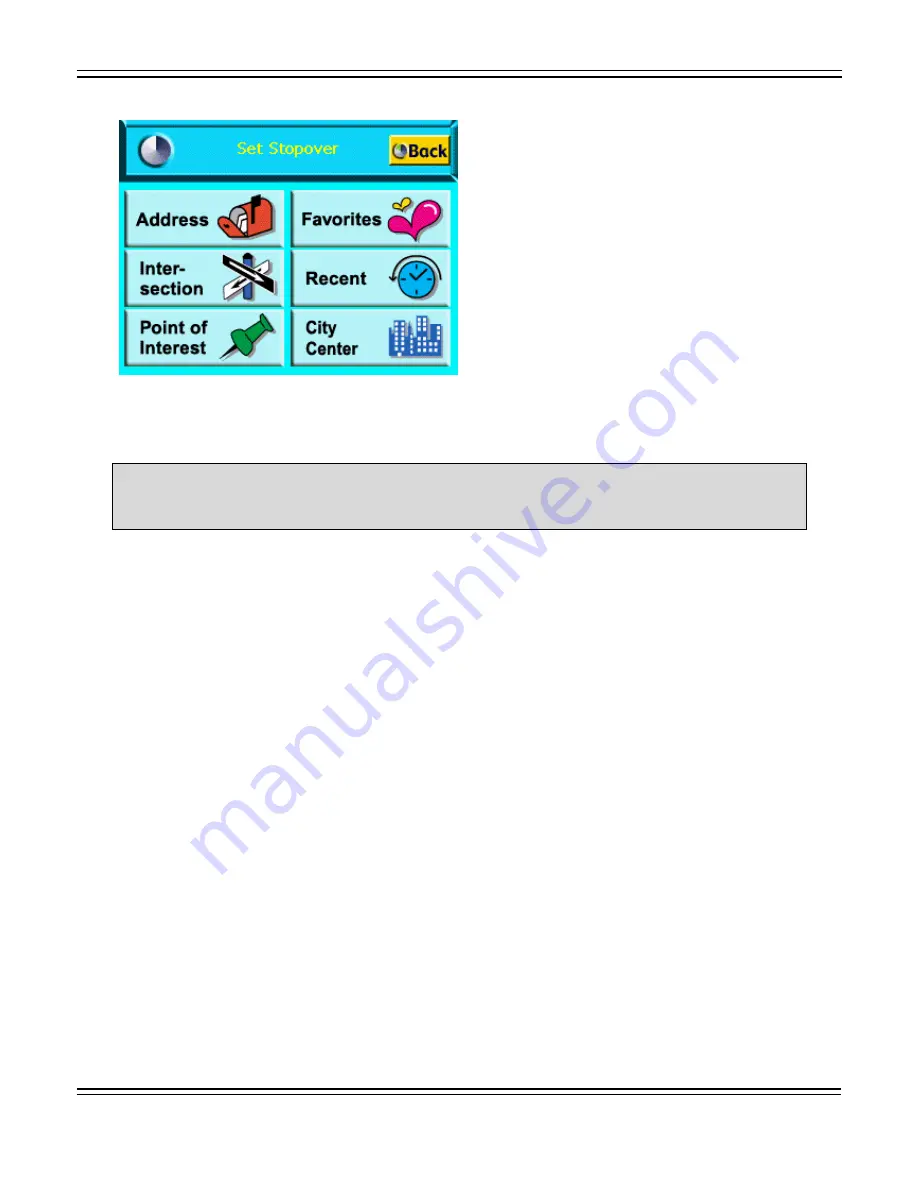
2. Tap on a Stopover Category.  

3. Enter the Stopover information.  

Refer to the Entering a Destination section for the steps to enter information for a specific 

category. 


4.2.12.


Clearing a Selected Destination  

To cancel a selected destination, do one of the following:  

1. Tap on the Menu button > Destinations option.  

2. Tap on the Clear button on the Destination Options screen.  

The screen displays in Map View mode.  


4.3.


Navigating the Vehicle  

After you have entered a destination and selected the Nav option, the navigation system 

quickly calculates a route based on your preferences and guides you to your destination. 

The guidance includes:  

z


A map that automatically scrolls as the vehicle moves.  

z


Voice instructions for each maneuver.  


Page 25 

Summary of Contents for Finedrive 500

Page 1: ...User s Manual 2005 2005 Fine Digital USA Inc or its subsidiaries...

Page 2: ...ION SYSTEM 13 4 1 ENTERING A START LOCATION 14 4 2 ENTERING A DESTINATION 14 4 2 1 Setting a Destination by Address 15 4 2 2 Setting a Destination by Intersection 16 4 2 3 Setting a Destination by Poi...

Page 3: ...4 3 2 Viewing the Route List 27 5 TECHNICAL SUPPORT 27 6 APPENDIX 28 6 1 FCC COMPLIANCE 28 6 2 SYSTEM SPECIFICATIONS 29 Page 2...

Page 4: ...ount 5 SD Card with NAVTEQ Map Data 6 SD Card Reader 7 CD including z Navigation application Desktop application z User s Manual z U S and Canada map data 1 2 System Requirements Desktop or Laptop PC...

Page 5: ...CARD INSTALLATION CHECK LIST Installation Requirements NAVIGATION unit SD Card Reader Installation Map CDs SD Card NOTE if you are using a full map version navigation system you do not have to instal...

Page 6: ...Loader program installation has completed click Finish 4 Map Loader program will launch automatically You can also execute the software later by double clicking on the Map Loader icon located on the...

Page 7: ...in your vehicle where this unit will not distract or otherwise interfere with the driver s ability to control the vehicle Do not install components in areas which are susceptible to rain moisture dir...

Page 8: ...commend that you install the unit below the center of the windshield between the driver and passenger seats Make sure the windshield is clean and dry to ensure a tight grip z 1 When the suction on the...

Page 9: ...vigation into the holder 5 Turning power on off z Once the power is turned on wait for a couple of seconds and then the WARNING sign will appear as follows z When the warning sign has appeared read th...

Page 10: ...pproximately 90 seconds to receive signals 3 G e t t i n g A c q u a i n t e d w i t h y o u r N a v i g a t i o n S y s t e m When you start navigation System the downloaded map displays in Map View...

Page 11: ...om of the map To view detailed vehicle location information z Tap on the locator bar at the bottom of the map z Tap on the map location and select Info from the Pop Up menu 3 1 Moving Around the Map T...

Page 12: ...rts stops the current routing simulation Display Options Sets the map orientation screen color on the navigation unit automatic or manual guidance and the display of POI icons Return to Map Displays a...

Page 13: ...n to Map icon The Map View screen displays 2 The orientation of a map is set in the Display Options screen z Heading Up to automatically orient the map in the direction of vehicle travel z North Up to...

Page 14: ...ajor to include major roads such as highways z Local for local streets only The other route preferences allow you to include or exclude Ferries Toll Roads or Carpool lanes in the route the navigation...

Page 15: ...er on the map location A pop up menu with the selected address displays Tap the Set Start Location option on the pop up menu z Tap the Menu button Destinations icon Enter the destination information F...

Page 16: ...he house number z Tap City First to enter the city name and street address including the house number An example of a dialog box is shown below Valid entries will be shown at the top of the screen cit...

Page 17: ...following buttons at the bottom of the screen z Nav to calculate the route and center in on the map location z Fav to add this location to your list of favorite locations z Map to set this location a...

Page 18: ...ection such as Ave St N or SW When you enter a street or city dialog boxes similar to the following display For an intersection there are two address dialog boxes for the two intersecting streets 3 To...

Page 19: ...3 Setting a Destination by Point of Interest The map database contains over two million points of interest POIs within the U S and Canada POIS are divided into categories and represented by icons on t...

Page 20: ...s z Scroll through the list by using the scroll keys at the right of the list z Tap in characters using the keypad on the screen 3 Tap on the OK button The POI Select screen displays 4 Tap on one of t...

Page 21: ...it 2 Tap on one of the following buttons at the bottom of the screen z Nav to calculate the route and center in on the map location z Fav to add this location to your list of favorite locations z Map...

Page 22: ...K button The POI Select screen displays 6 Tap on one of the following buttons at the bottom of the screen z Nav to calculate the route and center in on the map location z Fav to add this location to y...

Page 23: ...Setting a Destination from the Recent Destinations List 1 Tap Recent on the Set destinations screen The Recent Destinations screen displays This screen lists all of your recent destinations You can u...

Page 24: ...nformation refer to the Entering Detours section z Stopover to enter places to stop along the route For more information refer to the Entering Stopovers section z Clear to clear the current destinatio...

Page 25: ...he selected road 4 Repeat steps 1 3 for each road to avoid 5 Tap on the Nav button to recalculate the route To cancel a selection tap on it and tap the Clear button To cancel all selections tap the Rs...

Page 26: ...p on the Menu button Destinations option 2 Tap on the Clear button on the Destination Options screen The screen displays in Map View mode 4 3 Navigating the Vehicle After you have entered a destinatio...

Page 27: ...er 4 3 1 Using Day vs Night Display The navigation system can display the map or guidance view in one of the following modes z Day Mode to set the screen color for daylight driving conditions z Night...

Page 28: ...return to Map View by tapping on the red x at the bottom of the screen You can also center on a specific section of the map by scrolling through the list tapping on the location and tapping on the map...

Page 29: ...f not i nstalled and used in accordance with the instructions may cause harmful interfere nce to radio communications However there is no guarantee that interference will not occur in a particular ins...

Page 30: ...ion sensitivity 146 dBm Acquisition Rate z Hot start 8 sec typical with ephemeris and almanac valid z Warm start 38 sec typical with almanac but not ephemeris z Cold start 60 sec typical neither alman...

Page 31: ...z Operating 23 122 F z Storage 4 158 F z Humidity Up to 90 non condensing Page 30...

Reviews: