background image

.

.

.

.

.

Assembly and Disassembly

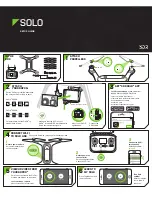
1 Propellers

Unfold the front and rear arms of the drone.

Attach the gray marked propellers to the motor mounting base with gray marks on the arms.

Ensure the propeller is pressed to the bottom of the mounting base.

Rotate the propeller to the end of the lock direction until  the propeller gets bounced and locked.

Press the propeller forcefully and rotate the propeller along the unlock direction to remove 
the propeller.

Safety tips:

If the propeller is damaged, please replace them 
to ensure flight safety and efficiency.Check if the 
propeller is properly installed and fastened before 
each flight.Stay away from the rotating propeller 
to avoid cutting.

Note: Take the installation of reverse propeller as an example.

Summary of Contents for FMWRJ03A6

Page 1: ...Please read the quick start manual carefully before using and keep it for future reference FIMI X8 SE 2020 Drone Quick Start Manual ...

Page 2: ...Product Introduction 1 Drone Integrated gimbal camera Power button Flight status lights Reverse propeller Battery level lights Positive propeller ...

Page 3: ...Drone tail light Motor Ultrasonic detecting module Landing gear Optical flow camera Battery buckle ...

Page 4: ...tion 2 Remote controller Power button Auto take off land button Auto return Left stick Stick storage slot Five directional button Mobile device holder Charging port Right stick Battery level lights Cable slot USB port ...

Page 5: ...Right dial Antenna Left dial Record button Shoot button ...

Page 6: ...Five directional button Toggle the button to the left switching to normal flight Toggle the button to the right switching to auto return Power button Short press to view the battery level Short press long press 2 seconds to power on off long press 2 seconds to auto take off landing Auto take off land button short press to start stop shooting Shoot button Short press to start stop recording Default...

Page 7: ...d Drone heading Up Right Down Left Backward Up Down Forward Backward Counter clockwise Clockwise Left Right Note The stick mode can be set in FIMI Navi app the default is American hand Left stick Right stick ...

Page 8: ...tecting range 0 5m when GPS positioning is active Horizontal 1 5m Operating temperature 0 C 40 C Suitable altitude 5000m Operating frequency 5 725 5 850GHz Charger Rated input 100 240V 50 60Hz 1 5A Rated output 13 05V 3A Rated power 39 15W Remote controller Net weight About 373g Dimensions 203 8 91 46 6mm Operating frequency 5 725 5 850GHz Type Rechargeable lithium battery Capacity 3900mAh Nominal...

Page 9: ...pack Weight About 275g Capacity 4500mAh Voltage 11 4V Limit voltage 13 05V Energy 51 3Wh Operating temperature 0 C 40 C Gimbal Controllable rotation range 0 90 Pitch Angular vibration range 0 004 Lens FOV 79 5 Camera aperture f2 0 Camera focal distance 3 54mm Equivalent focal distance 26mm Sensor 1 3 06 CMOS Effective pixels 12M ISO range 100 3200 Shutter speed 32 1 8000s Max video resolution 3840...

Page 10: ...nd AC cable as shown below and plug the charger into a power outlet When the battery is in charge the battery level lights are flashing When the battery is fully charged the battery level lights go out It takes about 2 hours to fully charge the battery 100V 240V ...

Page 11: ...r to a power adapter as show below When the RC is in charge the battery level lights are flashing when the RC is fully charged the battery level lights go out It takes about 2 5 hours to fully charge the RC in the powered off condition 5V 2A ...

Page 12: ...end of the lock direction until the propeller gets bounced and locked Press the propeller forcefully and rotate the propeller along the unlock direction to remove the propeller Safety tips If the propeller is damaged please replace them to ensure flight safety and efficiency Check if the propeller is properly installed and fastened before each flight Stay away from the rotating propeller to avoid ...

Page 13: ...installing TF card to the drone please unfold the arms of the drone first and open the protective cover Insert the TF card with the literal upward into the TF card slot When removing TF card press the TF card to pop out RC ...

Page 14: ... 3 Battery Push hard the battery after the battery installed in place there will be a click sound To remove the battery you need to press the battery buckle on both sides to pull out ...

Page 15: ...ice holder by extending the holder to the left Open the protective cover on the RC bottom Connect your phone and the RC with a USB cable Connect the drone and update firmware according to instructions in FIMI Navi app Note The cable slot is reserved on the right ...

Page 16: ...rone heading Once the drone is turned on the heading can be told by navigation lights The red light and the green light indicate the heading and the yellow light is the tail Safety tips Always keep the tail pointed at the user to avoid direction misjudging red green yellow Drone heading ...

Page 17: ... 2 Turning on off the drone and the RC Remote controller Short press long press power button 2 seconds to power on off Short press to check battery level Drone ...

Page 18: ...ding Left stick Right stick Left stick Right stick 2 Manual take off landing Keep both sticks to the bottom inner still over 3 seconds the propellers start spinning Release both sticks once propellers have been spinning and firmly push the left stick upward to take off the drone During flight release both sticks to hover At any time during controlled flight release the sticks and the drone will ho...

Page 19: ...wnward to land the drone Once the drone has landed push and hold the left stick down over 5 seconds the motors will stop Safety tips The drone has no waterproof function Please be careful of landing environment Do not land on an inclined plane for safety ...

Page 20: ...to avoid motors being stopped in the air 3 Stop propellers in an emergency When motors can t properly turn off please toggle the left stick to the bottom inner in maximum range and press Auto take off landing button for 5 seconds simultaneously the motors will stop ...

Page 21: ...you hear 2 short sounds Press again to stop recording with 4 short sounds During recording short press the shoot button to capture a picture only support 1920x1080 25 30 50 60fps The pitch angle of the gimbal can be controlled by toggling the left dial up and down The right dial can adjust EV ISO 4 Shooting and Recording Record button Shoot button ...

Page 22: ...is updating Drone on the ground self check fails Drone is flying internal error Ready to fly in flight 1 2 3 4 5 6 1 Drone lights Remote status Weak signal or not connected to the drone Auto take off or landing not enabled Ready for auto take off Normal signal RC Pairing or upgrading firmware Recording videos 1 2 3 4 5 6 2 Remote lights Remote lights Power button s red light is on Power button s w...

Page 23: ...s electric wires and areas where drones are restricted Keep away from telecommunication base stations high power antennas and areas with complex electromagnetic signals Do not use this product in restricted areas Be sure to read the Disclaimer and Safety Operation Instructions carefully Open and unobstructed environment Good GPS signal In visual range ...

Page 24: ...Scan the QR code to download FIMI Navi app ...

Reviews: