


www.ffv.com
V 1.0 July 2015 MP
Preliminary Version subject to change without prior notice
22
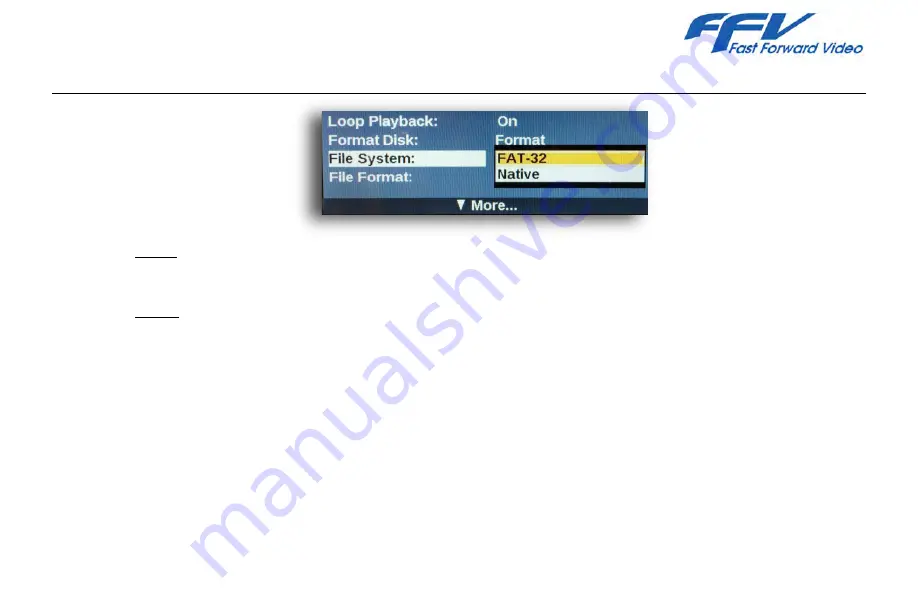
FILE SYSTEM
-
FAT32 – this will allow viewing of disk content in PC or MAC computer environments (see JPEG2000 CODEC
section on page 28). Use this mode to copy downloaded firmware files to your SSD for update purposes.
-
Native- is a proprietary FFV mode which formats the drive more efficiently; SSD’s formatted in this mode are
not viewable in computer environments. Use this mode if the Studio Pro is used in a standalone setting and
no computer review of clips is ever needed.
A.
Press the menu button– this will place you in the settings Menu (#13, Figure 4 on page 14).
B.
Highlight the desired option using the scroll wheel (#19, Fig. 4).
C.
Press the selection button and the two file system will be displayed (#14, Fig. 4).
D.
Highlight the desired file system using the scroll wheel (#19, Fig. 4).
E.
Press the selection button to select either the FAT32 or the Native file system (#14, Fig. 4).


