6
Ferm
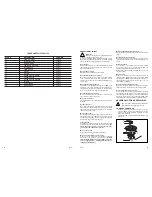
SPARE PARTS LIST FAG-230
REF NR
DESCRIPTION
FERM NR
03
WOOD RUFF KEY
407920
04
FLANGE OUTSIDE
406847
06
FLANGE INSIDE
406846
07
PROTECTING GUARD
407929
16
SPINDLE GEAR
407921
23
PINION GEAR
407922
32
ROTOR
407923
37
STATOR
407928
39
CARBON BRUSH COVER
407924
41
CARBON BRUSH
407925
42
CARBON BRUSH HOLDER
407926
45
SWITCH
407927
47
CAM WRENCH
406814
48
SIDE HANDLE
406277
Ferm
3
OPERATIONAL SAFETY
Warning!
Never use the machine for grinding magnesium
workpieces. Use fibre reinforced discs only.
Do not use near flammable materials or people. Do not use
the machine to grind/cut deeper than the maximum grinding
depth of the disc. Do not use grinding discs for deburring.
Concentrate
Routine and repetition can lead to mistakes. Remember
that a slight lack of concentration can result in serious
injuries in a split second.
Keep work area clean
Cluttered areas and benches invite injuries.
Consider the work environment
Do not expose power tools to rain or use them in damp
or wet locations. Keep work area well lit. Do not use
power tools in the presence of flammable liquids, vap-
ours or gases.
Guard against electric shock
This unit contains dangerous voltages. Use a RCD (resi-
dual current device) to provide protection against elec-
trical shock. Prevent body contact with grounded sur-
faces (e.g. pipes, radiator, ranges or refrigerators).
Keep children and pets away
Do not let children or pets come into contact with the
tool, extension cable or work area.
Do not force the tool
It will work better and safer at the rate for which it was
intended
Use the right tool
Do not force small tools or attachments to do the job of a
heavy-duty tool. Do not use tools for purposes for which
they were not intended; for example do not use a circular
saw for cutting trees or logs.
Do not abuse cable
Never carry the tool by the cable or pull it to disconnect
it from the power socket. Keep the cable away from heat,
oil and sharp edges. Do not touch the metal plug pins
when connecting or removing the plug.
Secure Work
Use clamps or a vice to hold work. It is safer than using
your hand and it frees both hands to operate the tool.
Be
aware that this grinder is a powerful machine;
you must use two hands to control it.
Do not over-reach
Keep a proper footing and balance at all times.
Disconnect tools from power supply
When not in use, before servicing and when changing
accessories such as blades, bits and cutters.
Always
switch off and unplug the angle grinder from the
power supply before making adjustments or
changing grinding discs,
Remove adjusting keys and wrenches
Ensure that they are removed from the tool before swit-
ching on.
Avoid unintentional starting
Do not carry plugged in tools with your finger on the
switch. Check that the switch is off before plugging in to
socket.
Extension cables
Use only three core earthed extension cables suitable
for the power input of the tool (minimum cable size
1.5mm2). Plug into an earthed socket only.
When using a cable reel unwind it fully. Do not use long
extension cables.
Outdoors use
If the tool is suitable to be used outdoors, only use an
extension cable intended for outdoor use and marked
accordingly. Use a RCD (residual current device) to pro-
vide protection against electrical shock. Do not use in
rain or damp conditions.
Connect a dust extraction device
Whenever there are facilities for fitting a dust of fume
extraction system, make sure it is connected and used.
Use recommended accessories
The use of any other accessory or attachment other than
recommended in the instructions or catalogue may pre-
sent a risk of personal injury. Use extension cables suita-
ble for the power input of the grinder (minimum cable
size 1.5mm2). When using a cable reel unwind it fully.
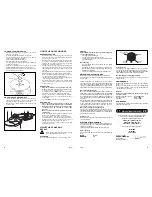
ASSEMBLING THE ACCESSORIES
Do not use this machine without the guard in place.
Ensure the grinder is unplugged from mains.
TO MOUNT THE GUARD
_ Without a grinding disc in the machine, place the
guard assembly (9) over the flange; make sure the
clamp on the guard assembly is pushed onto the
flange as far as it will go.
-
Tighten the clamp screw firmly with the hexagon key
provided.
+
11
12
7
9
6
5


