Page 9
Upper stop position
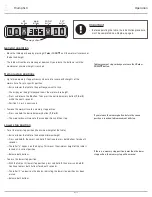
• To set the upper stop position (the maximum height of the table):
— Raise or lower the table to the desired maximum height.
— Press and hold S, then press and hold 3. Continue to press both buttons for about 3
seconds.
— The letter “L” appears on the display. This means the maximum height of the table is
locked at its current position.
— Release both buttons.
• To erase the upper stop position:
— With the table at its upper stop position, press and hold S, then press and hold 2.
Continue to press both buttons for about 3 seconds.
— The letter “C” appears on the display, indicating the upper stop position has been
erased.
— Release both buttons.
Changing the height display units
• To change the display units from centimeters to inches or from inches to centimeters:
— Press and hold S, then press and hold the DOWN
▼
button. Continue to press both
buttons for about 3 seconds.
— The height information will change between centimeters and inches.
— Release both buttons.
Adjusting the height readout
• To set the display height of the table to account for different worksurface thicknesses:
— Move the table to the lowest position by pressing the DOWN
▼
button.
— Measure and record the height of the top of the worksurface.
— Press and hold S until the first LED number blinks.
— Press and hold UP
▲
or DOWN
▼
, changing the number in the first LED position to
the number desired.
— Press and hold S again until the second LED number blinks.
— Press and hold UP
▲
or DOWN
▼
, changing the number in the second LED position
to the number desired.
— Press and hold S again until the third LED number blinks.
— Press and hold UP
▲
or DOWN
▼
, changing the number in the third LED position to
the number desired.
— Finish setting this new height readout by pressing S one more time.
• The new height readout is now ready to use.
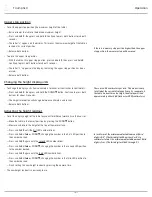
In inch format, the minimum adjustable amount (third
digit) is 0.5". (The third digit will be either 0 or 5.) In
centimeter format, the minimum adjustable amount (third
digit) is 1 cm. (The third digit will be 0 through 9.)
There are 2.54 centimeters per inch. This makes it easy
to tell what the current display units are. For example, if
the table is about three feet high, the display will read
approximately either 36.0 (inches) or 090 (centimeters).
If there is a memory stop position higher than the upper
stop position, the memory stop will be erased.
TriumphLX Operation
Summary of Contents for esi Triumph LX
Page 11: ......

