


2)
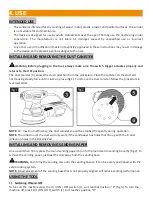
Cleaning the dust canister
Remove the dust canister (3) by pulling it from the dust outlet nozzle. Carefully shake the dust bag
assembly with the end cap opening pointing downward to remove the sanding dust.
3)
Selection of the sanding sheet
Grain size P
Application
P 60
For pre-sanding rough wood surfaces
P 80 or P 120
For plain sanding
P 240
For fine sanding of primed and painted surfaces
4)
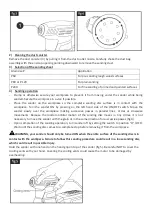
Sanding operation
-
Clamp or otherwise secure your workpiece to prevent it from moving under the sander while being
sanded. Secure the workpiece in a vice if possible.
-
Place the sander on the workpiece so the complete sanding disc surface is in contact with the
workpiece. Turn the sander ON by pressing on the left hand side of the ON/OFF switch. Move the
sander slowly over the workpiece making successive passes in parallel lines, circles or crosswise
movements. Because the random orbital motion of the sanding disc moves in tiny circles, it is not
necessary to move the sander with the grain or in the same direction for successive passes (fig 4).
-
Upon completion of the sanding operation, turn sander off by setting the switch to position “O” (OFF).
Wait until the sanding disc comes to a complete stop before removing it from the workpiece.
WARNING, your sander should only be turned ON when the entire surface of the sanding disc is in
contact with the workpece. Failure to follow this sanding procedure could result in a loose sanding disc,
which could result in possible injury.
Hold the sander with one hand on the hand gnp on top of the sander (fig 5). Be careful NOT to cover the
cooling vents with your hand. Covering the cooling vents could cause the motor to be damaged by
overheating.


