


This micro USB port is for uploading photos from USB drive only, it is not for connecting computer.
P
hotos in the USB drive can’t
b
e displayed directly in the frame, you have to upload
/
import photos
from USB drive to the frame first.
Y
ou can e
x
port
/
copy photos from the frame to USB drive.
R
emar
k
s
:
The us
b
flash drive is recogni
z
ed as
“
S
D
card
”
w
hen it
w
as inserted in the frame.
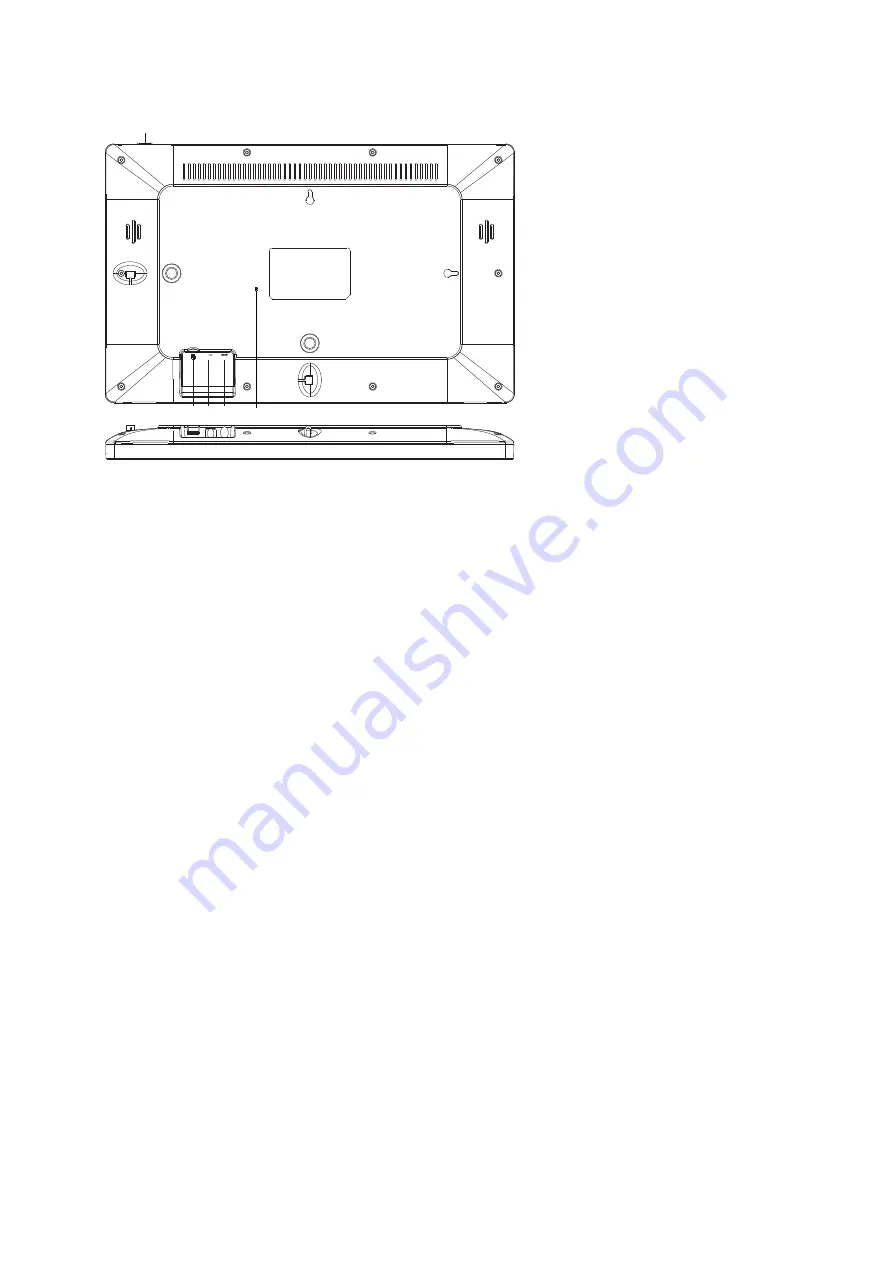
2
.
USB
3
.
RESET
Use a needle or paper clip to reset unit.
5. DC
Connect
DC
adapter
to
power
on
the
device.
1. POWER
Load external micro SD memory cards here.
P
hotos in the micro SD card can’t
b
e disp
l
a
y
ed direct
ly
in
the frame,
y
o
u
ha
v
e to
u
p
l
oad
/
import photos from micro SD card to the frame first
.
Y
o
u
can e
x
port
/
cop
y
photos from the frame to micro SD card
.
If you want to backup the photos in the frame, please
follow the below steps:
step 1: get a micro SD card(maximum 32GB), and put it in the micro SD card slot.
step 2: tap the screen and go to “Settings”
step 3: go to “Backup and Restore”
step 4: tick “ Automatic backup”
step 5: tap “Backup frame to SD card”
Then you will see a sentence “Last successful backup: 29 December...” under “Backup frame to SD
card”.
Use power adapter to power on the frame.
When it is on, press and hold power button for approximately 3 seconds to access reboot or power
off menu. Short press on power button will turn off/onscreen (but leave the photo frame in on
position).
Power off: To avoid any possible damage to the frame, please do not unplug the power adapter
from the frame directly, please always press the power button for 2 seconds and tap “Power off” .
ENG-1
4. Micro SD
(Support maximum 32G micro SD card
, NTFS format
)
4
2 5 3
1


