background image

Fat Shark                


                             8 

Detailed Operation 

Power Management 

The Scout uses a single of lithium ion 2600 mAh 18650 battery cell as the primary battery for the 
device. A fully charged battery should provide more than 2 hours of operation without needing 
replacement or recharging.  


WARNING: USING NON-CERTIFIED 18650 CELLS OR CAN CAUSE SERIOUS RISKS OF 
FIRE OR OTHERE HAZARDS AND VOIDS THE DEVICES WARRANTY    


When off, the battery level can be quickly checked with a short press of the power button. The 
LED ring with flash and display a color indicating the battery power based on the following: 
 

Battery Power 

LED Flashes 

LED Color 

80% -100% 

5 times 

Green 

60% - 80% 

4 times 

Orange 

40% - 60% 

3 times 

Orange 

20% - 40% 

2 times 

Orange 

0% - 20% 

1 time 

Red 


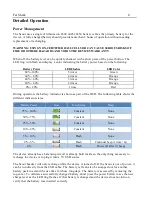
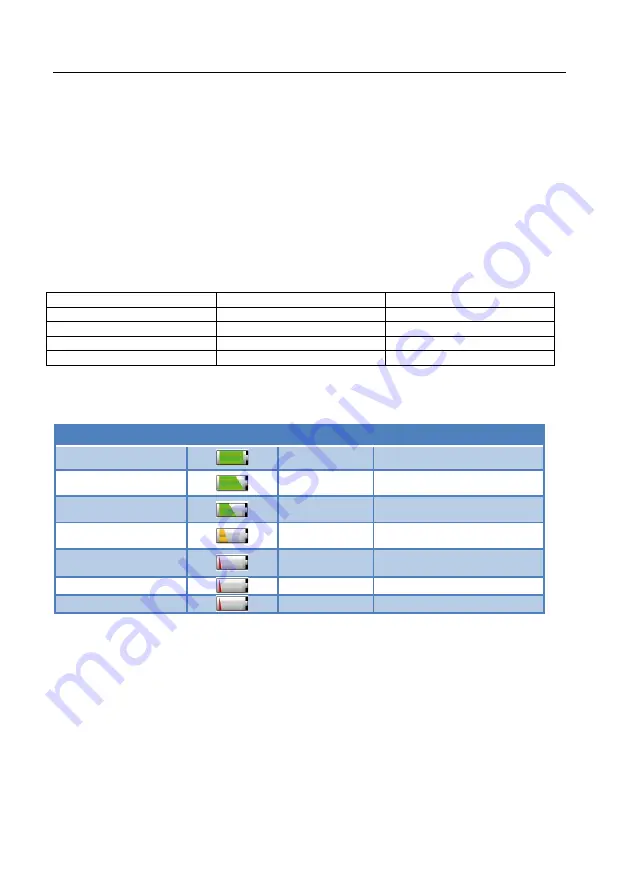
During operation, the battery indicator is shown as part of the OSD. The following table shows the 
different indicator states. 
 

Battery Power 

Icon 

Icon Status 

Beep 

75% - 100% 


Constant 

None 

50% - 75% 


Constant 

None 

25% - 50% 


Constant 

None 

10% - 25% 


Constant 

None 

5% - 10% 


Flash 

None 

0% - 5% 


Flash 

Continual beep (1 time / 2s) 

0% 


Flash 

Power off after 10 beeps 


The device already has a balancing circuit is already built inside so the only thing necessary to 
recharge the device is to plug it into a 5V USB source.  
 
The Scout headset will only recharge while the device is turned off. If the Scout is out of power, it 
can be run directly from the USB cable. The battery cell can also be swapped out for another 
battery pack to extend the use time for those long days. The battery is accessed by removing the 
top cover. To validate a successfully changed battery, short press the power button to see the new 
charge level as the LED ring flashes. If that battery is changed and the device does not turn on, 
verify that the battery was inserted correctly.  
 

Summary of Contents for Scout FSV1132

Page 1: ...Fat Shark 1 Scout MODEL FSV1132 USER MANUAL Revision D 05 21 2019 For more product information please visit www fatshark com All Rights Reserved ...

Page 2: ...tup 7 Detailed Operation 8 Power Management 8 General Lithium Polymer safety and handling instructions 9 Flight OSD and Controls 10 The OSD 10 Changing Bands and RX Channels 11 Adjusting Brightness and Contrast 11 Using an AV or Aux input 11 DVR Operation 12 Basic DVR functions 12 Video Format 12 Supported Formats 13 Playback 13 Advanced Features 13 Options Menu 15 DVR 15 Source 15 Band 15 Display...

Page 3: ...ibility The Scout has been designed and tested to work with a wide variety of currently available NTSC and PAL analog transmitters as well as display video directly from an audio visual or auxiliary source Due to the high number of different manufacturers and potential variation in quality it s impossible to for us to have tested with every product combination of transmitter and camera and some tr...

Page 4: ...Fat Shark 4 Scout Headset Overview ...

Page 5: ...he antenna LED will also display your channel color if in the Race Band mode You are ready to fly Options Menu The Scout has a wide array of adjustable options and deeper features that are accessed through the menu system To enter the options menu press and hold the center of the 5 way button The high level menu will come up on the screen The arrows are used to navigate through the options To exit...

Page 6: ...d E Band B Band A Channel Button active when the headset is on Short Press less than 0 5 seconds Decrements the current RX channel by 1 and will go back to channel 8 if currently on channel 1 Long Press hold for 2 seconds or more Does an automatic channel scan in the current band and will automatically select the channel with the strongest RX signal 5 Way Button in flight mode Short Press on the C...

Page 7: ...high level menu options 5 Way Button for DVR playback Long Press center joystick Exit file list interface or player interface Short Press Enter Key Play back recorded video by the unit Up Down on the joystick Select any file in turn Left Right on the joystick Page down or page up directly ...

Page 8: ... as part of the OSD The following table shows the different indicator states Battery Power Icon Icon Status Beep 75 100 Constant None 50 75 Constant None 25 50 Constant None 10 25 Constant None 5 10 Flash None 0 5 Flash Continual beep 1 time 2s 0 Flash Power off after 10 beeps The device already has a balancing circuit is already built inside so the only thing necessary to recharge the device is t...

Page 9: ...R charge LiPo batteries at currents greater than the 1C rating of the battery C equals the rated capacity of the battery NEVER continue to charge LiPo batteries if the charger fails to recognize full charge Overheating or swelling of the LiPo cells is an indication of a problem and the battery should be disconnected from the charger immediately and placed in a fireproof location ALWAYS discontinue...

Page 10: ...2 5665 5771 5825 CH4 MHz 5800 5769 5645 5790 5805 CH5 MHz 5820 5806 5885 5809 5785 CH6 MHz 5840 5843 5905 5828 5765 CH7 MHz 5860 5880 5925 5847 5745 CH8 MHz 5880 5917 5945 5866 5725 We ve set up a special set of BAND L that you can turn on in the menu if you want for experimental purposes CH1 5362 CH2 5399 CH3 5436 CH4 5473 CH5 5510 CH6 5474 CH7 5584 CH8 5621 Channel The current channel the headse...

Page 11: ...selectable bands can be adjusted by the user in the Options Menu A long press on the Channel button will enter RF MAX scan mode and the Scout will automatically search for the strongest signal in the current band The OSD will display RF MAX Scan in the center of the screen and the Scout will change to the channel with the highest RSSI value This allows you to quickly tune into a transmitter after ...

Page 12: ... that there is a video source displaying inside the Scout headset This source can either be an RX signal or an Aux AV input The default mode of the DVR is to manually start and stop recording with a short press of the center of the 5 way button When you press the button to start recording you should see a recording symbol in the upper right corner of the display as well as the duration of the reco...

Page 13: ... for greater control A short press on the enter button will pause unpause playback The Up button will enter fast forward mode and the down button will enter fast reverse mode Long press on the center button will return the to file selection long press on the center button again will return user to RX mode Advanced Features The DVR menu has two additional sub menus that enable more advances feature...

Page 14: ...Fat Shark 14 ...

Page 15: ...d remove bands from the selection interface FS adds removes the Fat Shark band from the RX input options Race adds removes Race Band from the RX input options Band E adds removes Band E from the RX input options Band B adds removes Band B from the RX input options Band A adds removes Band A from the RX input options Band L adds removes Band L from the RX input options Display changes what is shown...

Page 16: ...DVR Control Electrical Power Supply Standard 18650 Li ion battery RF Modules Infinite channel support on multiple bands Analog DVR MicroSD support to 64 GB Record Rate 6Mbps MJPG compression 60 fps MOV File playback native recording no codec support Upgradeable via SD card Battery 3 7V 2600mAh 18650 cell Interface 3 5mm AV in port 3 5mm 3p earphone port MicroSD USB C AUX port Mechanical Ergonomic ...

Page 17: ...ar line of sight exists between the transmitter and the video headset Two of the worst causes of interference are human bodies and reinforced concrete Place your TX antenna in open area in a vertical orientation Multipathing reflections off buildings tall objects causes signal cancellation and result in broken video Fly in open areas away from buildings or other tall structures i e barns hills Eve...

Reviews: