OPERATING INSTRUCTIONS
1.
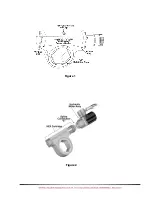
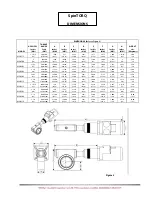
Each SpinTORQ hex cartridge (Fig 1) is a sealed unit. The
precision gearing is installed and adjusted at the factory.
DO NOT LOOSEN OR REMOVE THE END CAPS (A and B) OR
THE RETAINING RING ( C ).
Opening these connections will void the warranty.
2.
Check the gear grease level before each use. Open the gear
grease port. If grease is required, use only SpinTORQ Gear Grease
as supplied with the unit.
3.
The SpinTORQ hex cartridges are connected to the hydraulic motor
at the splined connection (E). Several cartridges of different sizes
may be interchangeably connected to the motor.
4.
To operate the SpinTORQ, refer to the “Pressure vs.
Torque Chart” supplied with each serial numbered unit.
DO NOT EXCEED THE MAXIMUM PRESSURE INDICATED ON THE
TORQUE CHART.
5.
Preset the SpinTORQ Control Unit or 603A Power Unit to the
desired torque, and follow the instructions of the control unit.
6.
Place the SpinTORQ on the nut and press one of the buttons on
the control pendant to start rotation. To reverse direction of
rotation, press the other button.
7.
During the torquing operation, allow the SpinTORQ cartridge
end cap “A” to react against an adjacent nut. This is the
preferred reaction point. When loosening, turn the SpinTORQ
over so end cap “A” is the reaction point.
8.
When the nut is torqued to preset level, the SpinTORQ
cartridge will stall.
9.
To release the reaction point, reverse the SpinTORQ rotation a few
degrees until loosened.


