141
Connecting to the Theta Wi-Fi
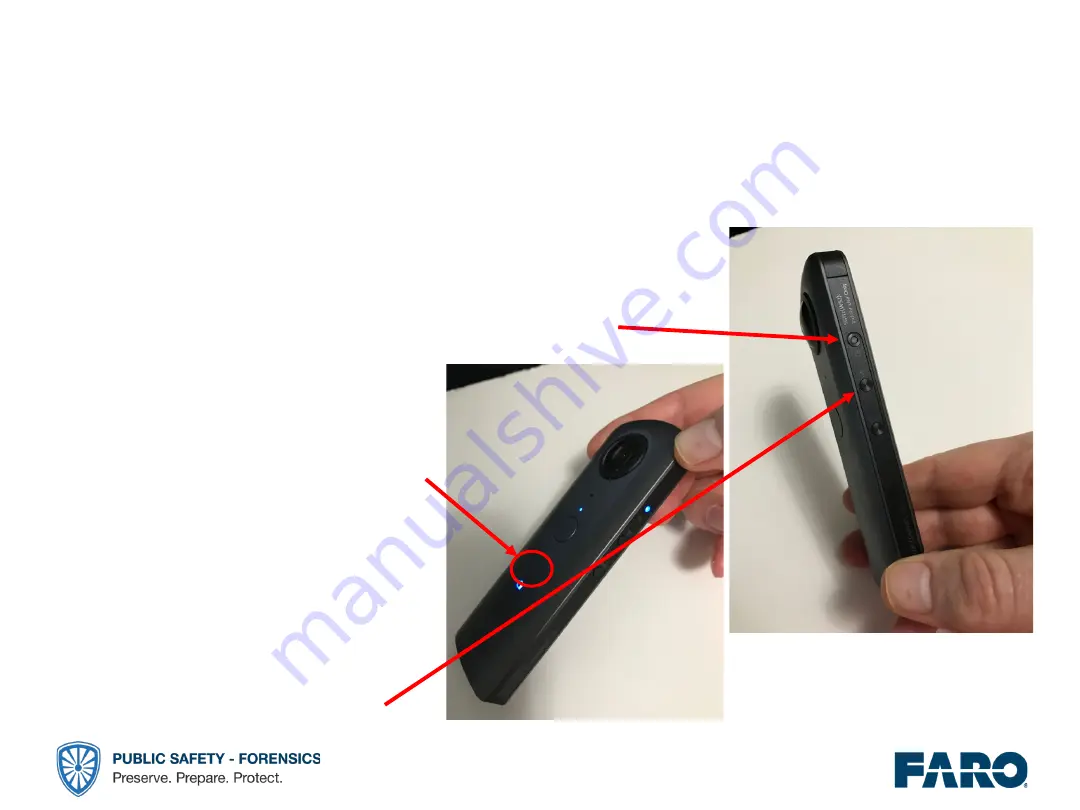
1. Remove the USB connector from the Theta camera
(the Wi-Fi can’t be enabled while it’s connected)
2. Turn on the Theta camera (if it is not
already on) by briefly pressing the
power button on the side
3. LED’s will illuminate
and the Wi-Fi icon
above the camera
icon will be flashing
4. If the Wi-Fi icon is
not flashing, press
the 2
nd
button
Summary of Contents for ScanPlan
Page 5: ...5 Front of ScanPlan...
Page 6: ...6 Rear of ScanPlan...
Page 14: ...14 Connecting Android to ScanPlan cont 2 Click Connect to ScanPlan 1 Open the ScanPlan App...
Page 17: ...17 Opening the ScanPlan App Return to the phone Home screen Tap the ScanPlan App...
Page 27: ...27 Connecting iPhone to ScanPlan cont The ScanPlan is ready to begin mapping...
Page 33: ...33 Connecting Android Phone to ScanPlan via Wi Fi cont Phone is connected via Wi Fi...
Page 36: ...36 Creating New Project cont 1 Enter new project name NO SPACES 2 Click Create...
Page 40: ...40 Pausing Mapping 1 Press the Pause icon to pause the mapping 2 Press YES to pause mapping...
Page 42: ...42 Pausing Mapping cont 1 Once map is located correctly press YES 2 Mapping can now continue...
Page 43: ...43 Adding Pictures and Files Select the green button...
Page 44: ...44 Adding Pictures and Files cont Choose the type file to be added photo in this instance...
Page 52: ...52 Adding Measurements 1 Select the ruler icon 2 Choose Measurement Option...
Page 54: ...54 Adding Measurements cont Measurement is captured and identified...
Page 62: ...62 Exporting Your Project to SCENE 2go 1 Select the menu tree 2 Choose Export...
Page 63: ...63 Exporting Your Project to SCENE 2go cont Choose Export to SCENE 2go...
Page 64: ...64 Exporting Your Project to SCENE 2go cont 1 Click OK 2 Click Yes...
Page 65: ...65 Exporting Your Project FARO Zone 2D to USB Drive 1 Select the menu tree 2 Choose Export...
Page 68: ...68 Exporting Your Project to USB Drive cont Click Yes to close the project...
Page 71: ...71 Exporting Your Project to WebShare Cloud cont 1 Select the menu tree 2 Choose Export...
Page 72: ...72 Exporting Your Project to WebShare Cloud cont 1 Choose WebShare 2 Enter account information...
Page 76: ...76 Exporting Your Project to VR Suite cont 1 Select the menu tree 2 Choose Export...
Page 77: ...77 Exporting Your Project to VR Suite cont Choose Export to VR Suite...
Page 80: ...80 Exporting Your Project to VR Suite cont 1 Select the menu tree again 2 Choose Export...
Page 81: ...81 Exporting Your Project to VR Suite cont Choose Export to VR Suite...
Page 82: ...82 Exporting Your Project to VR Suite cont Checking the license status...
Page 84: ...84 To Export to DXF 1 Select the menu tree 2 Choose Export...
Page 85: ...85 To Export to DXF cont 3 Choose DXF AutoCAD 4 Insert USB stick...
Page 86: ...86 To Export to DXF cont 5 Choose level for export and press OK 6 Export finished...
Page 97: ...97 Using ScanAssist cont 1 Start ScanAssist during mapping 2 Choose Generate a Set of Points...
Page 98: ...98 Using ScanAssist cont 3 ScanAssist will guide you through the parameter for the calculation...
Page 99: ...99 Using ScanAssist cont 4 Choose your Scanner model 5 Set the desired Point Distance...
Page 100: ...100 Using ScanAssist cont 5 Specify the desired scan resolution 6 Select the Quality setting...
Page 104: ...104 ScanAssist Removing a Location...
Page 105: ...105 Position has been removed ScanAssist Removing a Location...
Page 108: ...108 ScanAssist Triggering a Scan Scan Positions will turn blue after Scan is completed...
Page 109: ...109 Results in SCENE Unregistered scans...
Page 110: ...110 Results in SCENE Registered scans...
Page 111: ...111 Change Registration Method to Cloud to Cloud...
Page 117: ...117 Opening the SCENE 2go Project cont Select Allow Access...
Page 120: ...120 Opening a project in FARO Zone 2D 1 Open FARO Zone 2D 2 Select New Scene...
Page 121: ...121 Opening a project in FARO Zone 2D cont Select Import Select Import ScanPlan Project...
Page 122: ...122 Opening a project in FARO Zone 2D cont Select project file to be opened...
Page 125: ...125 Opening a project in FARO Zone 2D cont...
Page 126: ...126 Opening Project as a PDF Locate and open the USB drive on your computer...
Page 127: ...127 Opening Project as a PDF cont Select FAROScanPlan...
Page 128: ...128 Opening Project as a PDF cont Select Your Project...
Page 129: ...129 Opening Project as a PDF cont Open PROJECTS_META_DATA...
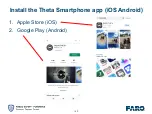
Page 140: ...140 Install the Theta Smartphone app iOS Android 1 Apple Store iOS 2 Google Play Android...
Page 143: ...143 Connecting to the Theta Wi Fi Android 1 Settings 2 Network Internet 3 Wi Fi...


