


Digital Video Recorder
Digital Video Recorder
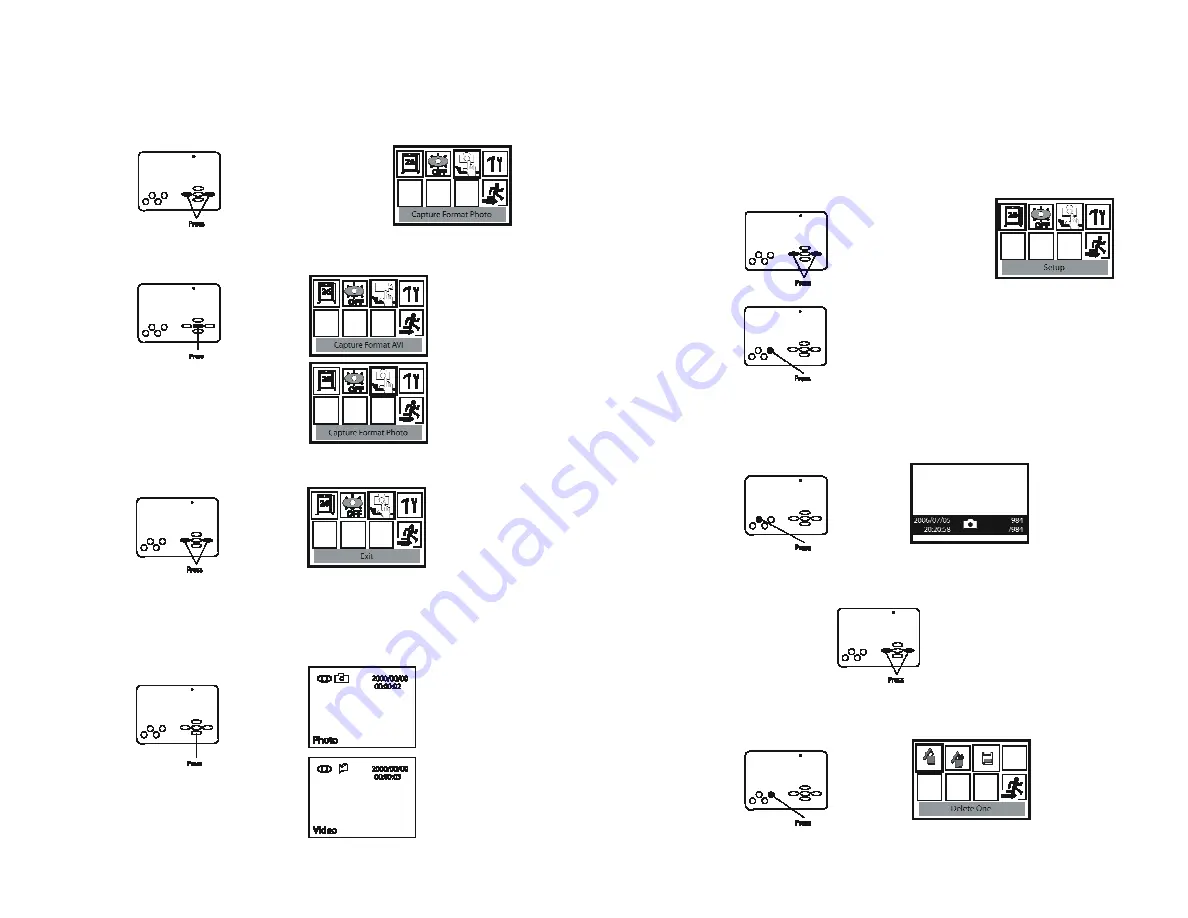
2. Press the
Left/Right
buttons to highlight
Capture Format Photo/AVI (Video).
11. Press
Left/Right
to highlight the
Exit
option and then press
OK
to return menu
Interface.
SHORTCUT:
To exit or go to previous menus press the
Menu
button on the DVR
3. Press
OK
to toggle Photo or AVI (video) recording.
Viewing and Deleting Saved Images
4. Press the
Left/Right
buttons to highlight
Exit
and then press
OK
to exit the menu.
SHORTCUT:
When viewing your camera press the
DOWN
arrow to quickly toggle between
Photo or Video.
1. When viewing a live image press
Mode
to enter playback mode and view saved images.
2. Press
Left/Right
to switch between images.
3. To delete an image, in playback mode press
Menu
to bring up the delete menu.
6
11


