background image


27 


7.5 Playing movie/video (Android only) 

Tip:    It is highly recommended to create a folder or folders where to copy all your movie 
files into the WiFi HDD for ease of use and file organization. 
 
The movie or video files can be played regardless if you are inside the “My WiDisk” (or 
“My Wifi Disk for Android) or “My Device.     
 
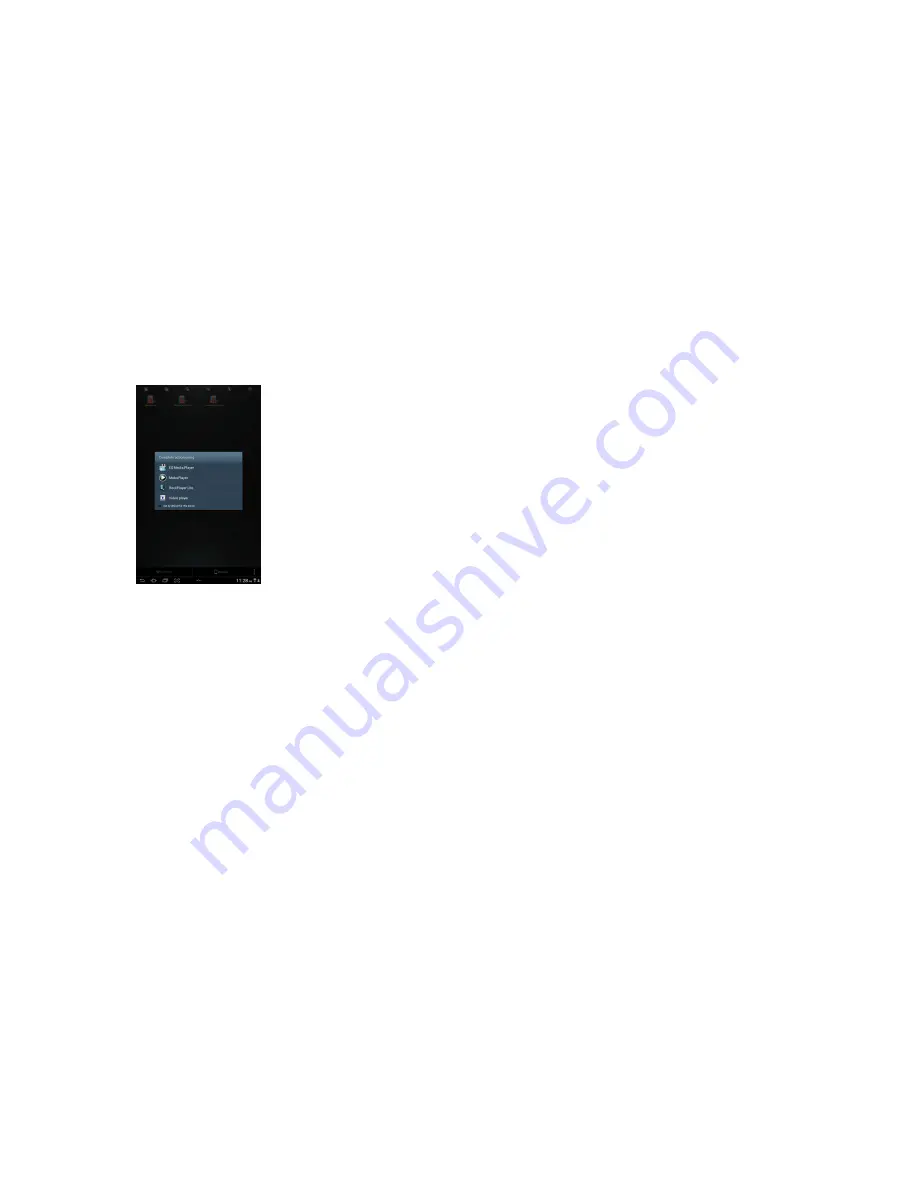
Simply locate the movie or video file that you would like to play. Click on the file and the 
list of movie player will appear as seen on the screenshot below. 


Note: The control panel will vary depending on the movie player installed on your Android 
devices. Please consult the movie player’s user guide on how to control the movie. 


Summary of Contents for MWiD25-DS

Page 1: ...FANTEC MWiD25 DS Wireless Docking Station ENGLISH ...

Page 2: ...D USER LOGIN 19 7 BASIC FUNCTIONALITY 20 7 1 IOS DEVICE CLIENT 20 7 2 ANDROID DEVICE CLIENT 22 7 3 PLAYING MUSIC AUDIO IOS AND ANDROID 24 7 4 PLAYING MOVIE VIDEO IOS ONLY 25 7 5 PLAYING MOVIE VIDEO ANDROID ONLY 27 7 6 VIEWING PLAYING PHOTOS IOS ONLY 28 7 7 VIEWING PLAYING PHOTOS ANDROID ONLY 30 7 8 SHARING PHOTOS IMAGES IOS ONLY 31 7 9 SHARING PHOTOS IMAGES ANDROID ONLY 32 7 10 OPENING VIEWING DOC...

Page 3: ...r The mobile wireless Docking Station can be accessed while the battery is charged 1 1 Product Features Supports USB 1 1 2 0 External Storage devices Supports SDXC SDHC and SD memory cards SD adapter is needed for Micro SD and Mini SD Wirelessly stream media for up to 5 users simultaneously Access and stream your music videos photos and data by using the a free app for iOS and Android operating sy...

Page 4: ...ess router to have internet access as illustrated below Wired mode Connect the RJ45 cable to an available RJ45 port of your router then enable the DHCP feature of the WiFi HDD to automatically assign an IP address A To function as SD memory card reader Simply connect the device into the computer s available USB port The device will automatically mount on your desktop or inside the My Computer ...

Page 5: ...e USB 2 0 cable 1 3 Minimum Requirements Internet Access and App Store Access PC Operating System Requirements o Windows XP Vista Windows 7 o Mac OS X 10 5 0 and later o Others Fedora 12 Linux and late PC Web Browser o Windows Supports Internet Explorer 7 0 and higher version o Mac Supports Safari 3 0 and higher version o Others Firefox 3 5 and higher version iOS 4 0 and above Android 2 3 and abov...

Page 6: ...een 5 35 C 2 2 Product Specification WiFi Standard 802 11 b g n Frequency 2 4 GHz Speed 72Mbps at 20MHz 150Mbps at 40MHz Network Interface 100Mbps Ethernet RJ45 WAN port for Internet access USB Interface Micro USB 2 0 for data transfer and charging Battery Capacity 2600mAh Power consumption SD Card reading and writing data 2 0W Stand by SD Card Sleep Mode 1 5W ...

Page 7: ...ther 3 1 2 Micro USB Interface The built in Micro USB 2 0 is for data transfer and charging the internal battery when connected directly into the computer s USB port or wall chargers 3 1 3 USB Host Interface The built in USB 2 0 Host Interface for connecting any USB Mass Storage device and for charging mobile devices such as smartphones MP3 Players and tablets 3 1 4 SD Card Slot Available SD slot ...

Page 8: ...r Blinking Fast Will soon shut down must be charged immediately SD Card LED White color Steady Light Ready to use Blinking Read Write activities LED Off No SD card inserted WiFi LED Blue Color Flashing Starts the Initialization process Steady Light a Initialization process completed b Ready to use c WiFi signal is normal LED Off The device is switched off WAN LED Green Color Connected to the Inter...

Page 9: ...ess the power button to switch on the device Wait for few seconds to complete the initialization process and your SD memory card is ready to use 4 2 USB External Storage Locate the USB port on the device Simply insert the any USB Mass Storage device including Flash Drives External Hard Drive and card readers into the USB port of the device as seen the image below Press the power button to switch o...

Page 10: ... your device and complete the configuration process 5 2 PC Client Login Utility The Client Utility software is the only software that you will need to run on your computer This software utility allows you to easily search and look for your WiFi Docking Station that is connected to your home network 1 To run the tool double click on the NAS Client Login Utility file and follow the on screen instruc...

Page 11: ... logged in it automatically mounts the storage area of the WiFi Docking Station onto your desktop 5 3 WiFi Docking Station Configuration Wizard 1 During the initial setup the Wizard will automatically run and will guide you through the process of configuring the WiFi Docking Station as seen on the screenshot below You can cancel this process by clicking on the X at the top right corner of the wind...

Page 12: ...ess network connections Password Type in the correct password to join the wireless network connection selected IP Address Select either DHCP or Manually assign an IP address By selecting DHCP the host will provide an automatic IP address to connect to the internet By selecting Manual you manually have to enter an IP address to connect to the internet Selecting the WAN Option By selecting the WAN o...

Page 13: ...des to 11Mbps 802 11b 54MBPS 802 11g and 150Mbps 802 11n Security The default setting is NONE WPA PSK WPA2 PSK Mixed WPA WPA2 PSK are available Password for WPA PSK WPA2 PSK Mixed WPA PSK WPA2 PSK Minimum 8 Maximum 63 characters IP Address The default IP address is set to 10 10 10 254 with subnet mask of 255 255 255 0 The IP address can be changed 4 Click on the Next button The next step is to cha...

Page 14: ... system will start rebooting This process will take approximately 5 minutes as seen on the image below The step by step wizard can be canceled at anytime Click on the X located at the top right of the window as seen on the image below Click on the OK button to exit or Cancel ...

Page 15: ...installation process has been completed the FANTEC MWiD25 app can be found on the desktop as seen on the image below 6 2 Wireless connect your iPhone iPad 1 Turn on the WiFi Docking Station Wait for few minutes to complete the initialization process The blue WiFi LED on the device should remain solid indicating that the initialization process has been completed 2 Click on the Settings icon on the ...

Page 16: ...e WifiSD xxxx as seen on the image below The 4 characters XXXX represent the 4 last digits of the device s MAC Address The standard WiFi password is 11111111 Once the WifiSD XXXX is selected a check mark will appear before the SSID and the WiFi logo will appear after the device s name on the top left of the display ...

Page 17: ...rd that you assigned during the configuration process The password is only required during the first login The device remembers the password and there is no need to enter it again 3 Once the password has been entered correctly you will be automatically connected to the My WiDisk The My WiDisk is the MWiD25 DS storage device ...

Page 18: ...lled FANTEC MWiD25 from the official website as seen on the screenshot below 2 Click on the Install button and follow the on screen instructions 3 Once the Client App is successfully installed the FANTEC MWiD icon can be found on your desktop as seen on the image below ...

Page 19: ...at the initialization process has been completed 2 Click on the Settings icon on your desktop as seen on the screenshot below 3 Click on the WiFi option Inside of the WiFi Network the SSID WifiSD xxxx should appear on the list Click on the WifiSD xxxx as seen on the image below The 4 characters XXXX represent the 4 last digits of the device s MAC Address The standard WiFi password is 11111111 ...

Page 20: ...launch the app as seen on the image below 2 Enter the Admin password that you assigned during the configuration process The password is only required during the first login The device remembers the password and there is no need to enter it again 3 Once the password has been entered correctly you will be automatically connected into the My WiDisk The My WiDisk is the WiFi HDD Storage ...

Page 21: ...g Station and the My Device is the device that you are using to access the WiFi Docking Station Following buttons that can be found inside the Main Screen are listed below My Device Main Screen View By default the Documents folder Music folder Photos Folder Videos folders and iPad or iPhone folder are available to easily organize your files inside the My Device My WiDisk Main Screen View ...

Page 22: ...n Back Button back to previous screen Share Button to share copy delete and upload files Search Box to search for specific file name and or extension My WiDisk the WiFi Docking Station SD Card or USB Device My Device the device that you are using to access the WiFi HDD or the Local Storage Status Button to view the download upload status list ...

Page 23: ...and the My Device is the device that you are using to access the WiFi Docking Station Following buttons that can be found inside the Main Screen are listed below My Device Main Screen View By default the Documents folder Music folder Photos Folder Videos folders and SDCard folder are available to easily organize your files inside the My Device My WiFi Disk Main Screen View ...

Page 24: ...ice Back Button back to previous screen Share Button to share copy delete and upload files Search Box to search for specific file name and or extension My WiFi Disk the WiFi Docking Station SD Card and USB Device My Device the device that you are using to access the WiFi HDD or the Local Storage Status Button to view the upload downalod status current song video playing and to exit the app ...

Page 25: ...ll automatically start to play Note Please consult your device s manual to check whether it will support the music audio files that you would like to play When clicked the current music that is playing will restart at 0 00 Clicked twice it will play the previous music file When clicked it will play the next music file When clicked it will start playing the music or audio file Click again the will ...

Page 26: ...ewind the music Tip You can exit the Music Player Interface at any time and it will continue to play the music or audio file in the background 7 4 Playing movie video iOS only Tip It is highly recommended to create separate folders for all your movie files stored on the WiFi HDD for easy use and file organization The movie or video files can be played regardless if you are inside the My WiDisk or ...

Page 27: ...l scale your movie according to the screen size 3 Click hold and slide the progress button to fast forward or rewind the movie 4 Click hold and slide the volume control to increase or lower the volume 5 Press and hold to fast rewind the movie while playing 6 Press and hold to fast forward the movie while playing 7 When clicked it will start playing or resume playing the movie 8 When clicked it wil...

Page 28: ...be played regardless if you are inside the My WiDisk or My Wifi Disk for Android or My Device Simply locate the movie or video file that you would like to play Click on the file and the list of movie player will appear as seen on the screenshot below Note The control panel will vary depending on the movie player installed on your Android devices Please consult the movie player s user guide on how ...

Page 29: ...files can be viewed as thumbnails or as a list as seen on the screenshot below All images that are not supported will have generic thumbnail or icon Click on pictures or images and it will automatically play as a slide show as seen on the screen shot below There are a few functions are available to control the slideshow You can swipe your finger across the screen to manually view the pictures or i...

Page 30: ...ackground music can be added while playing the slideshow Click the button as seen on the following screenshot Stop Continue button to stop or continue playback of the background music Select button search and locate the file or files that you would like to play as the background music Click on the to return to the slideshow as seen on the screenshot below Repeat button the background music will re...

Page 31: ...or as a list as seen on the screenshot below All images that are not supported will have generic thumbnail or icon Click on any pictures or images and it will automatically play as a slideshow as seen on the screen shot below There are a few functions are available to control the slideshow You can swipe your finger across the screen to manually view the pictures or images or click the button to au...

Page 32: ...re photos image to your friends and family Note An Internet connection is required to share photos images via email or accessing any social media network Click on the button located at the top right of the screen to show the three options available to share your photos images Click the button to return from the previous screen 1 E Mail button when clicked the default email app will automatically l...

Page 33: ...nding on the apps installed on your device Note Internet connection is required to share photos images via email or accessing any social media networks Click the button to return from the previous screen or to exit Click the button at the top right of the screen to show the three options to share your photos images 1 Share button when clicked a list of app installed on your Android will appear as ...

Page 34: ...pdf txt and ppt files To open or view any documents simply click on the file This will automatically open the supported file Click the button to return from the previous screen or click the button to send the file via email as seen on the screenshot below Note Internet connection is required to send emails ...

Page 35: ...sent as an attachment Once the email is sent there will be a message Mail Sent located at the lower left corner of the screen This is an indication that the email was sent successfully Mail Canceled message will appear at the lower left corner of the screen when the email is canceled See the screen shot below ...

Page 36: ...app on your Android device as seen on the screenshot below Note Internet connection is required to send emails To send the document as an attachment click on the button at the top right of the screen Click on the File then Send Once the Send button is clicked a list of installed app will appear on your screen You may select from the list of app that you wish to use to send or share the selected do...

Page 37: ...ir functions Click once all the files will be selected The icon will turn into blue color and a check mark will appear on every file Click once again all the files will be unselected The check marks will no longer be visible Tip You may select a single file or multiple files by clicking on the thumbnail As well you may click and hold on the thumbnail for few seconds and drag it to icon to download...

Page 38: ...k From the My Device when clicked the file or files may be uploaded to the remote storage or to My WiDisk or My WiFi Disk The up arrow indicates that you are currently in the My Device When clicked the list of files that are in queue for uploads downloads will appear as well as the list of files that were copied transferred successfully When clicked any selected files will be deleted ...

Page 39: ...nsfer a single file or multiple files to the local storage My Device 1 Click on the 2 Use your index finger to select a single file or multiple files or use the icon to select all files that should be copied transferred 3 Click on the 4 Select and click the folder where you want the file or files to be copied or transferred ...

Page 40: ...minimum 2 characters and maximum 26 characters Click the Cancel button to exit 5 Click on the Select button to start copying transferring files as seen on the screenshot below Note Successfully copied transferred file or files will be listed below inside the Recent window as seen on the screenshot above Click on the Clear button to remove or clear the list 6 Click anywhere on the screen and you wi...

Page 41: ... are in the My Device 1 Click on the 2 Use your index finger to select a single file or multiple files or use the icon to select all files that should be copied transferred 3 Click on the 4 Select and click the folder where you want the file or files to be copied or transferred ...

Page 42: ... click the Create button as seen on the screenshot below The folder name can have minimum 2 characters and maximum 26 characters Click the Cancel button to exit 5 Click on the Select button to start copying transferring files as seen on the screenshot below into the My WiDisk 6 Click anywhere on the screen and you will return to the previous screen Once done click on the to exit ...

Page 43: ...s to delete erase 3 Click on the to delete or erase the selected file or files A warning message will appear on the screen to confirm file deletion as seen on the screenshot below Click OK to continue deleting files 7 16 Upload download history and status If you have uploaded or download multiple files from to the WiFi HDD to your local storage My Device simply click the to check the files on the ...

Page 44: ...ure your PC is connected to the WiFi network of the device You can search for WiFiSD SSID and then enter WPA2 key 11111111 8 1 Explorer Function Our user friendly web based utility allows the user to upload files to the device create folders copy cut delete and rename folders and file names We provide similar functionality as the windows explorer which makes the interface much easier to use Refres...

Page 45: ... your computer supports a specific file type this file will automatically be openned Note Downloading a folder or folders is currently not supported Delete button to delete a file or files Renaming button to make name modification or changing the file name 8 1 2 Context Menu 1 On the file level you can right click using your mouse and a pop menu will appear You can Copy Cut Delete Rename or Downlo...

Page 46: ...t Delete or Rename the folder as seen on the screenshot below 3 Select multiple files and right click on the mouse will allow to either Copy Cut or Delete the files as seen on the screenshot below 4 Right clicking at the bottom of the window as seen below will allow to either Paste Create or Upload file or files ...

Page 47: ... or folders Create Command Right click on the blank area inside the window and a pop up menu will appear Select Create Enter the folder name inside the Create Folder window and click on Save Rename Command Right click on the folder or the file name and select Rename This allows to make changes on the folder or file name Click on the Save after the name has been changed Upload Command Right click a...

Page 48: ... 8 1 4 Drag and Drop A single file drag and drop is supported by the built in Web Management Interface simply click and hold on the file inside the main window and drag it to any folders available inside the Folders tree 8 2 Information Provides detailed information about the hardware condition network status and storage usage 8 2 1 Device Information Provides information about the Host Name Devic...

Page 49: ...l capacity hard drive manufacturer and available storage as seen on the screenshot below 8 2 3 Network Information Provides detailed information about the current network settings like the connection to access the internet WiFi SSID and IP Address as seen on the screenshot below 8 3 Settings ...

Page 50: ...n and no password is assigned Click on the X to cancel and exit 8 3 2 Disk Click on the Disk thumbnail This window provides information about the internal hard drive as seen on the screenshot below It provides detailed information including firmware version serial number disk total capacity and more As seen on the screenshot below the Volume screen provides information about the File System of the...

Page 51: ...in the combination of letters and numbers only 32 characters is the maximum allowable SSID length Channel The default setting is set to Auto There are 14 available channels to choose from Modes The default setting is 11b g n You can also manually set the modes to 11Mbps 802 11b 54MBPS 802 11G and 150Mbps 802 11n Security The default is set to NONE The WPA PSK WPA2 PSK Mixed WPA WPA2 PSK are availa...

Page 52: ...y Click on the Save button after the changes are done Click on the X to exit and cancel Click on the DHCP List button and it will provide a list of all the computers and devices connected to your WiFi HDD Device Please see the screenshot below 8 3 3 4 Internet Settings There are two available Internet Access options A Wireless Access AP Client Connect the WiFi Docking Station to another wireless d...

Page 53: ...ng Manual you have to manually assign an IP address to connect to the internet Wired Access Option By selecting the Wired option the Dynamic IP is selected as the default setting You can manually assign your own IP address by clicking on the green arrow and select the Static IP option 8 3 4 Services Windows sharing and network services are available to access the WiFi HDD 8 3 4 1 Windows Sharing S...

Page 54: ...System Settings 8 3 6 1 Time Settings The time settings can be changed based on the region on earth you are located You can choose to synchronize the time with the Internet or the time on your PC Click on the drop down list and select the region you are located and switch on the Automatically synchronize with an Internet Time Server This will automatically update the time when the WiFi Docking Sta...

Page 55: ...s 8 3 6 2 Backup Settings You can make a backup of the WiFi Docking Station system settings Please note that this process will not create a backup of the WiFi Docking Station contents stored on the hard disk itself Simply click on the Save button to create a backup file of the system settings This process will create a bin gz or bin file which can be used to restore the current settings later on a...

Page 56: ...en on the screenshot below Click on the Save button to restore the settings A warning message will appear as seen on the screenshot below The device will reboot automatically once the restore process has been completed and will return to login screen 8 3 6 3 Firmware Upgrade The device firmware can be upgraded by following the steps below ...

Page 57: ...ate file will appear at the bottom of the folder Click on the Save button to continue updating the firmware 4 During the firmware updating process a warning message as seen on the screenshot below appears and the device will reboot and go back to the login screen automatically 8 3 6 4 Resetting to factory defaults Resetting to factory defaults will reset all your customized settings or whatever ch...

Page 58: ...k to WiFiSD XXXX and all passwords including the admin password 8 3 6 5 About Settings The About screen provides information on the HostName Device Serial Number and Model Number MAC address CPU and Memory utilization like on the screenshot below 8 3 7 Wizard This will guide the user through a step by step process to configure the device 8 4 Help The Help icon provides information and basic instru...

Page 59: ...ESSED OR IMPLIED INCLUDING BUT NOT LIMITED TO THE IMPLIED WARRANTIES OF MERCHANTABILITY AND FITNESS FOR A PARTICULAR PURPOSE THE ENTIRE RISK AS TO THE QUALITY AND PERFORMANCE OF THE PROGRAM IS WITH YOU SHOULD THE PROGRAM PROVE DEFECTIVE YOU ASSUME THE COST OF ALL NECESSARY SERVICING REPAIR OR CORRECTION IN NO EVENT UNLESS REQUIRED BY APPLICABLE LAW OR AGREED TO IN WRITING WILL ANY COPYRIGHT HOLDER...

Reviews: