background image

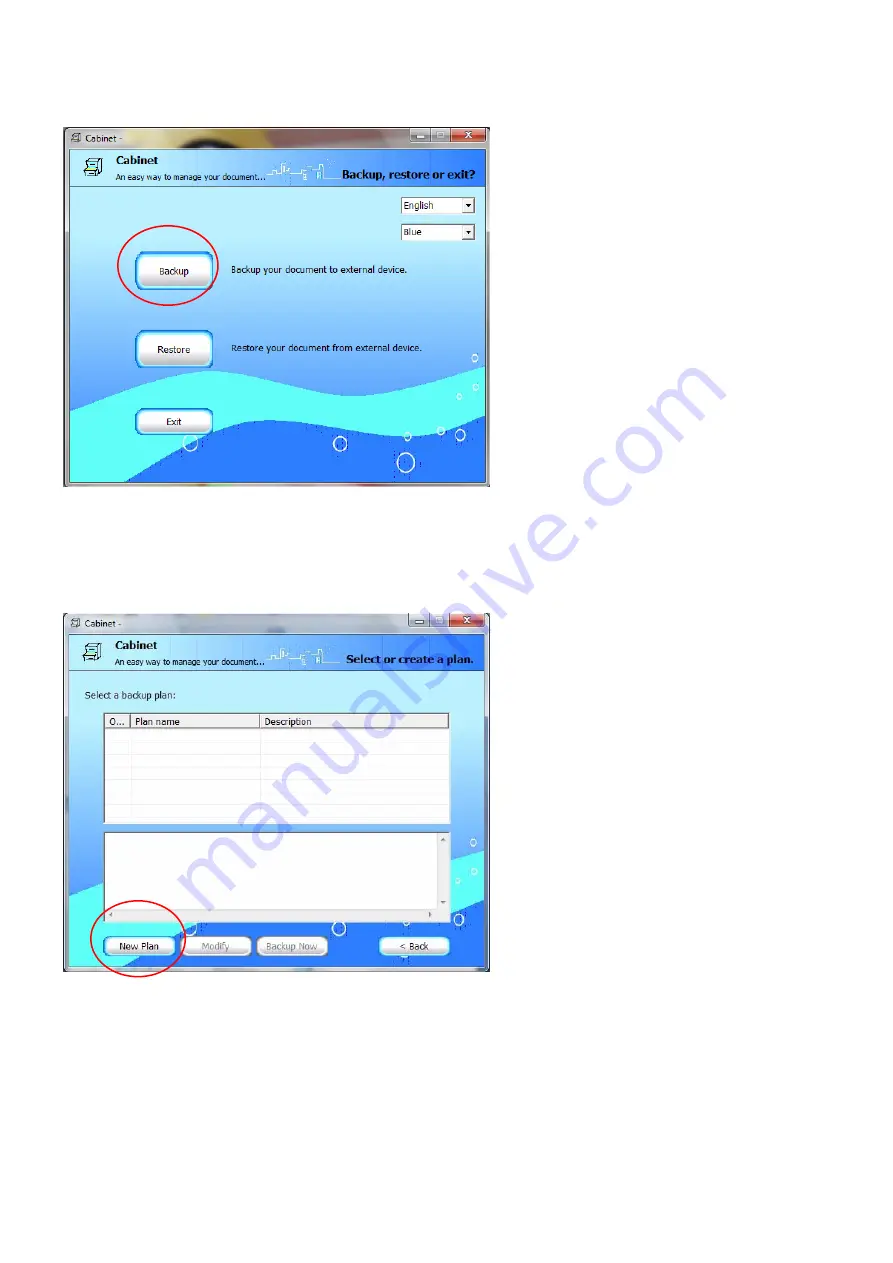
3. Click Backup to start a backup function. 


4. To create a backup plan, click on [New Plan] 


7

Summary of Contents for DB-ALU2

Page 1: ...FANTEC DB ALU2 3 5 Aluminum enclosure USER MANUAL ...

Page 2: ... Screws Power Adapter HDD fixing Pad Rubber feet Hardware Installation Guide STEP1 Open the enclosure You will see the internal structure of the enclosure STEP2 Push the HDD towards the electronic board and make sure the SATA connector is well connected 1 ...

Page 3: ...xing Pad STEP4 Close the enclosure and screw the rear cover back The assembling process is accomplished You can use the stand for vertical positioning If you want to use the device horizontally please mount the enclosed rubber feet at the bottom of the case 2 ...

Page 4: ...tted before you can use them Connect the FANTEC DB ALU2 via USB 2 0 on your PC Then turn the power on STEP1 Right click on My Computer icon and select the Manage column STEP2 Select Disk Management and you will see your External HDD showed Unallocated 3 ...

Page 5: ...STEP3 Right click on the Unallocated block and select New Partition STEP4 The New Partition Wizard will appear Please follow the instruction of the wizard to complete 4 ...

Page 6: ...STEP5 When partitioning is completed the external HDD will be recognized as a New Volume 5 STEP6 Double click My Computer You will see the new volume appears on your PC ...

Page 7: ...oftware is compatible with Windows 2000 XP Vista 7 Note The software can be found on the Driver CD 2 Click Next Æ Next Æ Install Æ Finish to execute the software installation Create a Backup 1 To open the software double click the Cabinet icon 2 On the top right site you can change the language and layout 6 ...

Page 8: ...3 Click Backup to start a backup function 4 To create a backup plan click on New Plan 7 ...

Page 9: ... side please select the folders files that should be saved On the right side you can choose the backup drive Click Next to go ahead 6 Here you can see a list about all selected backup files Click Next to go ahead 8 ...

Page 10: ...nter a name for the backup Optional it s possible to encrypt the backup For one touch backup button function enable the OTB function Click Next to finish the backup settings 8 Now you can see the Backup profile 9 ...

Page 11: ... you want to start a backup job please click on Backup Now or push the OTB button on the FANTEC DB ALU2 Restore data from FANTEC DB ALU2 to your computer 1 Click the Restore button to restore data files 10 ...

Page 12: ...d 3 On the left side you can select the files that should be restored On the right side you can choose the target folder Either you can restore to the original folder or choose a different folder to restore Click Next to finish the restore settings 11 ...

Page 13: ...4 If you set a password please type into the text field and click ok 5 The restore will start please wait until it s done 12 ...

Reviews: