


Page 3
Read through the instructions carefully
before you begin.
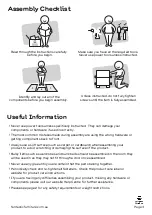
Assembly Checklist
Identify and lay out all of the
components before you begin assembly.
Unless instructed, do not fully tighten
screws until the item is fully assembled.
! Never use power tools unless specifically instructed. They can damage your
components or hardware if used incorrectly.
! The most common mistakes made during assembly are using the wrong hardware or
getting components back to front.
! Always use a soft surface (such as carpet or cardboard) when assembling your
product to avoid scratching or damaging the surface of the product.
! Bulky items such as wardrobes and bunk beds should be assembled in the room they
will be used in as they may not fit through a door once assembled.
! Never use any glue until you are certain that the parts belong together.
! Periodically check and re-tighten all fasteners. Check the product care label or
website for product care instructions.
! If you are having any difficulties assembling your product, missing any hardware or
components please visit our website Help Centre for further assistance.
! Please see page 2 for any safety requirements or weight restrictions.
Make sure you have all the required tools.
Never use power tools unless instructed.
Useful Information
fantasticfurniture.com.au


