


10
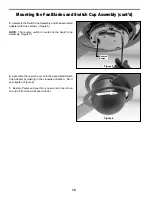
Figure 5
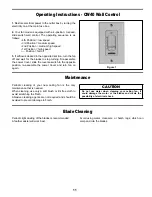
Figure 6
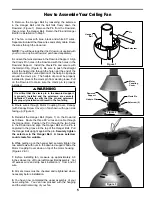
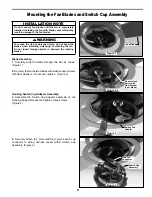
5.
Assemble the Switch Cup Assembly onto the assembled
Adapter with three screws. (Figure 5)
NOTE:
The reverse switch is located on the Switch Cup
Assembly. (Figure 5)
6.
Assemble the Lower Cover onto the assembled Switch
Cup Adapter by twisting in the clockwise direction. Don’t
over-tighten. (Figure 6)
7.
Restore Power and your fan is now wired to be turned
on and off from the wall speed control.
Mounting the Fan Blades and Switch Cup Assembly (cont’d)
Reverse
Switch
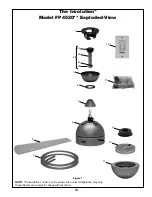
Summary of Contents for Involution FP4520 Series
Page 15: ......


