background image

English

   - 32 -

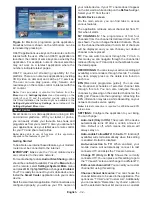
Figure b:

 Electronic programme guide application, 

broadcast video is shown on the left bottom, can be 
terminated by pressing 0. 

HbbTV applications use keys on the remote control to 
interact with the user. When an HbbTV application is 
launched, the control of some keys are owned by the 
application. For example, numeric channel selection 
may not work on a teletext application where the 
numbers indicate teletext pages. 

HbbTV requires AV streaming capability for the 
platform. There are numerous applications providing 
VOD (video on demand) and catch-up TV services. 
The user can use play, pause, stop, forward, and 
rewind keys on the remote control to interact with the 
AV content.

Note: You can enable or disable this feature from the 
More menu in Settings>System menu. Depending on the 
model of your TV and the selected country option in the 
First Time Installation this feature might be available in the 
Settings>System>Privacy Settings menu instead of the 
Settings>System>More menu.

Smart Center

Smart Center is a mobile application running on iOS 
and Android platforms. With your tablet or phone, 
you can easily stream your favourite live shows and 
programmes from your smart TV. Also; you can launch 
your applications, use your tablet as a remote control 
for your TV and share media files.

Note:  Being able to use all functions of this application 
depends on the features of your TV.

Getting Started

To be able to use internet based features, your modem/
router must be connected to the internet.

IMPORTANT:  Make sure the TV and mobile device 
are connected to the same network.

For media sharing feature 

Audio Video Sharing

 option 

should be enabled(if available). Press the 

Menu

 button 

on the remote, select 

Settings>System>More

 menu 

and press 

OK

. Highlight 

AVS

 and change as 

Enabled

Your TV is ready to connect to your mobile device now.
Install the 

Smart Center

 application onto your mobile 

device.
Start the smart center application. If all connections are 
configured properly, you will see your TV’s name on 

your mobile device. If your TV’s name doesn’t appear 
on the list, wait a while and tap on the 

Refresh 

widget. 

Select your TV from the list. 

Mobile Device screen 

On the main screen you can find tabs to access 
various features.

The application retrieves actual channel list from TV 
first when it starts.

MY CHANNELS:

 The programmes of first four 

channels from the channel list retrieved from the TV 
are shown. You can change the listed channels. Press 
on the channel thumbnail and hold. A list of channels 
will be displayed and you can choose your desired 
channel to be replaced.

TV:

 You can watch content through the TV tab. In 

this mode you can navigate through the channel list 
retrieved from your TV and click on thumbnails to view 
the detail pages.

RECORDINGS:

 You can view your active recordings(if 

available) and reminders through this tab. To delete 
any item, simply press on the delete icon found on 
each row.

EPG(

Electronic programme guide

): 

You can view 

the broadcast schedules of selected channel lists 
through this tab. You can also navigate through 
channels by pressing on the selected channel on the 
EPG grid. Please note that updating / refreshing the 
EPG information may take a while depending on your 
network and web service quality.

Note:  Internet connection is required for WEB based EPG 
informations.

SETTINGS: 

Configure the application to your liking. 


You can change;

Auto-lock (Only in IOS): 

The screen of the device 

automatically turns off after a certain amount of 
time. Default is off, which means the screen will 
always stay on.

Auto-enable FollowMeTV: 

FollowMeTV function (if 

available) will start automatically when this setting 
is enabled. Default is disabled.

Auto-connection to TV: 

When enabled, your 

mobile device will automatically connect to last 
connected TV and skips the TV search screen.

Change TV (Only in IOS): 

Shows the currently 

connected TV.


You can press on this setting to go to 

the “TV search” screen and change to a different TV.

Edit custom channel list:

 You can edit your custom 

channel list using this setting.

Choose channel list source:

 You can choose the 

channel list source to be used in the application. The 
options are “TV List” and “Custom List”. Additionally 
you can activate “Remember my choice” option to 
set the selected channel list source as a constant 

Summary of Contents for FL2D5505UH

Page 1: ...enna Connection 6 License Notification 7 Disposal Information 7 Specification 8 Remote Control 9 Connections 10 Switching On Off 11 First Time Installation 11 Media Playback via USB Input 12 USB Recording 12 Media Browser 13 FollowMe TV 14 CEC 14 E Manual 14 Settings Menu Contents 15 General TV Operation 20 Using the Channel List 20 Configuring Parental Settings 20 Electronic Programme Guide 20 Te...

Page 2: ...er cords When damaged it must be replaced this should only be done by qualified personnel Do not expose the TV to dripping or splashing of liquids and do not place objects filled with liquids such as vases cups etc on or over the TV e g on shelves above the unit Do not expose the TV to direct sunlight or do not place open flames such as lit candles on the top of or near the TV Do not place any hea...

Page 3: ...evision distribution system has therefore to be provided through a device providing electrical isolation below a certain frequency range galvanic isolator WALL MOUNTING WARNINGS Read the instructions before mounting your TV on the wall The wall mount kit is optional You can obtain from your local dealer if not supplied with your TV Do not install the TV on a ceiling or on an inclined wall Use the ...

Page 4: ...h an HDMI input The source device should also be at least HDMI 2 0a compatible in this case Accessories Included Remote Control Batteries 2 x AAA Instruction Book Standby Notifications If the TV does not receive any input signal e g from an aerial or HDMI source for 3 minutes it will go into standby When you next switch on the following message will be displayed TV switched to stand by mode automa...

Page 5: ...an option and press the Down direction button on the remote If you see Add to Home option you can add it to the Home menu Same way you can delete or change the position of any item in the Home menu Press the Down direction button and select Delete or Move option and press OK In order to move a menu item use the Right and Left direction buttons to select the position that you want the item to move ...

Page 6: ...enu you can access and manage your applications You can add new apps from the market or delete the existing ones Refer to Apps section for more information 5 Sources You can manage your input source references using the options of this menu To change the current source highlight one of the options and press OK 5 1 Source Settings Edit the names enable or disable selected source options There are a...

Page 7: ...ccess content that requires the upgrade The CI Plus Logo is a trademark of CI Plus LLP This product is protected by certain intellectual property rights of Microsoft Corporation Use or distribution of such technology outside of this product is prohibited without a license from Microsoft or an authorized Microsoft subsidiary Disposal Information European Union These symbols indicate that the electr...

Page 8: ... 5350 MHz CH52 CH64 200 mW 5470 5725 MHz CH100 CH140 200 mW Country Restrictions This device is intended for home and office use in all EU countries and other countries following the rele vant EU directive without any limitation except for the countries mentioned below Country Restriction Bulgaria General authorization required for outdoor use and public service France In door use only for 2454 24...

Page 9: ...ind Moves frames backwards in media such as movies 14 No function 15 Play Starts to play selected media 16 Pause Pauses the media being played 17 Stop Stops the media being played 18 Fast Forward Moves frames forward in media such as movies 19 My Button 2 20 YouTube Launches the YouTube application 21 Exit Closes and exits from displayed menus or returns to previous screen 22 Info Displays informa...

Page 10: ...en using the wall mounting kit available from a third party in the market if not supplied we recommend that you plug all your cables into the back of the TV before mounting on the wall Insert or remove the CI module only when the TV is SWITCHED OFF You should refer to the module instruction manual for details of the settings The Each USB input of your TV supports devices up to 500mA Connecting dev...

Page 11: ...d If you have any questions complaints or comments regarding this privacy policy or its enforcement please contact by email at smarttvsecurity vosshub com Highlight Next and press OK button on the remote control to continue and the Network Internet Settings menu will be displayed Please refer to Connectivity section to configure a wired or a wireless connection If you want your TV to consume less ...

Page 12: ...ms in the formatting process Wait a little while before each plugging and unplugging as the player may still be reading files Failure to do so may cause physical damage to the USB player and the USB device itself Do not pull out your drive while playing a file You can use USB hubs with your TV s USB inputs External power supplied USB hubs are recommended in such a case It is recommended to use the...

Page 13: ...ata If USB disk writing speed too slow to record message is displayed on the screen while starting a recording try restarting the recording If you still get the same error it is possible that your USB disk does not meet the speed requirements Try connecting another USB disk Media Browser You can play back music and movie files and display photo files stored on a USB storage device by connecting it...

Page 14: ... main functions after the connected HDMI source has been selected To terminate this operation and control the TV via the remote again press and hold the 0 Zero button on the remote control for 3 seconds You can disable the CEC functionality by setting the related option under the Settings System More menu accordingly The TV supports ARC Audio Return Channel This feature is an audio link meant to r...

Page 15: ...nding on the Picture Zoom setting Highlight and press OK then use directional buttons to shift the picture upwards or downwards Film Mode Filmsarerecordedatadifferentnumberofframespersecondtonormaltelevisionprogrammes Turn this feature on when you are watching films to see the fast motion scenes clearly Skin Tone Skin tone can be changed between 5 and 5 Colour Shift Adjust the desired colour tone ...

Page 16: ...ly AVL Automatic Volume Limiting Sets the sound to obtain fixed output level between programmes Headphone Lineout When you connect an external amplifier to your TV using the headphone jack you can select this option as Lineout If you have connected headphones to the TV set this option as Headphone Please ensure before using headphones that this menu item is set to Headphone If it is set to Lineout...

Page 17: ...twork channels D Cable Searches for cable network channels Satellite Searches for satellite network channels Analogue fine tune You can use this setting for fine tuning analogue channels This feature is not available if no analogue channels are stored and if currently watched channel is not an analogue channel Satellite Settings Displays satellite settings Satellite list Displays available satelli...

Page 18: ...ble only if the broadcaster supports it Note Audio description sound feature is not available in recording or time shifting mode Netflix If this feature is supported by your TV you can view your ESN number and deactivate Netflix ESN number is an unique ID number for Netflix created especially to identify your TV Note For 4K video streaming a minimum 25Mb s internet connection speed is required For...

Page 19: ...completely Press Left or Right button to enable or disable the feature CEC Auto Power On This function allows the connected HDMI CEC compatible device to turn on the TV and switch to its input source automatically Press Left or Right button to enable or disable the feature Speakers To hear the TV audio from the connected compatible audio device set as Amplifier You can use the remote control of th...

Page 20: ...t to 18 as default Child Lock If this option is set to On the TV can only be controlled by the remote control In this case the control buttons on the TV will not work Internet Lock If this option is set to ON the internet using applications will be disabled Set to OFF to release these applications again Set PIN Defines a new PIN number Default CICAM PIN This option will appear as greyed out if no ...

Page 21: ...ssing the coloured buttons Follow the instructions displayed on the screen Digital Teletext Press the Text button to view digital teletext information Operate it with the coloured buttons cursor buttons and the OK button The operation method may differ depending on the contents of the digital teletext Follow the instructions displayed on the digital teletext screen When the Text button is pressed ...

Page 22: ...ge is displayed on the screen while starting a recording try restarting the recording If you still get the same error it is possible that your USB storage device does not meet the speed requirements Try using a different USB storage device PC Input Typical Display Modes The following table is an illustration of some of the typical video display modes Your TV may not support all resolutions Index R...

Page 23: ... 720p 50Hz 60Hz O 1080i 50Hz 60Hz O 1080p 24Hz 25Hz 30Hz 50Hz 60Hz O 3840x2160p 24Hz 25Hz 30Hz 50Hz 60Hz O 4096x2160p 24Hz 25Hz 30Hz 50Hz 60Hz O X Not Available O Available In some cases a signal on the TV may not be displayed properly The problem may be an inconsistency with standards from the source equipment DVD Set top box etc If you do experience such a problem please contact your dealer and ...

Page 24: ...4K2K 30fps 100Mbps MKV mkv WebM webm Picture File Formats Image Photo Resolution width x height JPEG Base line 15360x8640 Progressive 1024x768 PNG non interlace 9600x6400 interlace 1200x800 BMP 9600x6400 Audio File Formats Audio Codec Sample rate Bit Rate Container MPEG1 2 Layer1 16KHz 48KHz 32Kbps 448Kbps MP3 mp3 AVI avi ASF asf Matroska mkv mka MPEG transport stream ts trp tp MPEG program stream...

Page 25: ...v AVI avi Matroska mkv mka 3GPP 3gpp 3gp MP4 mp4 mov m4a LBR cook 8KHz 11 025KHz 22 05KHz 44 1KHz 6Kbps 128Kbps RM ra FLAC 8KHz 96KHz 1 6Mbps Matroska mkv mka Subtitle File Formats Internal Subtitles Extension Container Subtitle Code dat mpg mpeg vob MPG MPEG DVD Subtitle ts trp tp TS DVB Subtitle mp4 MP4 DVD Subtitle UTF 8 Plain Text mkv MKV ASS SSA UTF 8 Plain Text VobSub DVD Subtitle avi AVI 1 ...

Page 26: ...rs by using DVI converter cable DVI to HDMI cable not supplied you can refer to the following resolution information 56Hz 60Hz 66Hz 70Hz 72Hz 75Hz 640x480 x x 800x600 x x x 1024x768 x x x 1280x768 x x 1280x960 x 1360x768 x 1366x768 x 1280x1024 x x x 1400x1050 x 1600x900 x 1920x1080 x ...

Page 27: ... DNS settings of the TV Highlight the desired one and press Left or Right button to change the setting from Automatic to Manual Now you can enter the Manual IP and or Manual DNS values Select the related item in the drop down menu and enter the new values using the numeric buttons of the remote Highlight Save and press the OK button to save settings when complete Wireless Connectivity To Connect t...

Page 28: ...device has WLAN feature you can connect it to your TV via a router in order to access the content in your device For this your mobile device must have an appropriate sharing software Connect your TV to your router following the steps mentioned in the sections above Afterwards connect your mobile device to the router and then activate the sharing software on your mobile device Then select files tha...

Page 29: ...from listed devices Confirm the request for connection on your TV screen and do the same on your hand held device screen If no pairing is done image transfer or audio streaming to the TV will not be possible The images sent by mobile device will be displayed on the TV without confirmation request if the image file is suitable You can also save the image file to a connected USB memory drive or set ...

Page 30: ... press OK Available media server devices in the network will be listed Select one and press OK to continue The media browser will then be displayed Refer to the Media Browser menu section for further information on file playback If a problem occurs with the network switch your television off at the wall socket and back on again Trick mode and jump are not supported with the Audio Video Sharing fea...

Page 31: ...standard that seamlessly combines TV services delivered via broadcast with services delivered via broadband and also enables access to Internet only services for consumers using connected TVs and set top boxes Services delivered through HbbTV include traditional broadcast TV channels catch up services video on demand electronic programme guide interactive advertising personalisation voting games s...

Page 32: ... name doesn t appear on the list wait a while and tap on the Refresh widget Select your TV from the list Mobile Device screen On the main screen you can find tabs to access various features The application retrieves actual channel list from TV first when it starts MY CHANNELS The programmes of first four channels from the channel list retrieved from the TV are shown You can change the listed chann...

Page 33: ...Remote Feature You can use your mobile device as a remote control for your TV once it has connected to the TV To use smart remote s full features tap on the Up arrow on the bottom left side of the screen Voice Recognition You can tap on the Microphone widget and manage your application giving voice commands such as Volume Up Down Programme Up Down Note This feature is only for android based device...

Page 34: ...en and check if you are logged in to your Amazon account if not you might need to re login and determine a Friendly Name again for your TV in order to be able to continue to control your TV with Alexa device Example Commands Here are some of the commands that you ll be able give to your Alexa enabled TV Command Function Alexa turn on FN Powers on the TV Alexa turn off FN Powers off the TV Alexa pl...

Page 35: ...acture we cannot guarantee compatibility with future DVB transmissions due to changes that may be implemented in broadcast signals and technologies Some digital television functions may not be available in all countries We continually strive to improve our products therefore specifications may change without prior notice For advice on where to purchase accessories please contact the store where yo...

Reviews: