Gnd
3
g
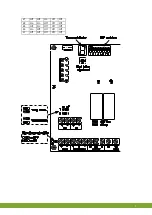
Install the IMS and associated components as follows:
1. Mount the IMS (see page 3)
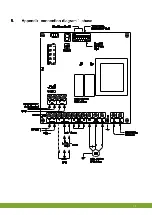
2. Connect the IMS (see page 3)
3. Test the IMS (see page 7)
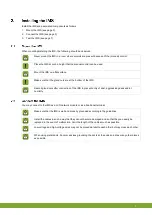
When mounting/installing the IMS, the following should be observed:
Never mount the IMS in a room where animals are present because of the (manual) control.
Place the IMS at such a height that the manual control can be used.
Mount the IMS on a flat surface.
Make sure that the gland nuts are at the bottom of the IMS.
Seal all gland nuts after connection of the IMS to prevent entry of dust, aggressive gases and/or
humidity
You may connect to the IMS as an I/O network module or as a traditional terminal.
Make sure that the IMS is well and properly grounded according to the guidelines.
Install the cables in such a way that they cannot become damaged and so that they can easily be
replaced in the event of malfunction. Limit the length of the cables much as possible.
Low-voltage and high-voltage wires may not be placed parallel to each other but may cross each other.
When using metal ducts, Fancom advises grounding the ducts at the ends and at as many other places
as possible.
Summary of Contents for IMS
Page 1: ...G N D Gnd...
Page 20: ...Gnd 17 g...
Page 21: ...Gnd 18 g...
Page 29: ...gNd 5 n...
Page 41: ...gNd 17 n...
Page 42: ...gNd 18 n...
Page 62: ...gnD 17 d...
Page 63: ...gnD 18 d...

