background image


1. Copyright 

Copyright ©2018 Famoco. All rights reserved. 

This manual is protected under international copyright laws. 

No  part  of  this  manual  may  be  reproduced,  distributed,  translated,  or 
transmitted  in  any  form  or  by  any  means,  electronic  or  mechanical, 
including photocopying, recording, or storing in any information storage 
and retrieval system, without the prior written permission of Famoco. 

We  reserve  the  right  to  make  modifications  on  print  errors  or  update 
specifications without prior notice. 


2. Trademarks 

o


Famoco  and  the  Famoco  logo  are  registered  trademarks  of 
Famoco.


o


The Android logo is the trademark of Google, Inc.


o


Bluetooth®  is  a  registered  trademark  of  Bluetooth  SIG,  Inc. 
worldwide.


o


Wi-Fi® and the Wi-Fi logo are registered trademarks of the Wi-Fi 
Alliance.


o


All  other  trademarks  and  copyrights  are  the  property  of  their 
respective owners.


FAMOCO SAS 
59 avenue Victor Hugo, 75116 Paris 

– FRANCE 

[email protected]


www.famoco.com 


Summary of Contents for PX320

Page 1: ...User Manual PX320 Professional Android Device...

Page 2: ...ng started 10 8 1 How to switch the device ON or OFF 10 8 2 Home screen and synchronization 11 8 3 LED colors 13 8 4 How to access the dashboard 14 8 5 How to find your device s serial number 15 8 6 H...

Page 3: ...permission of Famoco We reserve the right to make modifications on print errors or update specifications without prior notice 2 Trademarks o Famoco and the Famoco logo are registered trademarks of Fam...

Page 4: ...in the same compartment of your vehicle as your device and accessories 4 Limitation of liability Famoco shall not be liable for any loss of profits or indirect special incidental or consequential dam...

Page 5: ...from software provided by service providers or carriers and is subject to change without prior notice o Available features and additional services may vary by device software or service provider o App...

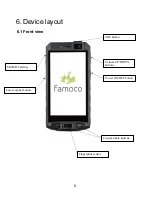
Page 6: ...6 6 Device layout 6 1 Front view Power ON OFF button Volume UP DOWN buttons Customizable buttons Fingerprint sensor Laser scanner button SOS button SIM SD Card tray...

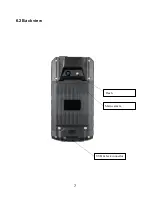
Page 7: ...7 6 2 Back view Main camera Flash USB Jack connector...

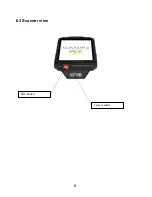
Page 8: ...8 6 3 Scanner view Laser scanner SOS button...

Page 9: ...river Note o The items supplied with the device and any available accessories may vary depending on the region or service provider o The supplied items are designed only for this device and may not be...

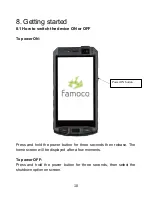
Page 10: ...OFF To power ON Press and hold the power button for three seconds then release The home screen will be displayed after a few moments To power OFF Press and hold the power button for three seconds the...

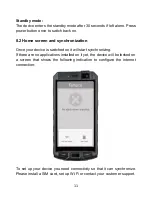
Page 11: ...nce your device is switched on it will start synchronizing If there are no applications installed on it yet the device will be locked on a screen that shows the following indication to configure the i...

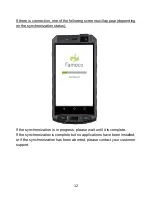
Page 12: ...depending on the synchronization status If the synchronization is in progress please wait until it is complete If the synchronization is complete but no applications have been installed or if the syn...

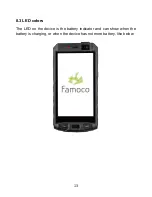
Page 13: ...13 8 3 LED colors The LED on the device is the battery indicator and can show when the battery is charging or when the device has not more battery like below...

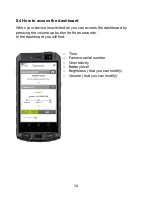
Page 14: ...e is switched on you can access the dashboard by pressing the volume up button for three seconds In the dashboard you will find o Time o Famoco serial number o Connectivity o Battery level o Brightnes...

Page 15: ...device To charge the device use the USB port shown in chapter 6 2 with the cable supplied 1 Insert the charger cable carefully Check that the plug and socket are aligned 2 The indicator light will tu...

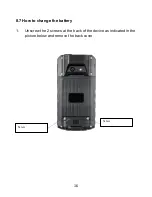
Page 16: ...16 8 7 How to change the battery 1 Unscrew the 2 screws at the back of the device as indicated in the picture below and remove the back cover Screw Screw...

Page 17: ...t leave the battery in a discharged state Keep your device and battery cool High temperatures degrade the battery more quickly The battery will not charge when over 45 C Do not leave on charge for mor...

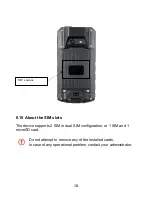
Page 18: ...SIM slots The device supports 2 SIM in dual SIM configuration or 1 SIM and 1 microSD card Do not attempt to remove any of the installed cards In case of any operational problem contact your administr...

Page 19: ...D barcode scanner Zebra SE4710 NFC Type of tags supported Mifare Desfire Connectivity 2G GPRS ED GE 850 900 1800 1900 MHz 3G 850 900 1900 2100 MHz 4G FDD 800 900 1800 2100 2600 MHz TDD 1900 2300 2500...

Page 20: ...unauthorized disassembly repair or modification 4 Power surges lightning fire flood or other natural events 5 Use with unauthorized third party products such as generic chargers 6 Any other cause beyo...

Page 21: ...light or near other heat sources where temperatures could exceed 45 C Keep the device and all accessories away from children In the unlikely event of a battery leakage avoid contact with eyes or skin...

Page 22: ...genuine or 3rd party chargers Do not attempt to dismantle the device or any of its accessories Do not put the device into a microwave oven dryer or high pressure container Do not use the device immedi...

Page 23: ...battery life is considerably reduced Please recycle the packaging and all parts Emergency service coverage is dependent on network availability and battery status It is always good practice to switch...

Page 24: ...www famoco com December 2018...

Reviews: