background image

6

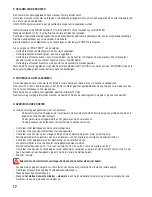
3/ CHARGING THE BOOSTER

The booster must always be left to charge when it is not being used.

Before charging your booster, make sure that the cables are wound separately on the booster unit identically to the photo in 

the parts list. 

All FACOM boosters must be charged in ventilated and dry premises.

Only use the FACOM 12V 7A  B.124HDCH charger to charge your BOOSTER.

Disconnect the 12V - 24V selection plug. Do not connect it during charging.

Check that the two 16A protections on the rear of the booster are activated. If they are not, press down on them firmly.

Connect the charger’s 4-pin plug in the booster.

Connect the charger’s power plug to the mains. The «POWER» light comes on green.

Press the charger’s «START STOP» button.

-   The light in the top left comes on yellow: the battery is charging.

-   The light in the bottom left comes on green: the battery is charging.

-   The light in the top right comes on red: internal booster problem. In this case, you must disconnect it and contact your  


  FACOM distributor.

-   The light in the bottom right comes on red: the booster and the charger are not connected.

When the booster is charged you must leave it charging. The B.124HDCH is equipped with a «FLOATING» mode which keeps 

the booster charged without the risk of damaging it.

4/ CHECKING THE CHARGE LEVEL

To check your booster’s charge level, you must make sure that it is disconnected from its charger.

The 12V – 24V booster contains two 12V batteries. The voltmeter indicates the average voltage of the two batteries.

Press the charge check button. 

For a full charge, the voltmeter must indicate 13V.

You must only use the booster if the needle is inside the yellow or green zones during the voltage test.

5/ USING THE BOOSTER

Before using the booster, you must check that: 

       -    The vehicle is wedged, the transmission is in neutral and that the vehicle does not present any faults and is in good    


mechanical condition.

       -    The operators are trained and know how to use the booster.

       -    The vehicle manufacturer’s procedures are followed.

-    Check that the booster’s charge level is sufficient.

-    Check that the voltage selection plug is disconnected.

-    Check that the booster is placed on a stable surface, either on the ground or on the vehicle.

-    First connect the red positive clip + to the vehicle’s positive te then connect the black negative clip  - .

-    Check that the sound alarm and the polarity reversal alarm light are off. 

     If the alarm is active, disconnect the booster immediately.

-    Connect the voltage selector to 12V for a 12V vehicle and to 24V for 24V vehicles.

-    Check that the booster and its cables, or any other object or person, are not in contact or near a mobile mechanism inside   

  the engine. (Belt for example).

-    Start the vehicle.

           Caution, make sure you do not activate the starter for longer than 8 seconds. 

-   If several tests are necessary to start the vehicle, wait 3 minutes between two tests.

-   Check that the charge level is sufficient between two tests.

-  Disconnect the voltage selection plug.

-    After the vehicle starts, 

disconnect the black negative clip - first

 and store the cable and the clip, then disconnect the red 

positive clip + and store the cable and the clip.

Summary of Contents for B124.HD

Page 1: ...1 B124 HD Notice originale Original instructions Originalbedienungsanleitung Oorspronkelijke gebruiksaanwijzing Manual original Istruzioni originali Manual original BOOSTER...

Page 2: ...TER 12 Volts sur un v hicule 24 Volts Toute intervention d apr s vente doit tre r alis e par le Service Apr s Vente FACOM 2 SPECIFICATIONS FR B124 HD Tension d utilisation 12V 24V Courant Peak Max 775...

Page 3: ...Appuyer sur le bouton de contr le de charge Pour une pleine charge le voltm tre doit indiquer 13V Il ne faut utiliser le booster que si l aiguille se trouve dans les zones jaunes ou vertes lors du tes...

Page 4: ...identels aux bornes de celui ci et contre les surcharges Pour contr ler le fusible il suffit d appuyer sur le bouton du contr le de charge Si la LED bleu situe sous le fusible s allume celui ci est en...

Page 5: ...OOSTER on a 24 Volt vehicle After sales interventions must be performed only by FACOM After sales 2 SPECIFICATIONS EN B124 HD Usage voltage 12V 24V Max Peak current 7750A Cranking current 3200A TCFC c...

Page 6: ...erage voltage of the two batteries Press the charge check button For a full charge the voltmeter must indicate 13V You must only use the booster if the needle is inside the yellow or green zones durin...

Page 7: ...ooster Caution Only use an original BF500A reference fuse 8 GUARANTEE Your FACOM BOOSTER is guaranteed 1 year from its invoice date against all manufacturing flaws List of exclusions of guarantee for...

Page 8: ...V Fahrzeug anschlie en Ein 12 V BOOSTER Starthilfeger t nie an ein 24 V Fahrzeug anschlie en Alle Kundendiensteins tze m ssen durch den FACOM Kundendienst durchgef hrt werden 2 SPEZIFIKATIONEN DE B124...

Page 9: ...ser zeigt den Mittelwert der beiden Akkuspannungen an Auf die Ladekontrolltaste dr cken Bei aufgeladenem Ger t muss der Spannungsmesser 13V anzeigen Das Starthilfeger t darf nur dann benutzt werden we...

Page 10: ...g durch Druck auf die Ladepr ftaste kontrollieren Leuchtet die blaue LED unter der Sicherung auf ist sie betriebsbereit Andernfalls muss sie ausgewechselt werden Eine Ersatzsicherung befindet sich lin...

Page 11: ...Nimmer een BOOSTER van 12 Volt gebruiken voor een voertuig van 24 Volt Alle servicebeurten moeten uitgevoerd worden door de Servicedienst van FACOM 2 SPECIFICATIES NL B124 HD Gebruiksspanning 12V 24V...

Page 12: ...op de controleknop van het laadniveau Wanneer de accu s volledig zijn opgeladen geeft de voltmeter 13 V aan De booster mag niet gebruikt worden wanneer de naald zich tijdens de spanningstest in de ge...

Page 13: ...vinden aan de linker zijkant van de booster Let op Gebruik uitsluitend een originele zekering met referentie BF500A 8 GARANTIE Uw FACOM BOOSTER heeft een garantie van 1 jaar tegen alle fabrieksfouten...

Page 14: ...Voltios Toda actuaci n postventa deber realizarla el Servicio postventa FACOM 2 ESPECIFICACIONES ES B124 HD Tensi n de utilizaci n 12V 24V Corriente Pico M x 7750A Corriente de arranque 3200A Corrien...

Page 15: ...de las dos bater as Pulsar el bot n de control de carga Para una carga completa el volt metro debe indicar 13V Solamente se debe utilizar el booster si la aguja de encuentra en las zonas amarilla o ve...

Page 16: ...tege el booster contra los cortocircuitos accidentales en los terminales del mismo contra las sobrecargas Para controlar el fusible pulsar el bot n de control de carga Si se enciende el LED azul situa...

Page 17: ...a 12 Volt Ogni intervento dopo la vendita deve essere realizzato dal Servizio Assistenza FACOM 2 SPECIFICHE IT B124 HD Tensione d uso 12V 24V Corrente Picco Max 7750A Corrente di trascinamento 3200A C...

Page 18: ...a delle tensioni delle due batterie Premere il pulsante di controllo della carica Per una carica completa il voltometro deve indicare 13V Il booster deve essere utilizzato solo se l ago si trova nelle...

Page 19: ...re unicamente un fusibile originale con riferimento BF500A 8 GARANZIA Il vostro BOOSTER FACOM garantito 1 anno a partire dalla sua data di fatturazione contro qualsiasi difetto di costruzione Elenco d...

Page 20: ...lizar um BOOSTER 12 V num ve culo 24 V Todas as interven es de p s venda devem ser realizadas pelo servi o p s venda FACOM 2 ESPECIFICA ES PT B124 HD Tens o de utiliza o 12V 24V Corrente m x 7750A Cor...

Page 21: ...tens es das duas baterias Premir o bot o de verifica o de carga Para uma carga completa o volt metro deve indicar 13V S preciso utilizar o booster se a agulha se encontrar nas zonas amarelas ou verdes...

Page 22: ...nos terminais do mesmo e contra as sobrecargas Para verificar o fus vel basta premir o bot o de verifica o de carga Se o LED azul situado sob o fus vel se acender este est num estado de funcionamento...

Page 23: ...23 NOTA...
Page 24: ...74 00 F 34 93 479 74 47 facomherramientas sbdinc com STERREICH STANLEY BLACK DECKER Austria GmbH Oberlaaerstrasse 248 A 1230 Wien Tel 43 0 1 66116 0 Fax 43 0 1 66116 613 verkaufat sbd sbdinc com www...

Reviews: