EN
3
3
RECOMMENDATIONS AND SUGGESTIONS
The Instructions for Use apply to several versions of this appliance.
Accordingly, you may find descriptions of individual features that do not
apply to your specific appliance.
INSTALLATION
•
The manufacturer will not be held liable for any damages resulting from
incorrect or improper installation.
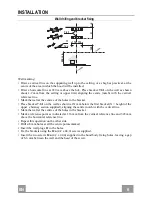
• The minimum safety distance between the cooker top and the extractor hood
is 650 mm (some models can be installed at a lower height, please refer to
the paragraphs on working dimensions and installation).
• Check that the mains voltage corresponds to that indicated on the rating
plate fixed to the inside of the hood.
• For Class I appliances, check that the domestic power supply guarantees
adequate earthing.
Connect the extractor to the exhaust flue through a pipe of minimum
diameter 120 mm. The route of the flue must be as short as possible.
• Do not connect the extractor hood to exhaust ducts
carrying combustion fumes (boilers, fireplaces, etc.).
• If the extractor is used in conjunction with non-electrical
appliances (e.g. gas burning appliances), a sufficient
degree of aeration must be guaranteed in the room in
order to prevent the backflow of exhaust gas. The
kitchen must have an opening communicating directly
with the open air in order to guarantee the entry of clean air.
When the
cooker hood is used in conjunction with appliances supplied with energy
other than electric, the negative pressure in the room must not exceed 0,04
mbar to prevent fumes being drawn back into the room by the cooker hood.
• The air must not be discharged into a flue that is used for
exhausting fumes from appliances burning gas or other
fuels (not applicable to appliances that only discharge the
air back into the room).
• In the event of damage to the power cable, it must be
replaced by the manufacturer or by the technical service
department, in order to prevent any risks.
2°
Summary of Contents for LI_991.0427.517
Page 1: ...Instructions Manual Naudojimosi instrukcija Instrukcijas Gr mata Kasutusjuhend...
Page 14: ...RU 1 14 650 I 120 0 04 2...
Page 15: ...RU 1 15 3 8...
Page 16: ...RU 1 16 2 4...
Page 20: ...RU 2 20 2 Vr 12a 12a Vr 12a Vr 150 120 120 9 9 120 150 125 9 120 8 2 12e 2 9 x 9 5 9 125 8 12e...
Page 21: ...RU 2 21 3 7 2 1 4 12c 2 9 x 9 5 2 12c 2 9 x 9 5 12c 12c 12c 2 1 2 2 2 7 2 1 B A...
Page 22: ...RU 2 22 T2 T1 L T3 T1 T2 T3 2 6 L T1...
Page 23: ...RU 2 23 2 4...
Page 58: ...SA 5 58 650 I 120 0 04 2...
Page 59: ...SA 5 59 3 8...
Page 60: ...SA 6 60 2 4...
Page 64: ...SA 6 64 Vr 12 A Vr Vr 12a Vr 120 150 120 9 9 120 150 120 9 120 8 12 e 2 9 x 9 5 9 125 8 12e...
Page 65: ...7 2 1 4 12 C 2 9 x 9 5 12c 12c 12c 2 1 2 2 2 7 2 1 B A B A...
Page 66: ...SA 6 66 T2 T1 L T3 T1 T2 T3 2 6 L T1...
Page 67: ...SA 6 67 4...
Page 69: ......
Page 70: ......
Page 71: ......


