background image


17 

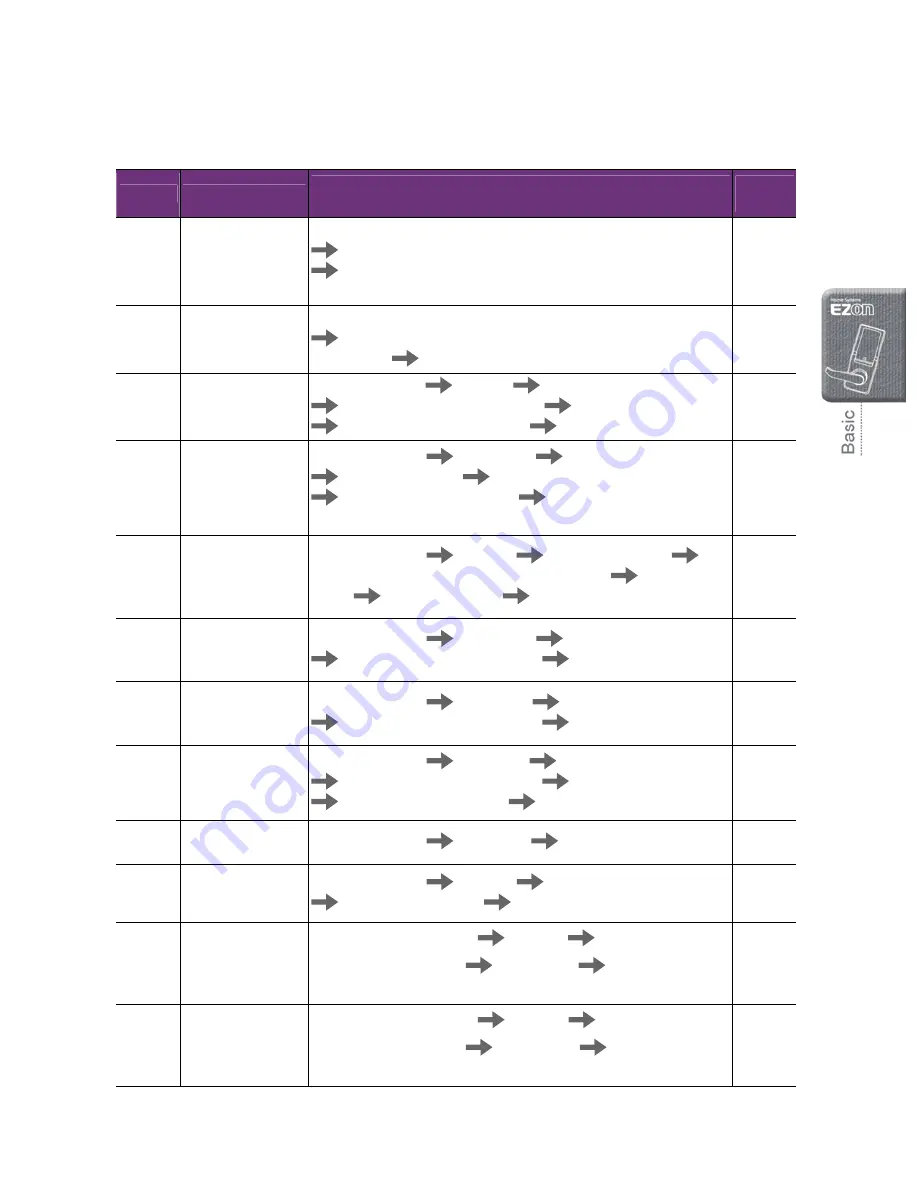
Functional Setup or Release Summary


Code 

Function 

Setup or Release 

(Follow the steps in the exact sequence.) 

Ref. 

Page 

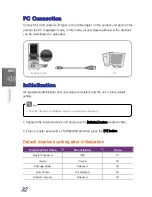
Initialization 
(Complete removal 
of all passwords 
and card data) 

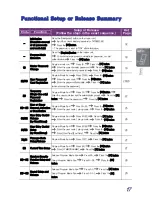
Press the [Initialization] button on the indoor unit. 

 Input the current master password or '1470852369'. 
 Press the [

¿

] button. 

 The password is reset to 

1234

 after initialization. 

32 

Program Mode 
Execution 

Press the [Register] button on the indoor unit. 

 Current master password, administrator password, or card 

authentication 

 Press the [

¿

] button. 

18 

10 

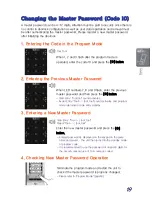
Master Password 
Change 

Program mode run. 

 Press 10. 

 Press the [

¿

] button.  

 Enter the current master password. 

 Press the [

¿

] button.  

 Enter the new master password. 

 Press the [

¿

] button. 

19 

20/40 

User Password/  
Card Registration 

Program Mode Run 

 Press 20/40. 

 Press the [

¿

] button.  

 Enter the user code. 

 Press the [

¿

] button.  

 Enter the password/card data. 

 Press the [

¿

] button  

(when entering the password). 

20/23 

30 

Temporary  
(Single Use only) 
Password 
Registration 

Program Mode Run 

 Press 30. 

 Press the [

¿

] button. 


Enter the user code (except the administrator group). 

 Press the [

¿

button. 

 Enter the password. 

 Press the [

¿

] button. 

22 

50~55 

User or Group 
Removal, Activation 
or Deactivation 

Program Mode Run 

 Pres 50~55. 

 Press the [

¿

] button.  

 Enter the user code / group code. 

 Press the [

¿

] button. 

25 

60/62 

User Entry Control 
Release  
(by User/Group) 

Program Mode Run 

 Press 61/63. 

 Press the [

¿

] button.  

 Enter the user code / group code. 

 Press the [

¿

] button. 

26 

61/63 

User Entry Control 
Setup 
(by User/Group) 

Program Mode Run 

 Press 61/63 

 Press the [

¿

] button.  

 Enter the user code / group code. 

 Press the [

¿

] button. 

 Enter [Start Time][End Time]. 

 Press the [

¿

] button 

26 

70/71 

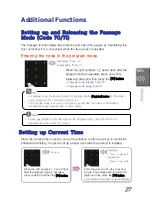
Passage Mode 
Setup/Release 

Program Mode Run 

 Press 70/71. 

 Press the [

¿

] button. 

27 

80 

Current Time Setup

Program Mode Run 

 Press 80. 

 Press the [

¿

] button.  

 Enter [YYMMDDHHMM]. 

 Press the [

¿

] button. 

27 

90~95 

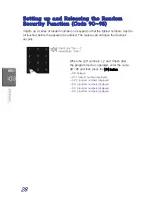
Random Security 
Function Setup and 
Release 

Release: Program Mode Run 

 Press 90. 

 Press the [

¿

] button.

Setup: Program Mode Run 

 Press 91~95. 

 Press the [

¿

button. 

28 

00~03 

Sound Setup and 
Release 

Release: Program Mode Run 

 Press 00. 

 Press the [

¿

] button.

Setup: Program Mode Run 

 Press 01~03. 

 Press the [

¿

button. 

29 


Summary of Contents for SHS-7020

Page 1: ......

Page 2: ......

Page 3: ...ed to open the door without the key Anti panic function can easily open the locked door The locked door can be easily opened from inside by just rotating the handle The door does not have to be locked...

Page 4: ...Opening the Door from Outside with a Password or a Card 14 Opening the Door from Inside 15 Program Function 16 User Group Management 16 Functional Setup or Release Summary 17 Program Mode 18 Changing...

Page 5: ...Current Time 27 Setting up and Releasing the Random Security Function Code 90 95 28 Setting up and Releasing the Sound Code 00 03 29 Warning Sound Alarm Sound 30 PC Connection 32 Initialization 32 Tro...

Page 6: ...ng Information given under this heading is information the user must be aware of to prevent physical harm Caution Information given under this heading is information the user must be aware of to preve...

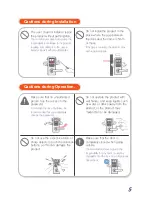
Page 7: ...uct or the product may malfunction or be damaged Make sure that the door is completely closed when going outside The manufacturer does assume the responsibility for any harm caused by engagement of th...

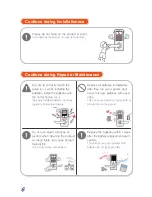
Page 8: ...f power and never mix new batteries with used ones This can cause reduction of product life or a malfunction in the product Do not use water benzene or alcohol when cleaning the product as these fluid...

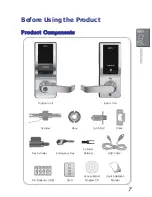
Page 9: ...the Product Product Components Indoor Unit Outdoor Unit Cylinder Strike Rose Latch Bolt User Installation Manual AA Batteries LR6 Cylinder Retainer Key Cylinder USB Cable Access Mgmt Program CD Emerg...

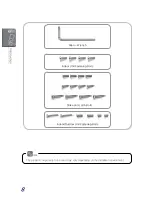
Page 10: ...8 The product components to be used may vary depending on the installation environment Strike and Latch Bolts Indoor Unit Fastening Bolts Indoor Outdoor Unit Fastening Bolts Allen Wrench...

Page 11: ...5 Outdoor Handle If the lock is released the door can be opened by turning the outdoor handle 6 Emergency Key Hole When the door becomes non operational because of completely discharged batteries or...

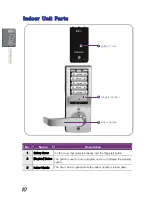
Page 12: ...cover that protects batteries and the Register button 2 Register Button The button is used to run in program mode or to release the warning sound 3 Indoor Handle The door can be opened while the indoo...

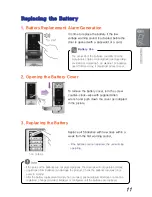
Page 13: ...If the batteries are not replaced the unit will stop operating The actual life of the batteries can differ from the manufacturer date of manufacturing and operating environment Assuming 5 AA alkaline...

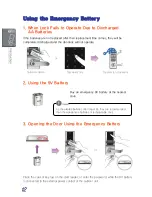
Page 14: ...the 9V Battery Buy an emergency 9V battery at the nearest store 3 Opening the Door Using the Emergency Battery Place the card or key tag on the card reader or enter the password while the 9V battery i...

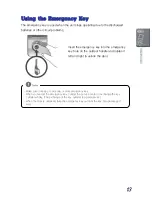
Page 15: ...ergency key hole on the outdoor handle and rotates it left and right to unlock the door Make sure to keep or carry one or more emergency key When you ve lost the emergency key contact the service cent...

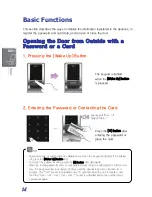
Page 16: ...e password or place the card or Successful Too t Failed Toot Password entry or card contact is validated only when the keypad is lighted If it is lighted off press the Wake Up button first To cancel t...

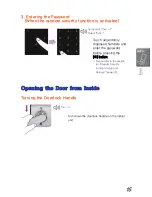
Page 17: ...displayed numbers and enter the password before pressing the button Please refer to the section for Random Security Function Setup and Release page 30 Opening the Door from Inside Turning the Doorloc...

Page 18: ...r each user When registering a new user the relevant group and empty number ID must be considered User Group Description Group Code Administrator Group User data with user code 001 010 0 Group 1 User...

Page 19: ...Registration Program Mode Run Press 30 Press the button Enter the user code except the administrator group Press the button Enter the password Press the button 22 50 55 User or Group Removal Activatio...

Page 20: ...rator card The unit returns to the normal mode if the password is not entered within 10 seconds 3 Terminating the Program To terminate the program mode press the Register button on the indoor unit or...

Page 21: ...he previous master password and then press the button Valid Entry Toot toot sound activates Invalid Entry Toot toot toot sound activates and program mode returning to code entry standby 3 Entering a N...

Page 22: ...e toot toot sound is activated and the mode is turned into the password entry standby mode Invalid Entry The toot toot toot sound is activated and the mode is turned into the program code entry standb...

Page 23: ...ton on the indoor unit or the Wake Up button on the outdoor unit 5 Checking New Password Operation from outside Check if the new password is successfully registered by opening the door using it and cl...

Page 24: ...try standby mode Invalid Entry The toot toot toot sound is activated and the mode is turned into the program code entry standby mode 3 Entering a Temporary Password When the LED numbers 7 8 and 9 flas...

Page 25: ...SO 14443 A Type can be registered User care up to 250 including the passwords can be registered 1 Entering the Code in the Program Mode When the LED numbers 1 2 and 3 flash after the program mode is o...

Page 26: ...n 10 seconds to register the additional cards The program mode is automatically terminated when there is no key entry within 10 seconds To terminate the program mode without registering an additional...

Page 27: ...sh after the program mode is operated press one of the following codes and then press the button Individual Deletion 50 Individual Activation 51 Individual Deactivation 52 Group Deletion 53 Group Acti...

Page 28: ...63 2 Entering the User Code or Group Code When the LED numbers 4 5 and 6 flash enter the user code or group code and then press the button 60 61 entered in step 1 Enter the user code 62 63 entered in...

Page 29: ...e set up at least once after the product is installed In Passage mode the doorlock does not operate until the Register button on the indoor unit is pressed or PC connection mode is run The Passage mod...

Page 30: ...ssword is entered The feature can enhance the doorlock security When the LED numbers 1 2 and 3 flash after the program mode is operated enter the code 90 95 and then press the button 90 Release 91 1 r...

Page 31: ...operated enter the code 00 03 and then press the button 00 No sound 01 Level 1 02 Level 2 03 Level 3 00 Button No sound is activated except the warning sound 01 03 Button All sounds are activated The...

Page 32: ...is activated and the doorlock becomes deactivated for 3 minutes The toot sound is activated every 10 seconds while the unit is deactivated and the unit becomes operational again with toot toot toot t...

Page 33: ...ed doorlock is forcefully separated If the outdoor unit is forcefully separated the alarm sound toot toot toot is continuously activated The alarm sound is released when the micro switch inside the ou...

Page 34: ...leted and the unit is reset default setting 1 Separate the inside doorlock unit and press the Initialize button located inside 2 Enter a master password or 1470852369 and then press the button Default...

Page 35: ...user password card cannot be registered If the card or password is already registered for a user code change the user code and then register the password or card A password must be 4 12 digits for reg...

Page 36: ...It is the warning sound indicating the batteries must be replaced Replace them with the new ones within a week Page 11 Error Code List The following table shows the type of errors occurred when the i...

Page 37: ...35 User Code Registration Table User Code Password 4 12 digits User Name...

Page 38: ...of the FCC Rules These limits are designed to pro vide reasonable protection against harmful interference in a residential installation This equipment generates uses and can radiate radio frequency en...

Page 39: ......

Page 40: ......

Page 41: ...Product Warranty...

Page 42: ......

Page 43: ......

Page 44: ......

Reviews: